


Hello all,
This weekend I have been able to work on the B747-8F/747-400F detail deck project and I have bad and good news.
Bad news is that the deck is now useless, I had an issue while trying to remove the original paint that covered some details resulting in the multiple bending of the deck. To be honest, I was never happy since then every time I looked at the deck. This issue ocurred several weeks ago and is one of the reasons why I haven’t been able to advance as much as I liked with this project.
The solution has been to start a new one, this is where I can say the good news; having learned a lot from the previous deck, I will remove the original system I had to hold the deck into place and instead, I will be using vertical walls, this will allow me more free space to work on the aft and fwd cargo bays and the same part that will hold the deck, will also be the part that delimitates the cargo bays.
The first step I wanted to do prior working with the new deck was to cut out the tail section, this will save a lot of material when casting and reduce costs, plus ease things when adding the rear wall. For this step I used polyester thread, it broke several times so in such cases is better to use nylon threads.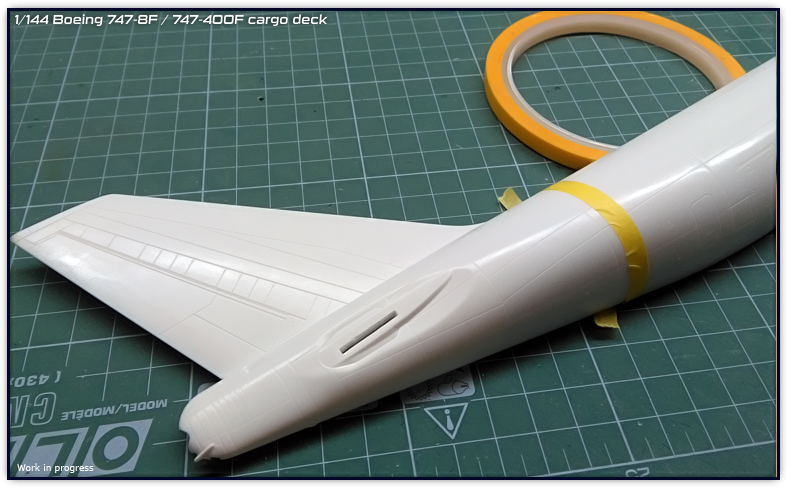
Cutting with thread, the thickness of the cut is minimal. I cut approximately 2 mm from the vertical panel line, I will make sure to precise everything in the instructions.
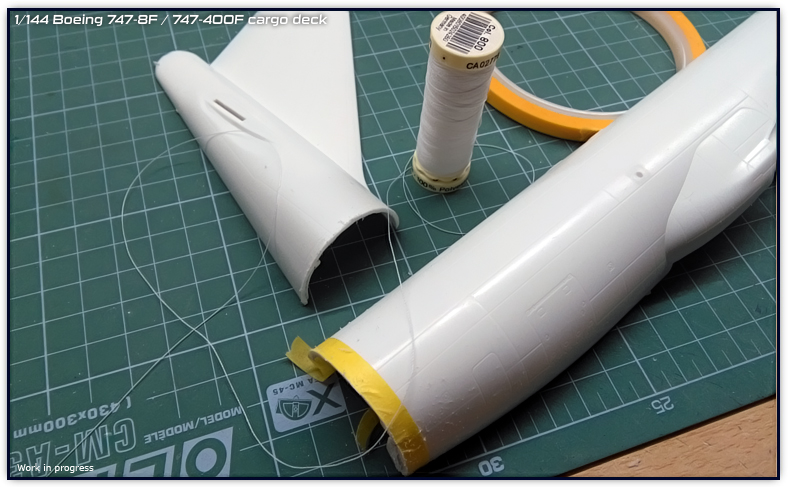
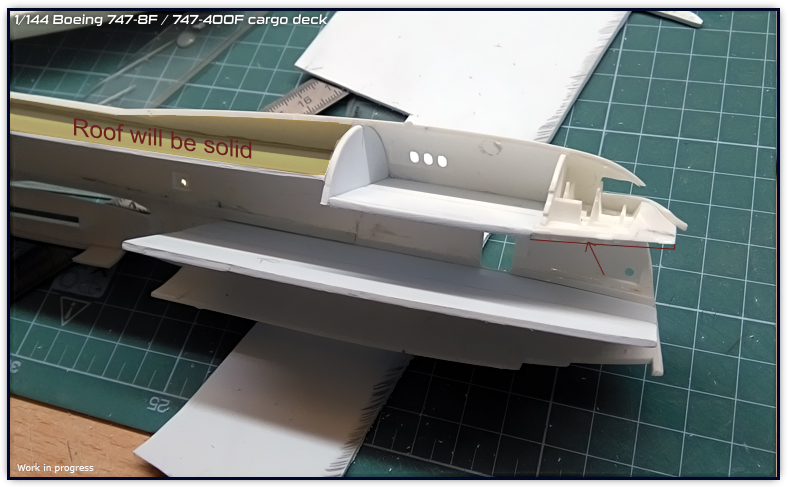
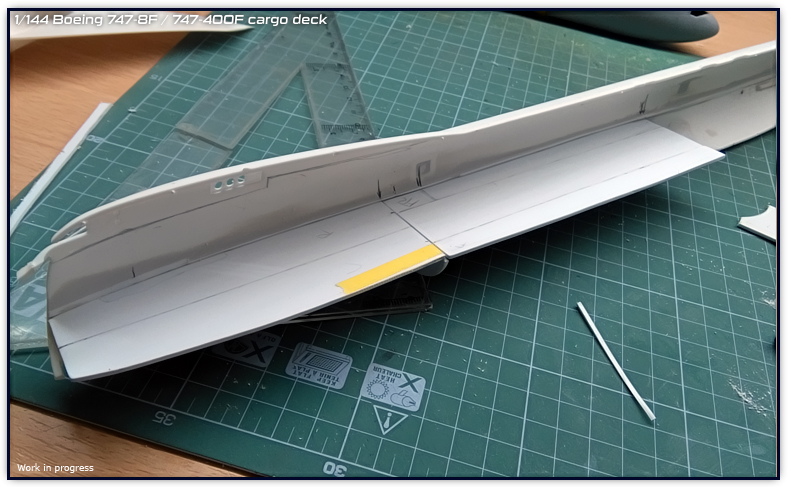
Photo above shows the first portion of the deck. Another thing that I learned was that the deck is way too long to make in one piece. It would no be an issue for casting but it would be for placing. The final deck will consist of three portions.
The roof will be solid, and the decision for this is purely for ease of placement. Many things have to be done having in mind that later, this will have to be build and parts must join perfectly, having a solid ceiling will ease the building process.
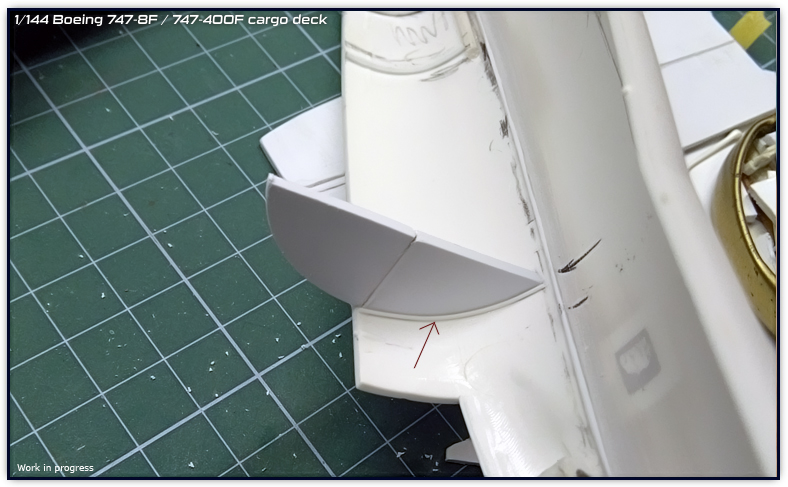
The floor of the cockpit (marked with the brown arrow) will have to be modified to make that area solid.
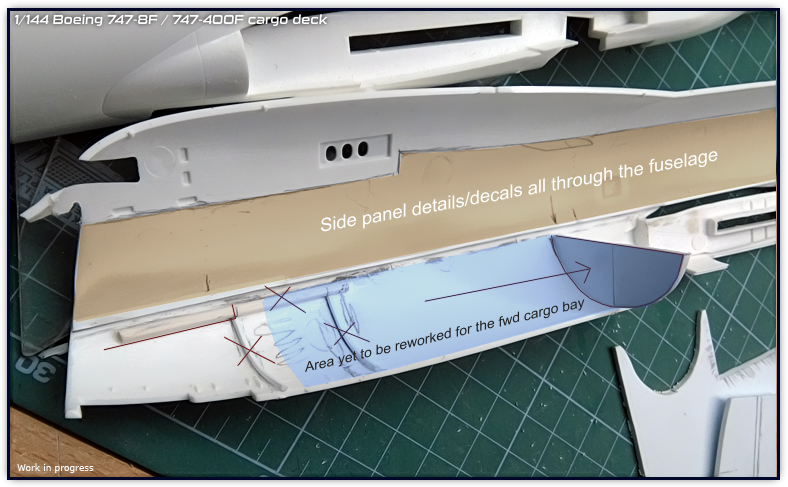
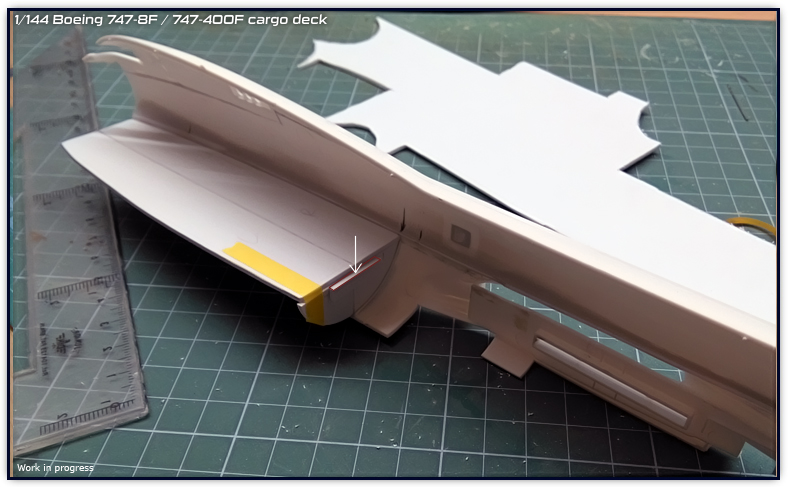
In the photo above there are two things to notice:
One is the sidewall marked in light brown. This is the area that is actually seen from outside, thus the whole wall will have details and decal markings according to the real 1/1 aircraft. This area is very important and I am aware that detailing must be done as much as possible.
The second thing to notice is the blue section. You can see the vertical wall that I made in order for the deck to rest on it. In the previous version, the deck was going to rest on a solid part between the two rails just behind the nose gear. These rails as well as the solid block would have given me a hard time when detailing or even opening the cargo door, thus making the forward and rear walls (note that only the rear is made at the moment) I will have plenty of space for detailing the FWD cargo bay.
The vertical wall will also have detail where the arrow indicates. This will be the wall within the cargo bay, so the same part that helps keep the deck in place, will also be a part of the FWD bay.
As I was mentioning earlier, all of the parts must join as best as possible, hence I added a thin line that will indicate precisely where the vertical wall for the cargo bay will go.
Here it shows the work so far on the deck. Note that the middle section still does not fit perfectly with the first section, but that has already been corrected as I also needed to do some adjustments for both fuselage halves to fit together.
It may seem a lot of work and a waste of time after the first deck work. However, by doing this again, I somehow got more energies and hope for this project, because I wasn’t 100% happy after the issues appeared with the first deck.
I am still not sure what I will do with the several rails or tracks on the deck, the first version I used 0,5mm thickness parts, but I may go a bit thinner this time to keep these in scale.
The FWD bay wall has an extra part on its rear which is actually the part that holds the middle section of the deck.
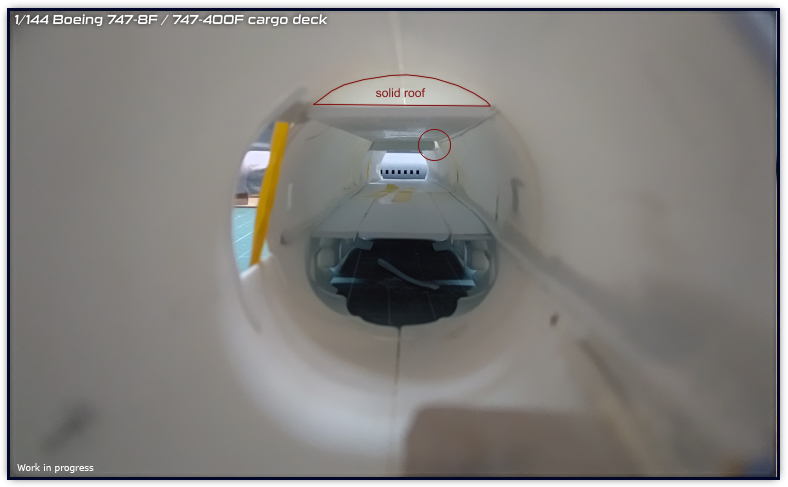
This is a view from the tail side. Note the gap on the ceiling that I have to fix. I do not think it will be seen from the Side Cargo door nor the nose door, however, since it is a structural point, it must be fixed.

This is how the project is so far. Next weekend I will start the LEAP-1A engines, thus there won’t be more updates on this cargo bird until a couple weeks. I may work with it during the week depending on the work with the items I need to make, but this has been a very important update for me, even if I haven’t done anything new, I have been able to redirect the project and most important of all; feel happy with it again which is really needed for working in such long tedious projects.
I am not forgetting the B737 cockpit project, but everything takes time and I only have two hands 🙂 wish time could stop sometimes…
Livery decals will be available on February 15th, things are getting finished and I am about to start the first prints. There is still some work to do on the A350 instructions. I am also working on the white decals, will be able to make them more opaque after adjusting some settings.
I want to apologize for the delays that have been produced during this long time. Sometimes things aren’t as easy as click a button, adjustments have to be done and tests had to be done as well.
Next weekend I expect to start the LEAP-1A engines and hope to update the blog.
Best wishes,
Guillem