


Hello all,
I am currently advancing with the B747-8F/-400F detail set. I am working alongside the other projects but despite that, the progress done so far has been very big, at least for what I am used to, in a sad way I can focus a lot more in work now, and hopefully the following renders will show:
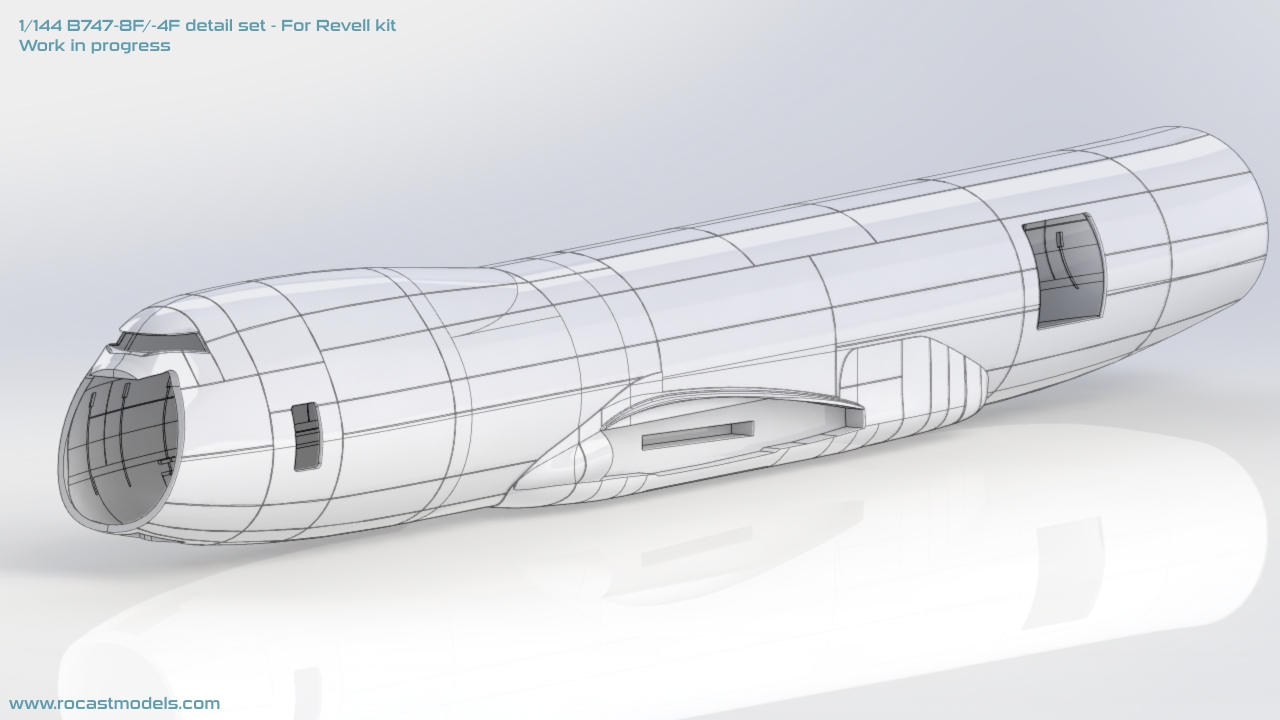
There were two major areas that I needed to actually test before proceeding any further, one was the wing root connection with the Revell wing and the tail cone section.
Fortunately, both fitted properly, as you can see from the above render, the fitting of the Revell wing is basically the same, only that the upper side is flattened down, as such, a small portion of the Revell wing needs to be removed, which is something that will be later properly specified in the instructions.
The inner structure:
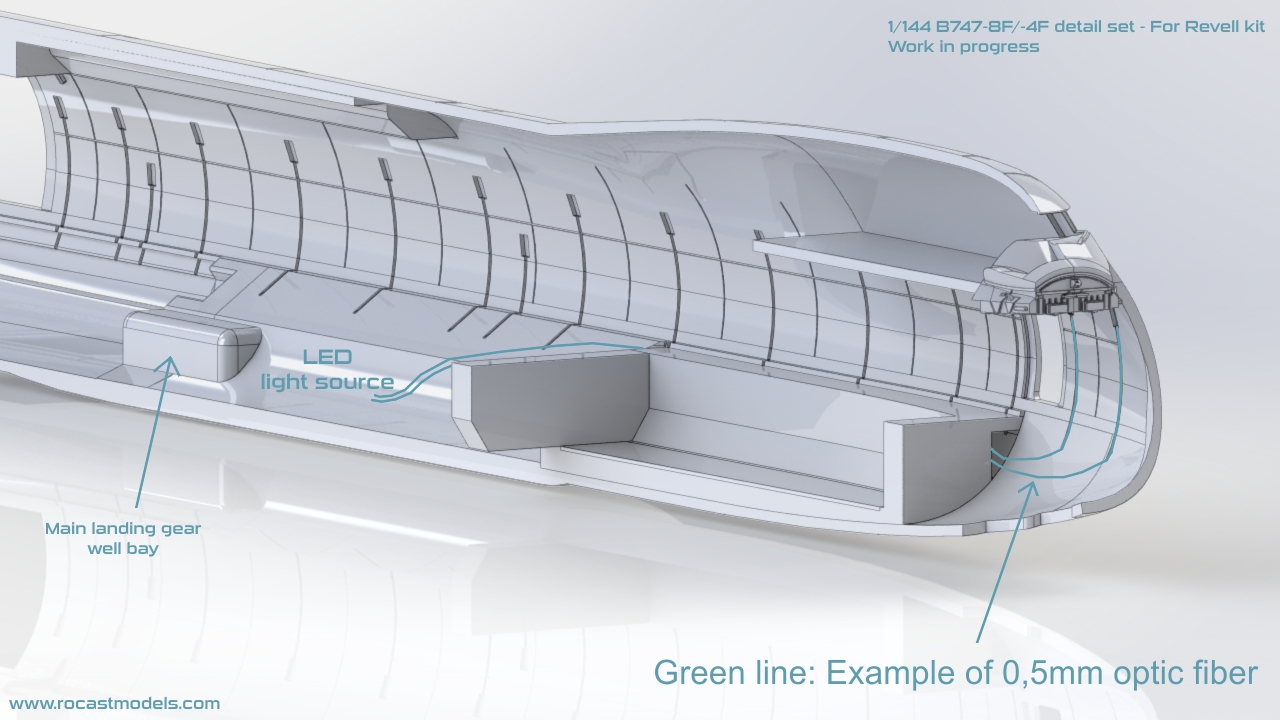
As you can see, there are several “windows” and each has an engraved line going across the fuselage passing through the sides of the cargo holds.
These openings are for the interior lights. The reason for the engraved line is to fit in the 0,5mm optic fiber that I plan to include in the set.
I have been thinking about using LED lights, but can you imagine how many wires would be in there for so many lights?
Instead, with a couple of LED lights placed in the center of the aircraft, using them as light source, several 0,5mm fiber lines can go through the different openings till reaching each light point. There are going to be a couple of small indented areas (for both AFT and FWD holds) to show the limit of the area where the fiber needs to be attached at, because that same area is the open section for the cargo holds.
Although I need to test this properly, it is one of the very few ways I could come up to have these sidewall lights in the model. Of course, this will mean that once the optic fiber is installed, it will need to be “buried” with a bit of putty, therefore, the extra detail to add on the inner side of the fuselage will be done with photo etch.
Photo etch will be used for the light panel frames as well as for the lining unions (seen in the image above with thinner lines for placement reference). Amongst other elements, photo etched will also be used for the ladder that connects with the cockpit.
At this point, I hope you can understand my reasons for wanting to make my own fuselage and stay away from Revell’s, the modifications needed were quite complex to carry on, at least I could not make them as fitting-precise as I can now.

The main gear bay; I tried to keep the assembly of those simple, one thing I do not like at all is the way Revell makes their design, having to later apply putty all around the belly to cover the union, instead I just made a simple bay, with detailing inside and the same fitting points as the Revell kit, so the original landing gear can be used.
Another area I struggled quite a lot has been the bottom side of the cockpit:
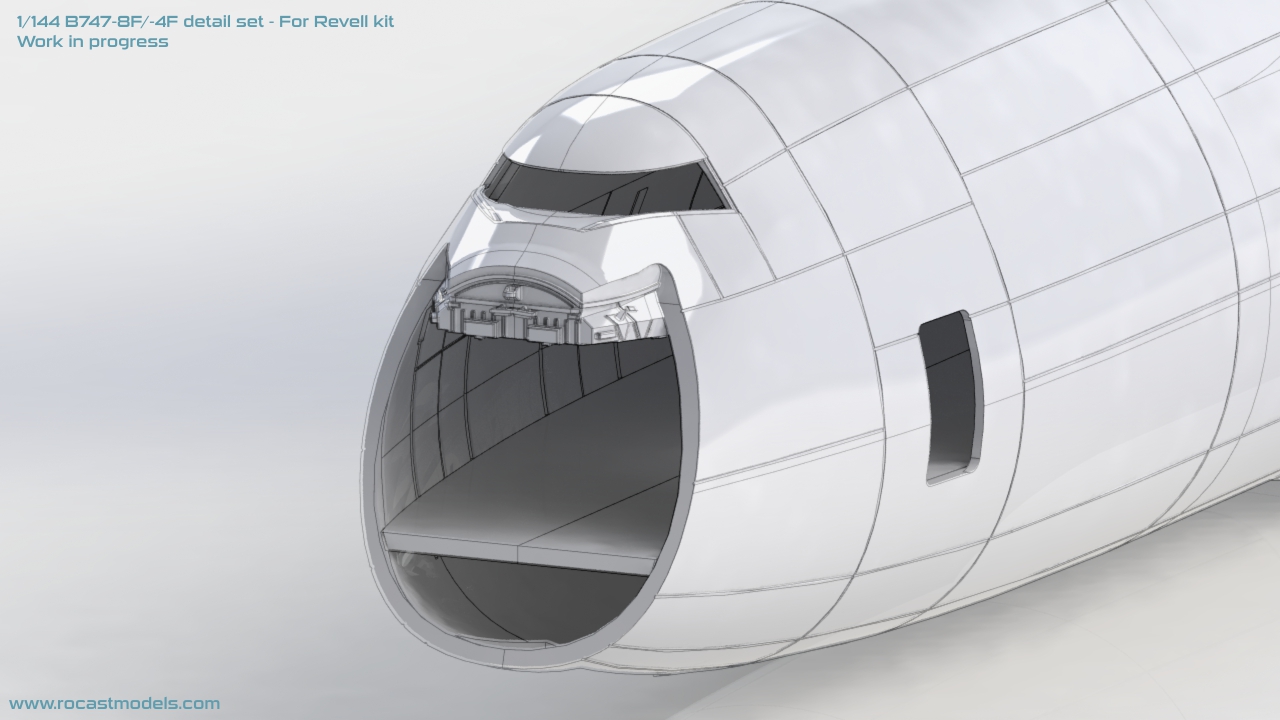
At the same time I am designing each part, I also need to assure everything will fit perfectly later. In this case, all the detail under the nose will be added as one piece, fitting at the bottom of the windshield.
A similar step will be done next with the front area under the main deck. I am also making the different areas taking into account the measurements, so that the opening of the nose door equals the same of the real one in 1/144, same for the positioning of the side cargo door, etc.
I hope this project is of your liking so far. At this moment I am also preparing several new items for their release. it is taking me some time but I am doing the best I can to release it all soon.
Hope everything is going well for you, take good care everyone.
Best wishes,
Guillem