


1/144 Stairs truck TLD ABS1740
In the step by step below, I will be sharing the order that I follow to build the 1/144 Stairs truck TLD ABS1740 which can also be applied similarly to the other GSE models.
First of all, let’s review which tools are required to assembly the model:
– Pointy tweezers: This will be your best friend through the entire building process, and in general, it will also be for the rest of the GSE models since there are always some small parts in each model kit.
– Glue: Since the parts of the kits are made out of resin, I generally use cyanoacrylate. Although I haven’t tried it, glue for plastic may also work. It is important that using such kind of glue, you make sure where the part goes and how to place it beforehand, you can try until you are sure before gluing.
– Paints, airbrush, paintbrush: Everything that a modeler uses in the painting process is also applied in this model as well, airbrushing is a quick way to have the bigger parts to be painted, paintbrush is used to paint the smaller parts.
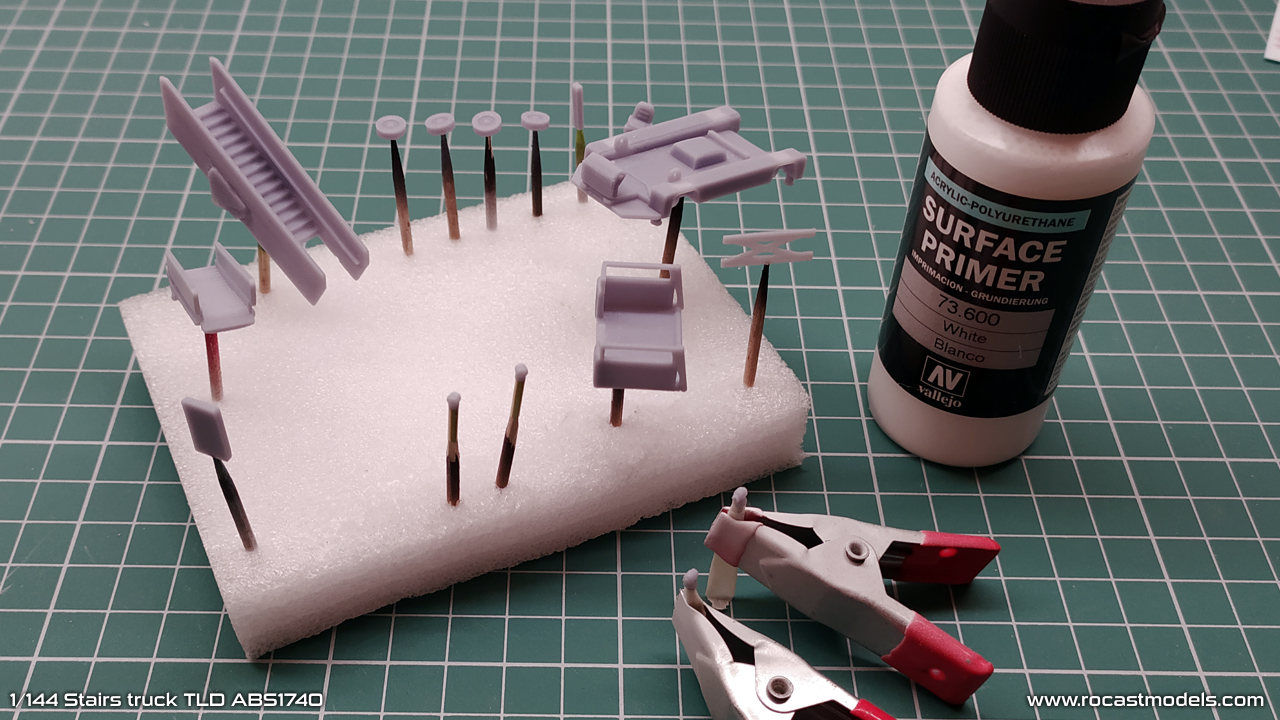
These are the bigger parts of the set, the smaller parts are always bagged in a small plastic bag closed tight so that all these parts are kept safe. Be careful when opening this bag, although the kit includes some spares, you may want to be careful to not to drop any small part.
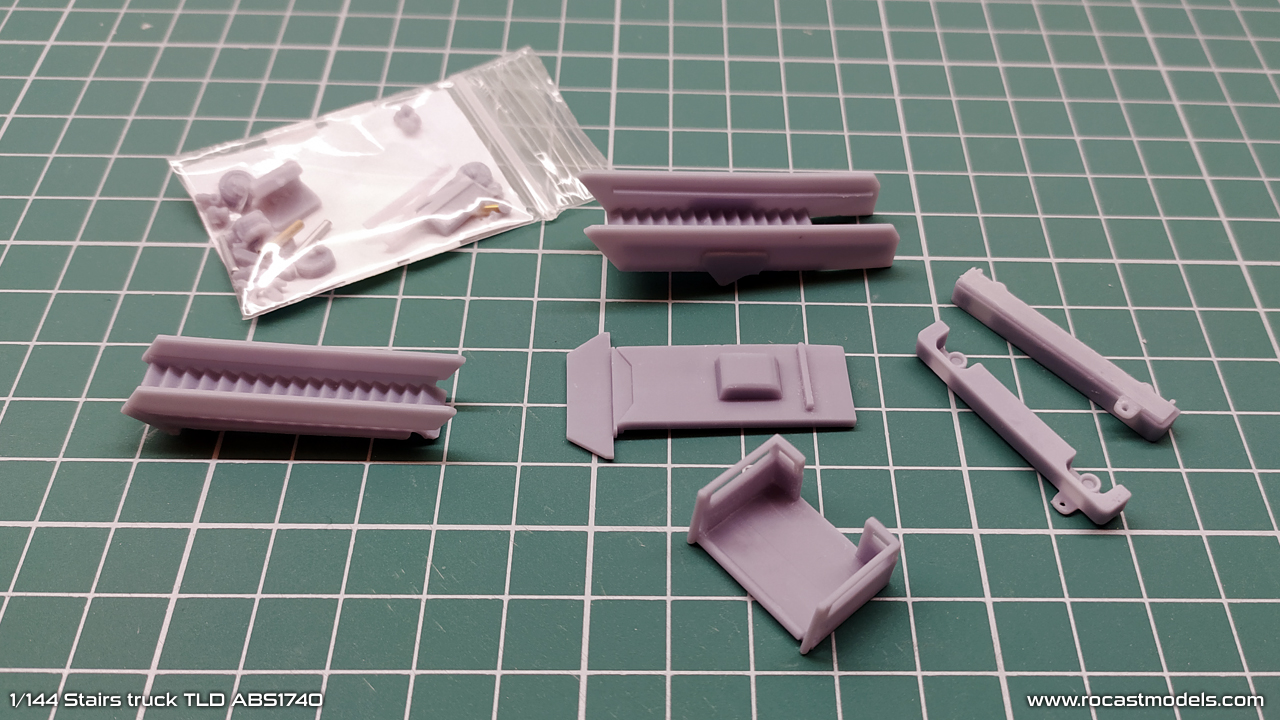
These resin parts are not coming out of a mold, therefore, washing them with dishwasher soap is not required as the grease from the silicone mold is not present.
It is however, important to give it a light primer coat to the bigger parts, those that are at least 15 or 20 mm long, smaller parts can be painted on directly as I will be painting on top with a paintbrush and black paint.
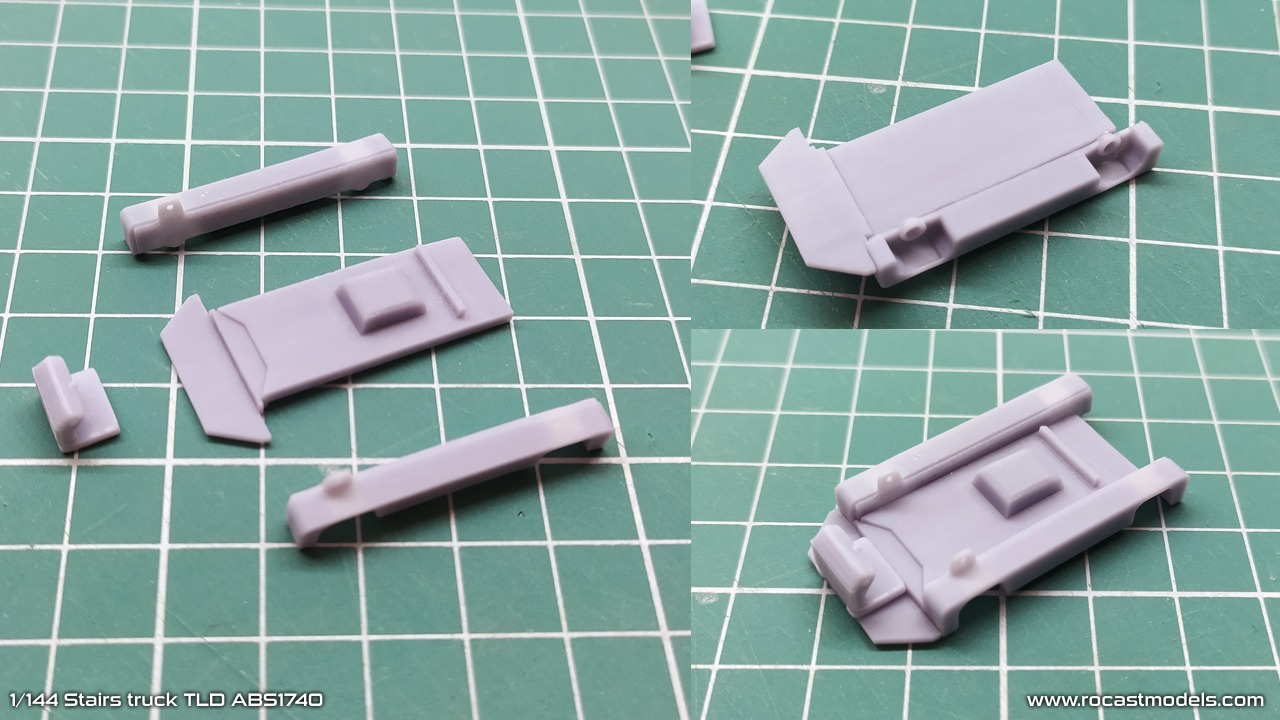
For this particular build, I start by joining the bigger parts that conform the main body of the stair truck. Make sure that the two side fenders are at the same level of the center part, you can see that from the image at the top right corner:
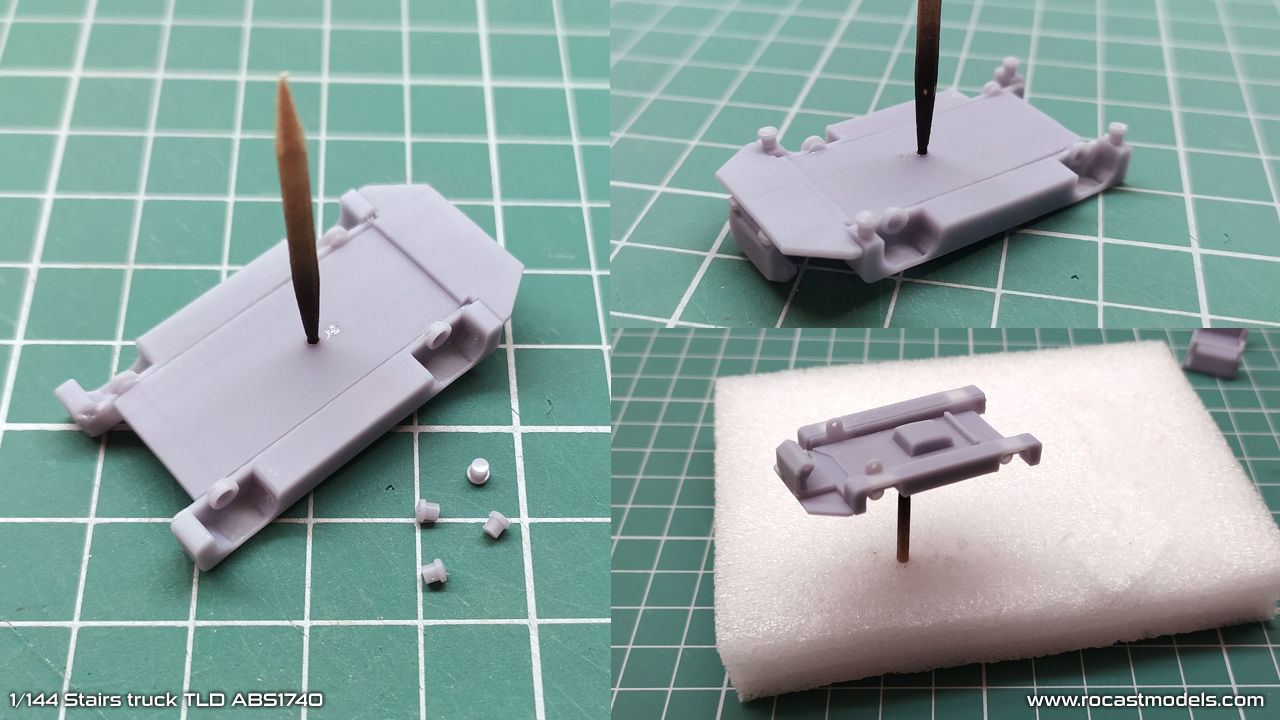
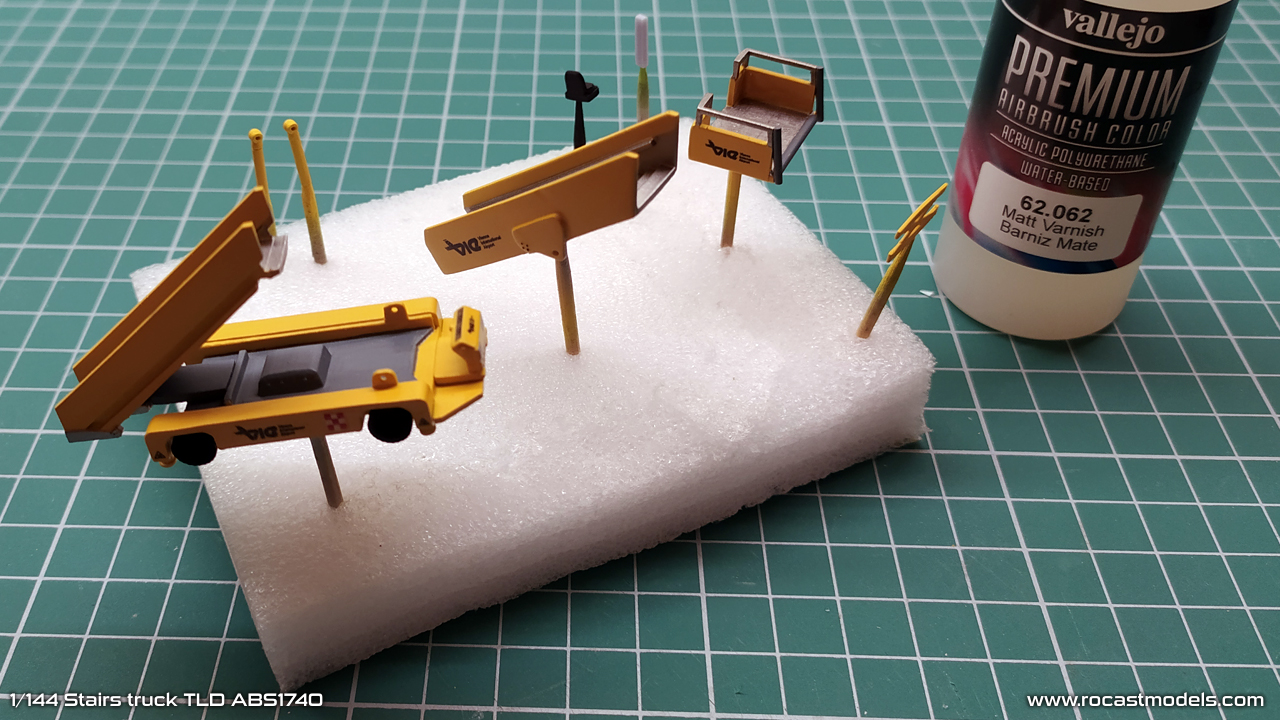
At this point, I glue the four stabilizers at each corner of the model, then I glue a toothpick and use a foam portion to hold the part leaving it ready for priming.
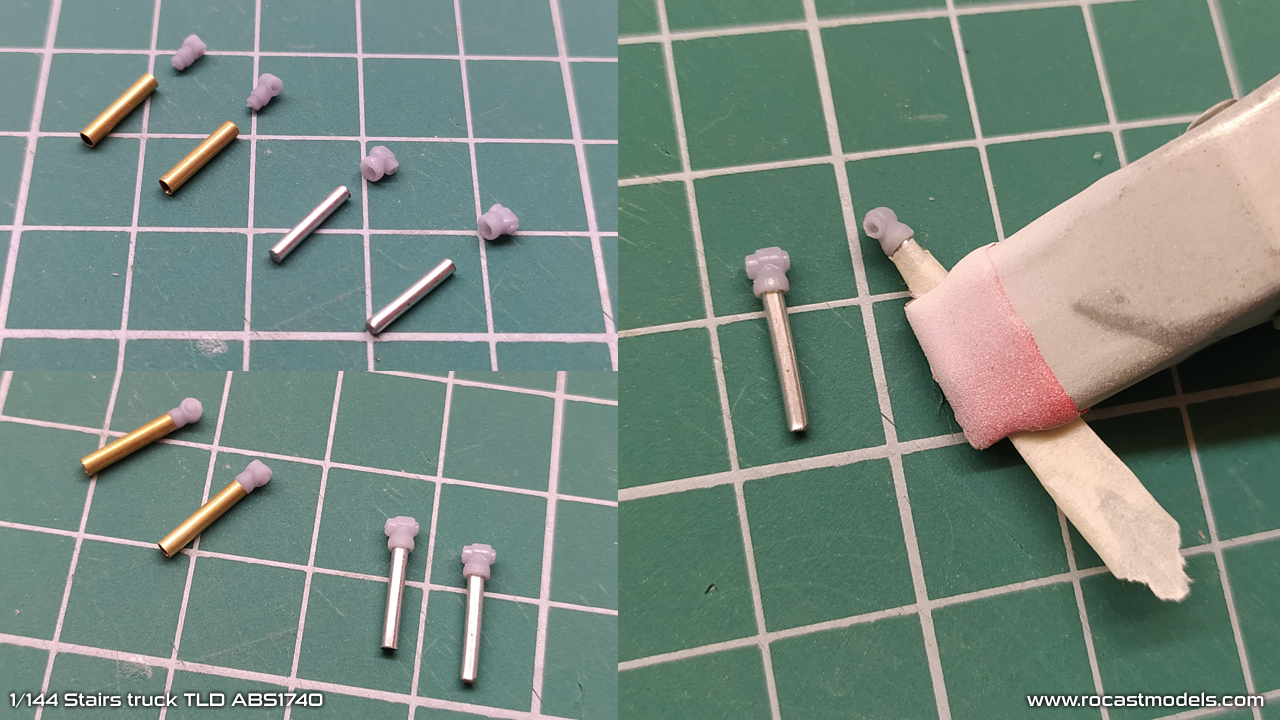
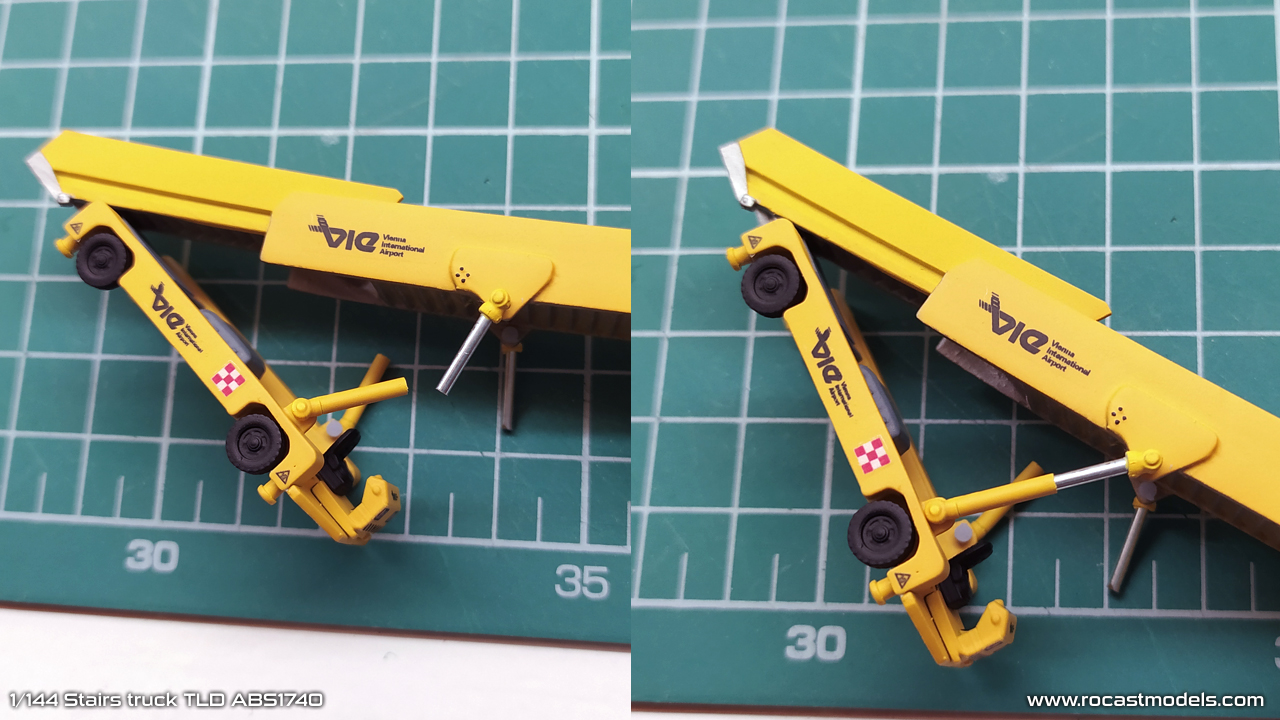
In the next step I prepare the tubes and rods that will conform the rising system. Although the instructions already show in detail how to assembly these, here is a photo of them. Also, notice that I covered with masking tape the rod, this is important to do as we do not want any paint to go on top of the tubes as this would not allow it to slide inside the tube.
Parts are prepared for priming. Note that I only prime the bigger parts, smaller ones do not require primer, specially since those will be painted black. The primer I use is from Vallejo and I apply it with airbrush, this is an acrylic-plyurethane resin, so it is ideal for projects that will not require posterior sanding and re priming again, this primer is used solely as a base, if tests or post sanding would be needed, I would chose Tamiya or Mr Hobby surface primer (spray).
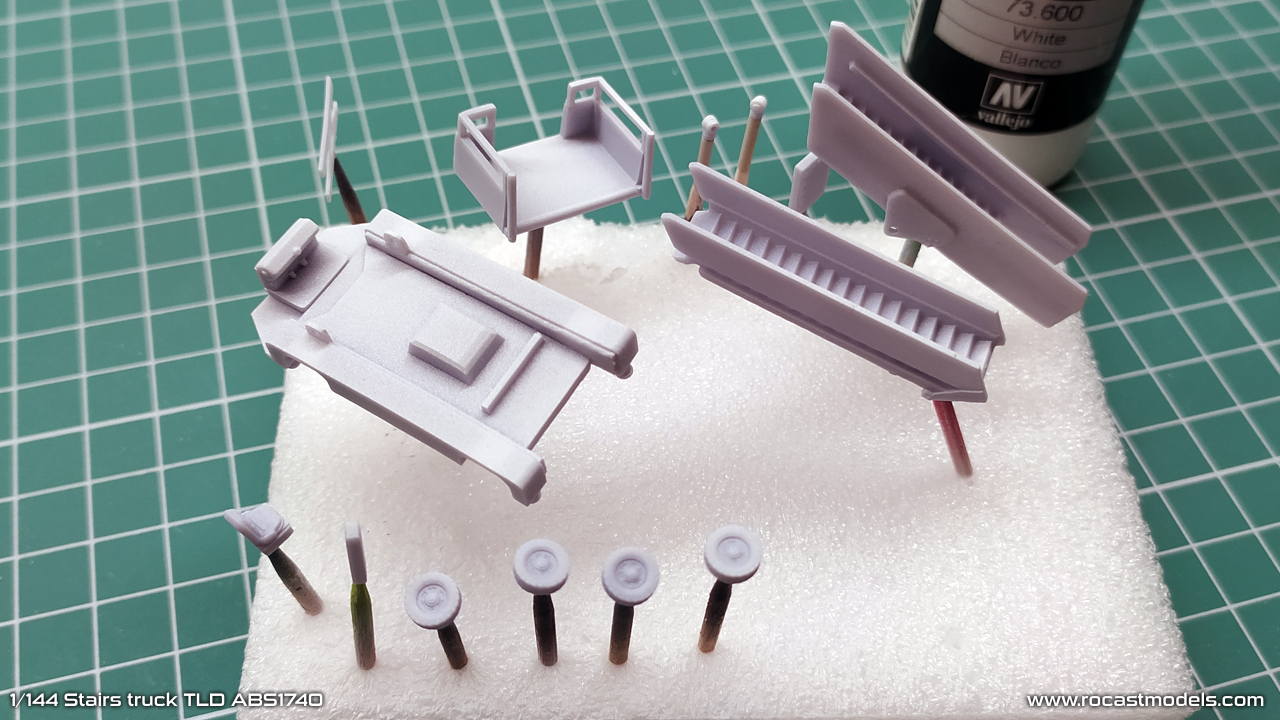
Apply primer in a very gentle way, do not over paint, it is best to apply a light coat even if the grey tonality of the resin is still visible, 2 thin coats are better than one thick coat.
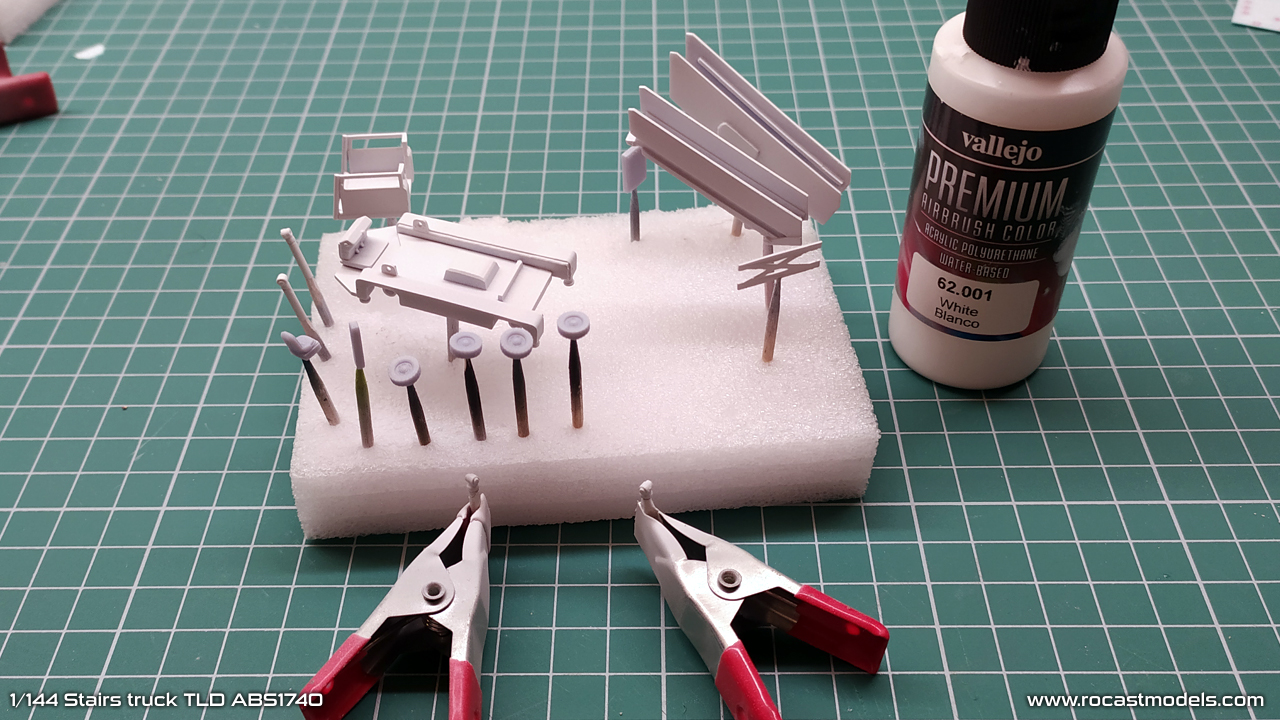
Since this model will be painted yellow, I paint it first with white color, I paint it in a way so that if the white was to be the final color, again, apply a couple thin coats, this also helps to keep the detail.
First coat applied, you can see a little bit of grey showing through the first white coat.
Second coat, it is white enough for applying the yellow paint. Please note that this process is being done with an airbrush.
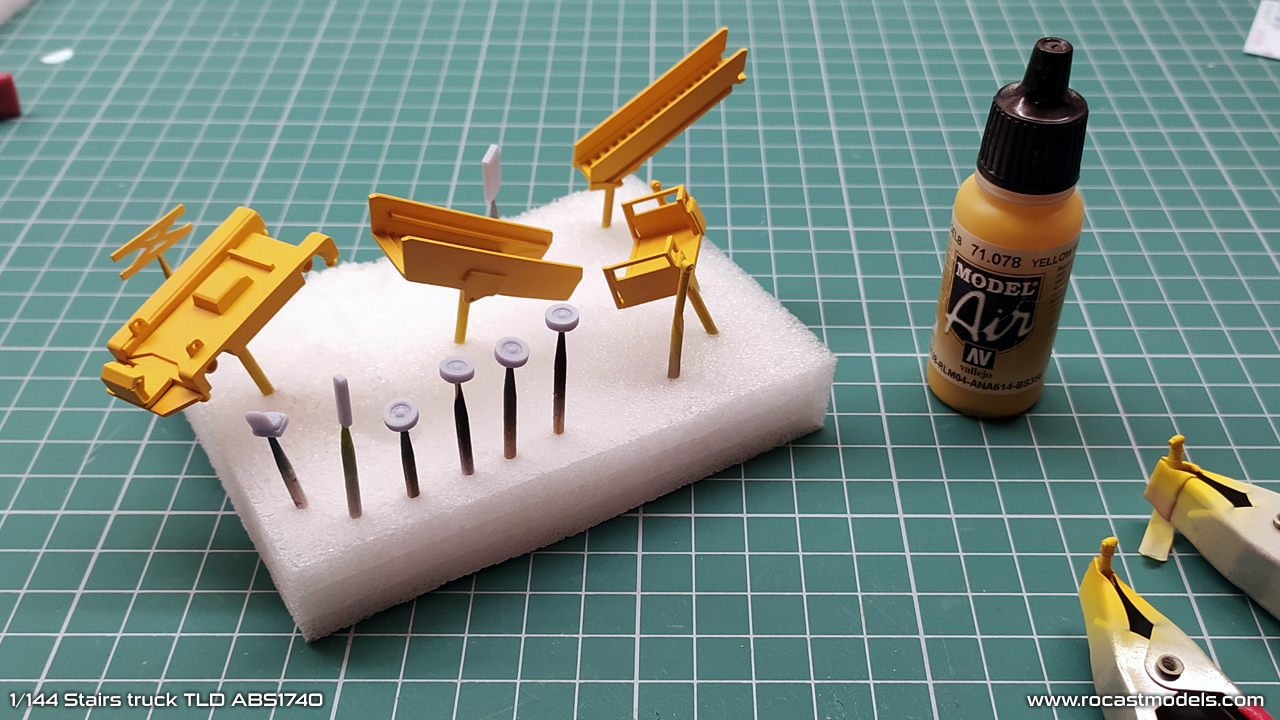
Yellow is applied, again I am using Vallejo colors, the yellow 71.078 from the Model Air line (ready for airbrush paint).
Once that the main color is applied, I paintbrush areas of the model that are different colored, for example, the center of the stairs, this area of the chassis I like to paint it in a dark gray.
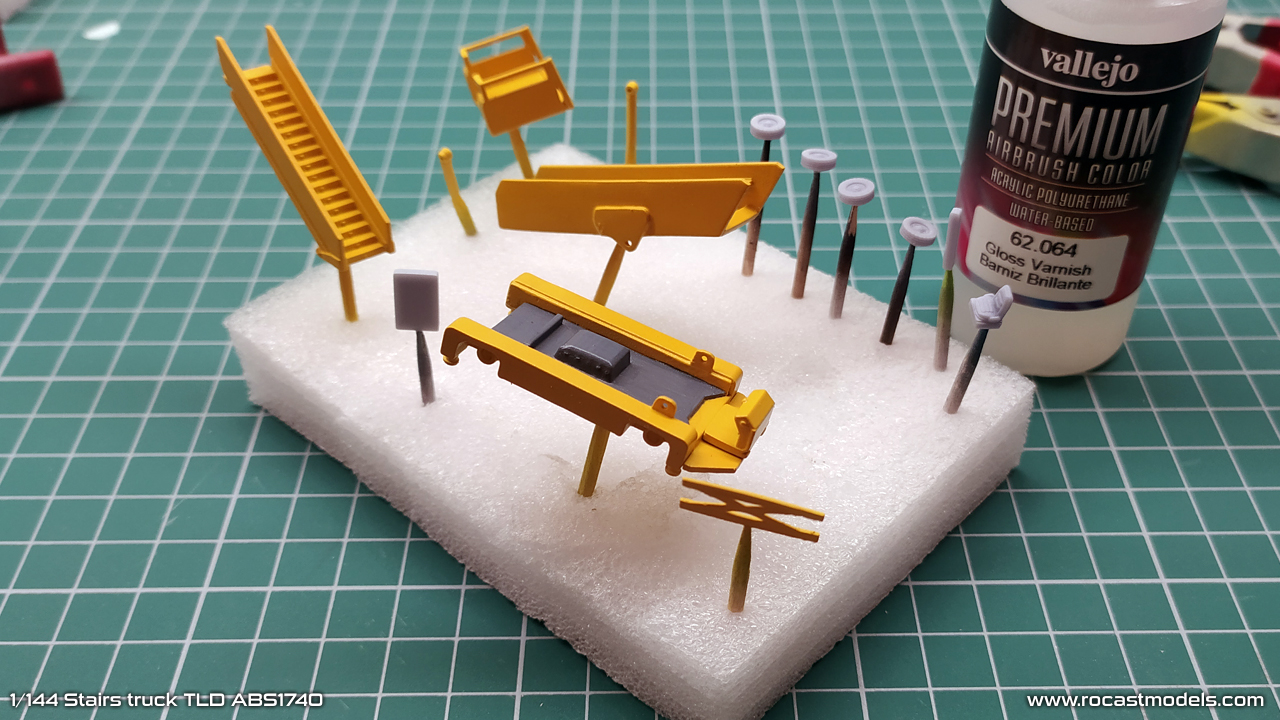
After the main color is applied, I “seal” the model with glossy varnish, this is an important step that will help on the decal placement and will avoid different kind of artifacts that may appear from the decal, for instance, if the model is matt colored, the decal may present some shine afterwards depending on the angle of the light source, so the process would be; glossy coat, decal, glossy coat (so the decal is sealed between two glossy coats) and a final matt coat.
You can also use satin varnish for this process.
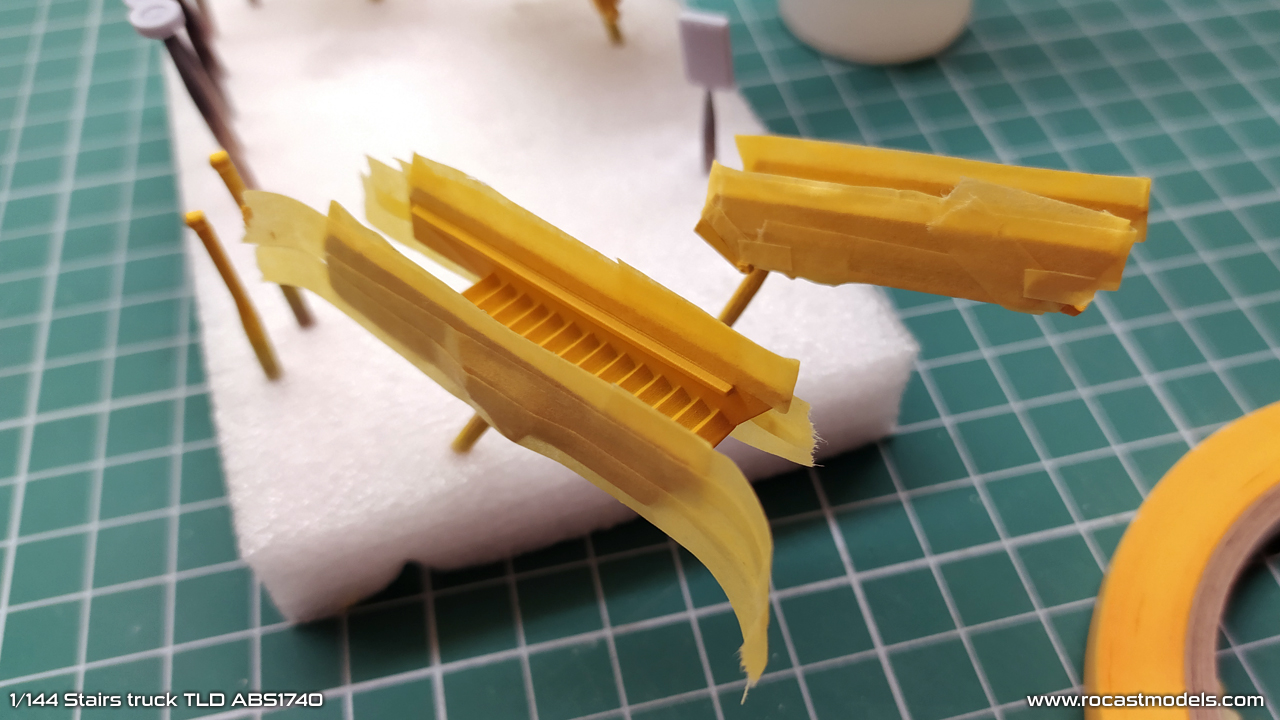
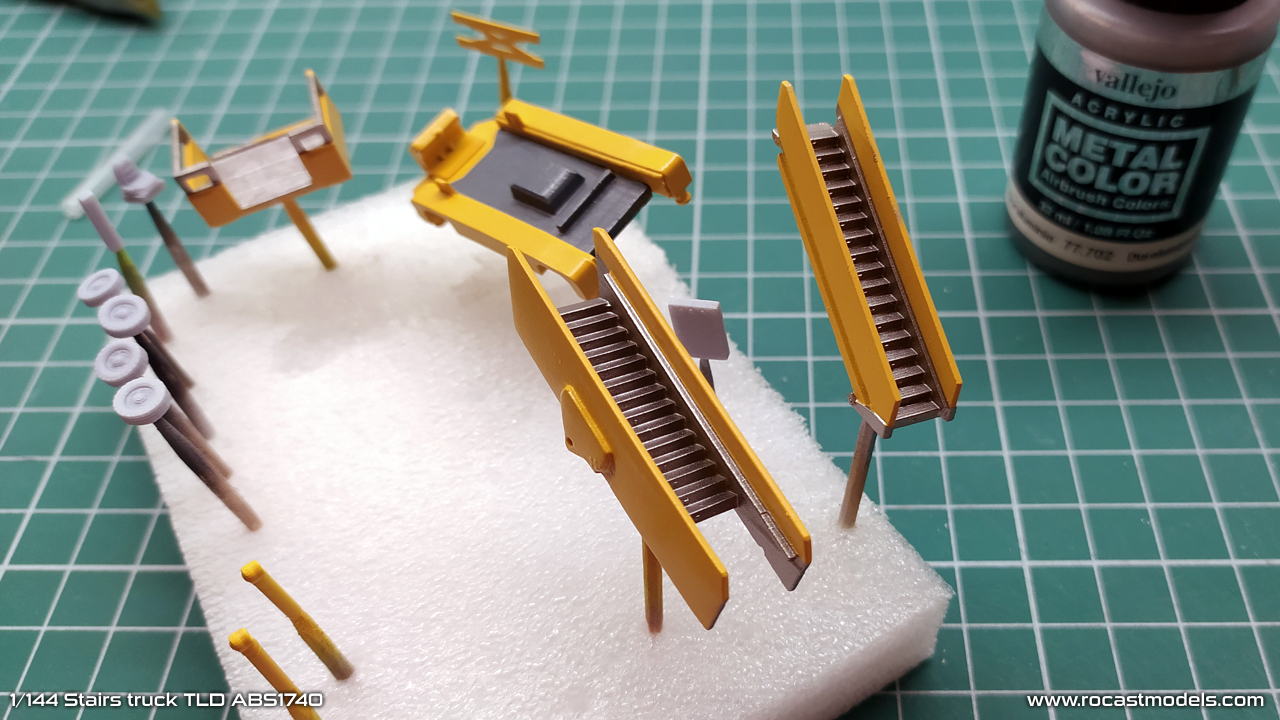
For painting the steps, I went ahead and mask taped the outside and half of the inside stairs body so that a silver color can be applied with airbrush.
The color I used is duraluminium 77.702 from Vallejo’s line Metal Color. I recommend these metallic colors, they have a very nice shade and there are several tonalities to chose from, quick dry and easy cleaning as they are water based.
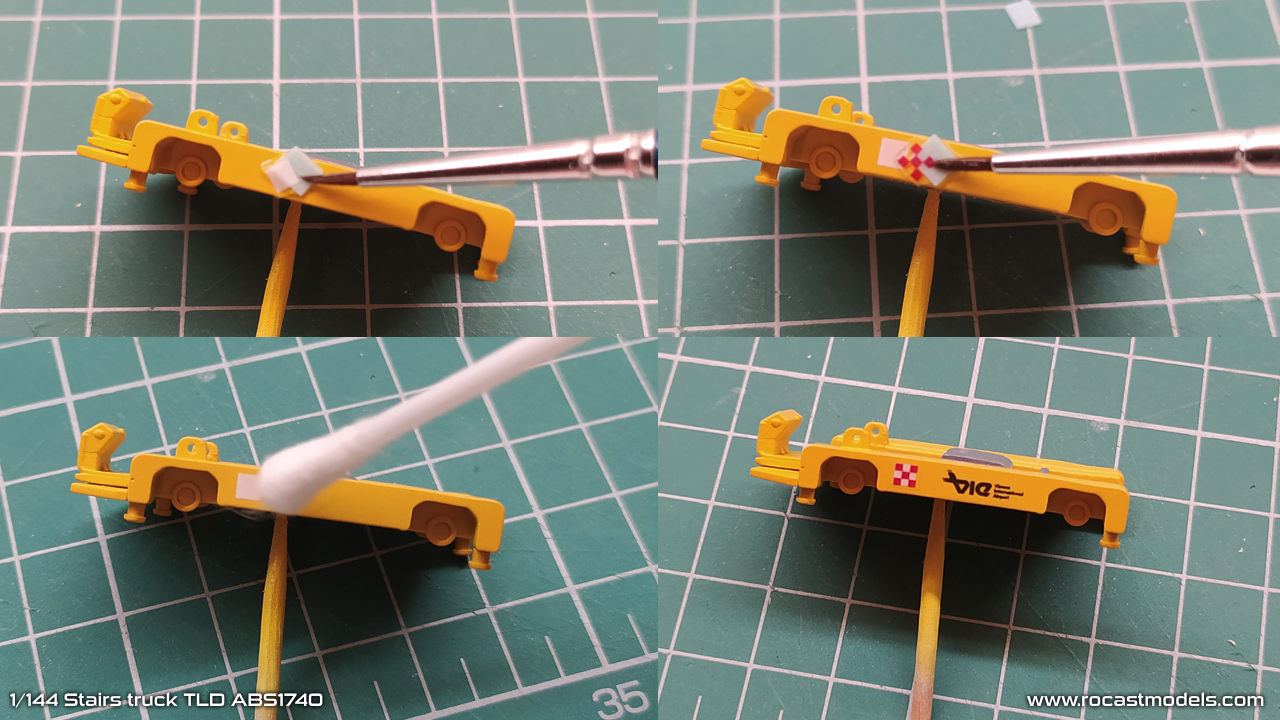
Now that the model has a shiny/satin surface, it is time to proceed with the decals. As these decals are laser printed and the surface is yellow, white decal must be placed first (top left corner in the photo below).
The decal is set using a cotton swab, I tend to use it as it is easy to fix the decal once in place, but be careful if the cotton leaves some hairs as it disintegrates from the use.
Once the white decal is fixed and dry (for safety, two hours, although if you use a softener, it may dry quicker) it is time to apply the color decal on top.
Very important: Be careful if using a hair dryier, the sudden change of temperature may make the resin of the model to deform, if you must use it, please do so at low power and from a distance of at least 50 cm / 20 inch.
Once all the decals are placed, it is time to seal them with a coat of glossy or satin varnish again.
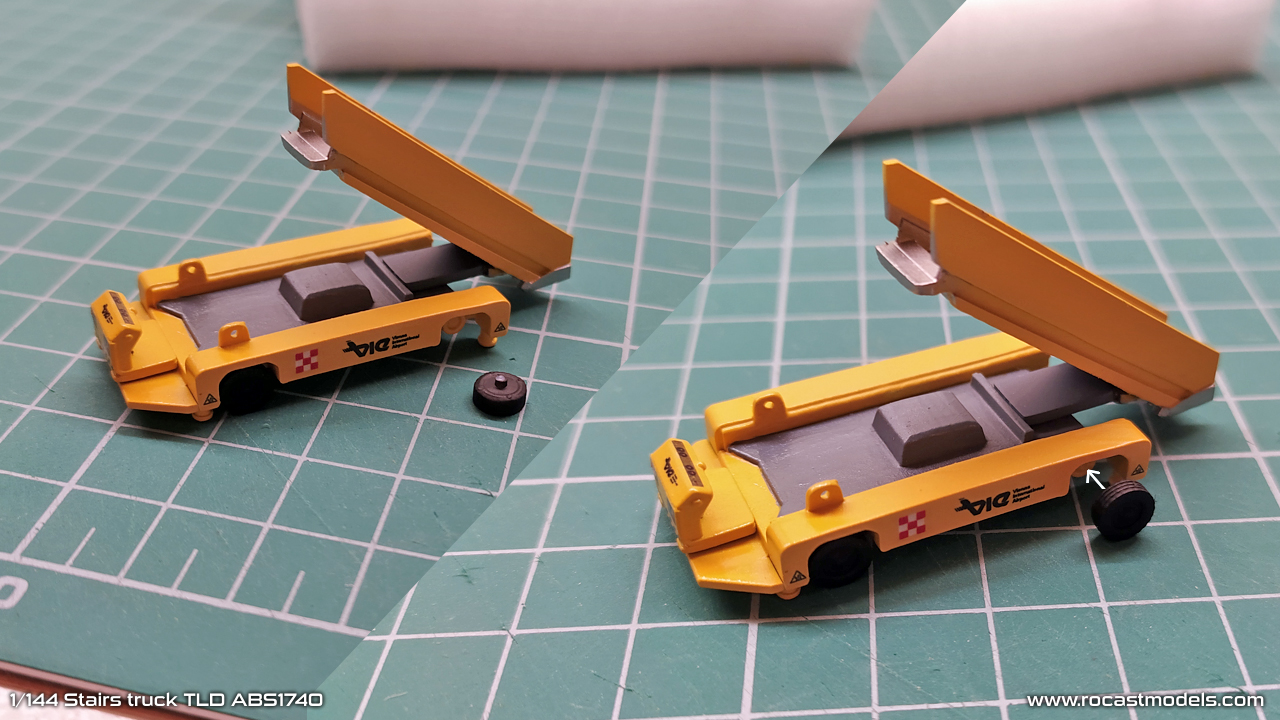
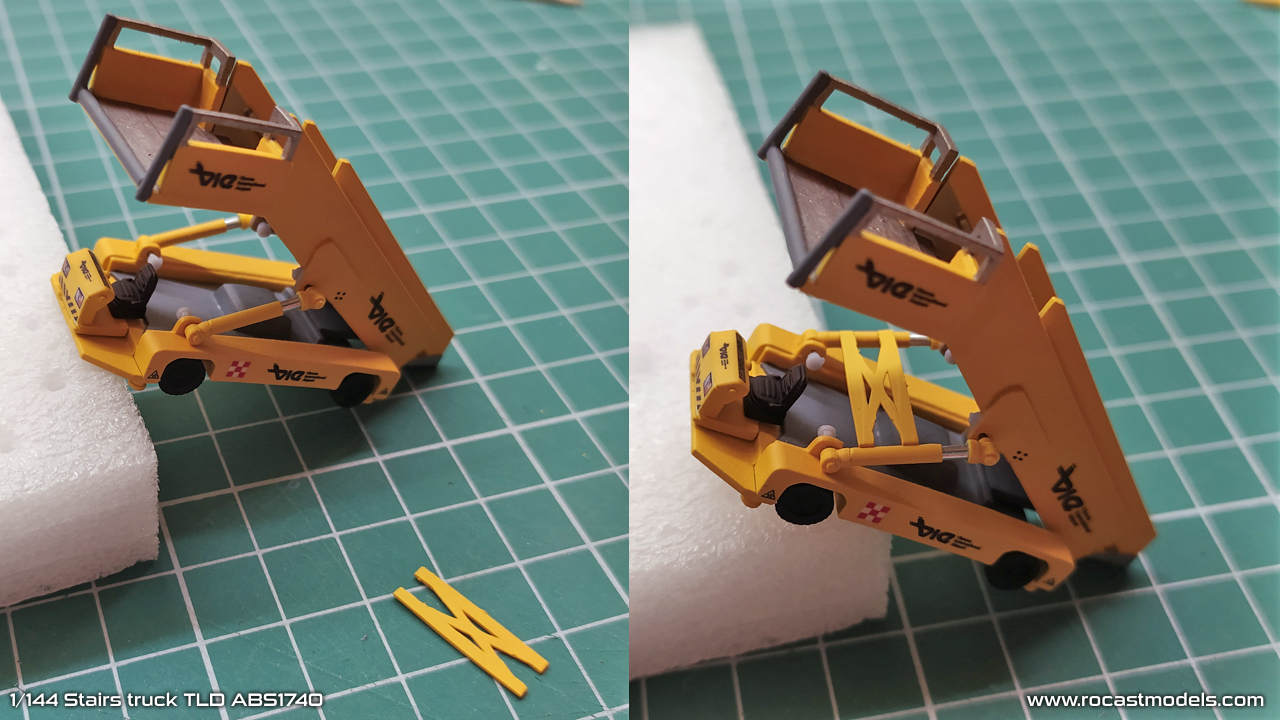
At this stage I glue the first set of stairs and the four wheels.
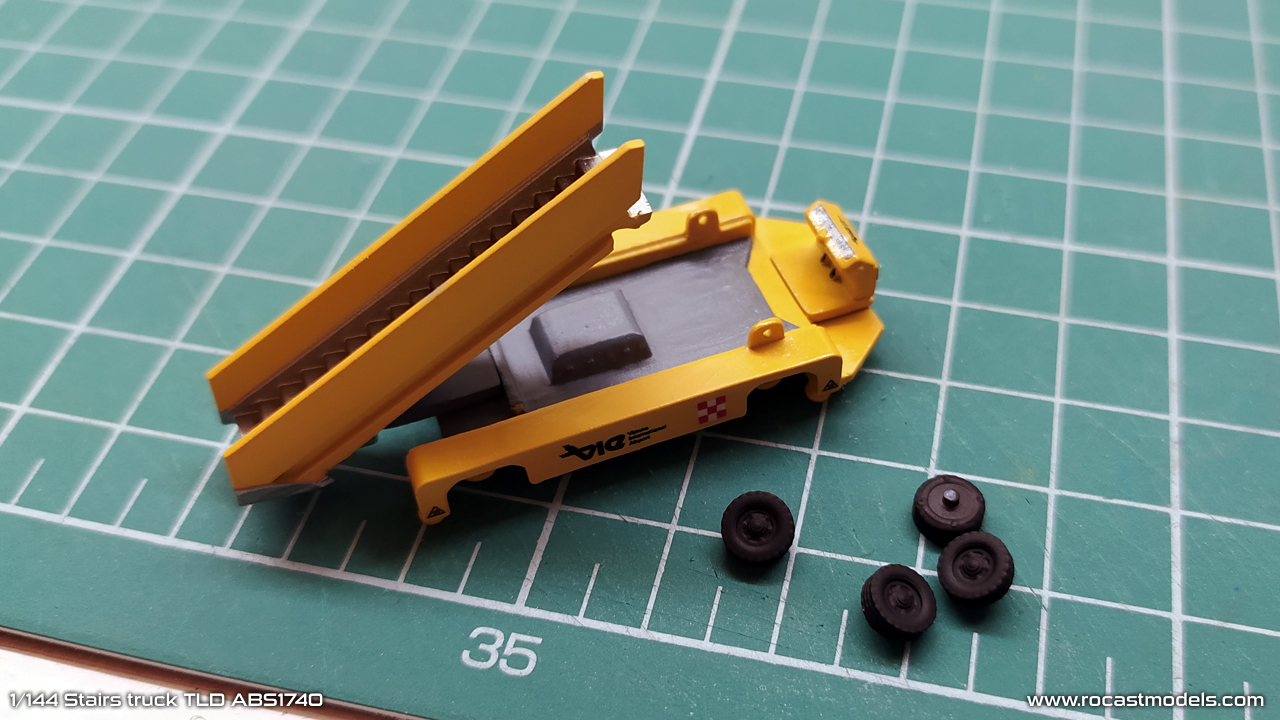
A tip in order to have the four wheels touching the ground is to place the last wheel with all the other three glued. Place the model standing on the three wheels and push the wheel into the wheel hub while the glue is on the wheel hub.
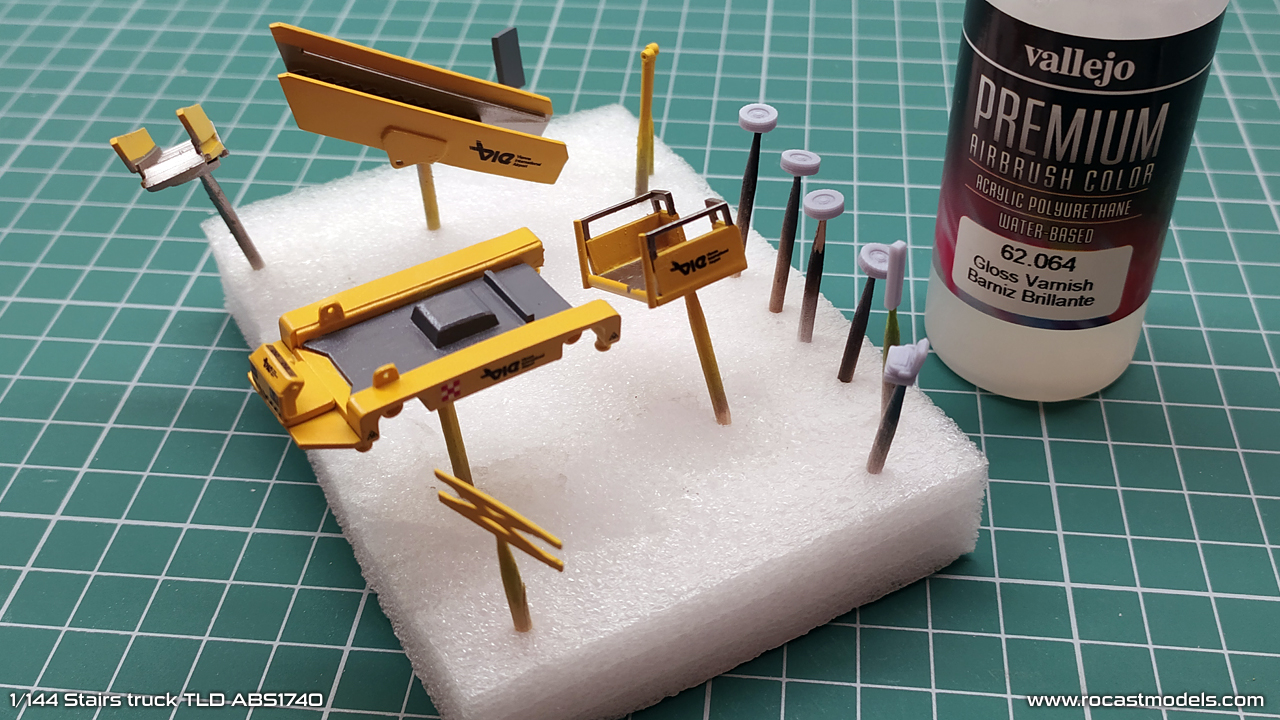
Now once the wheels are attached, I give the model a matt varnish coat. I personally like Vallejo’s matt coat very much. It gives a silky smooth finish, totally matt which helps at highlighting all the details as the light does not interfere with reflections.
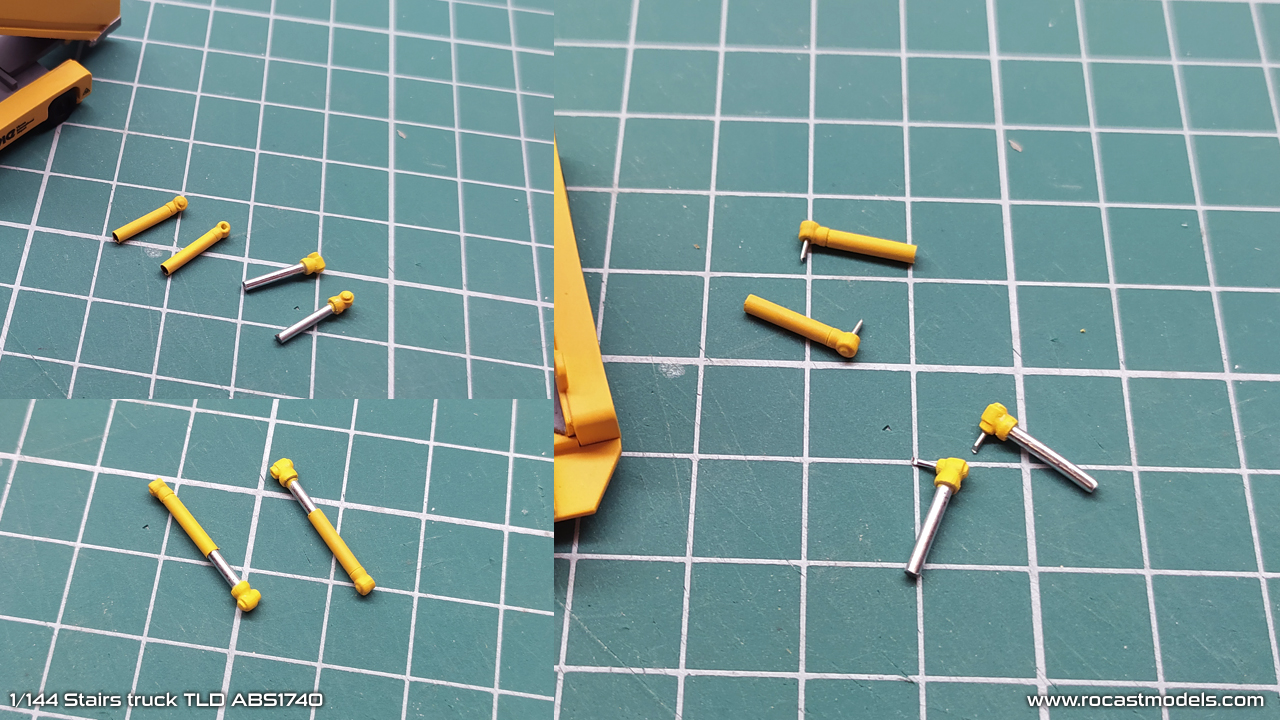
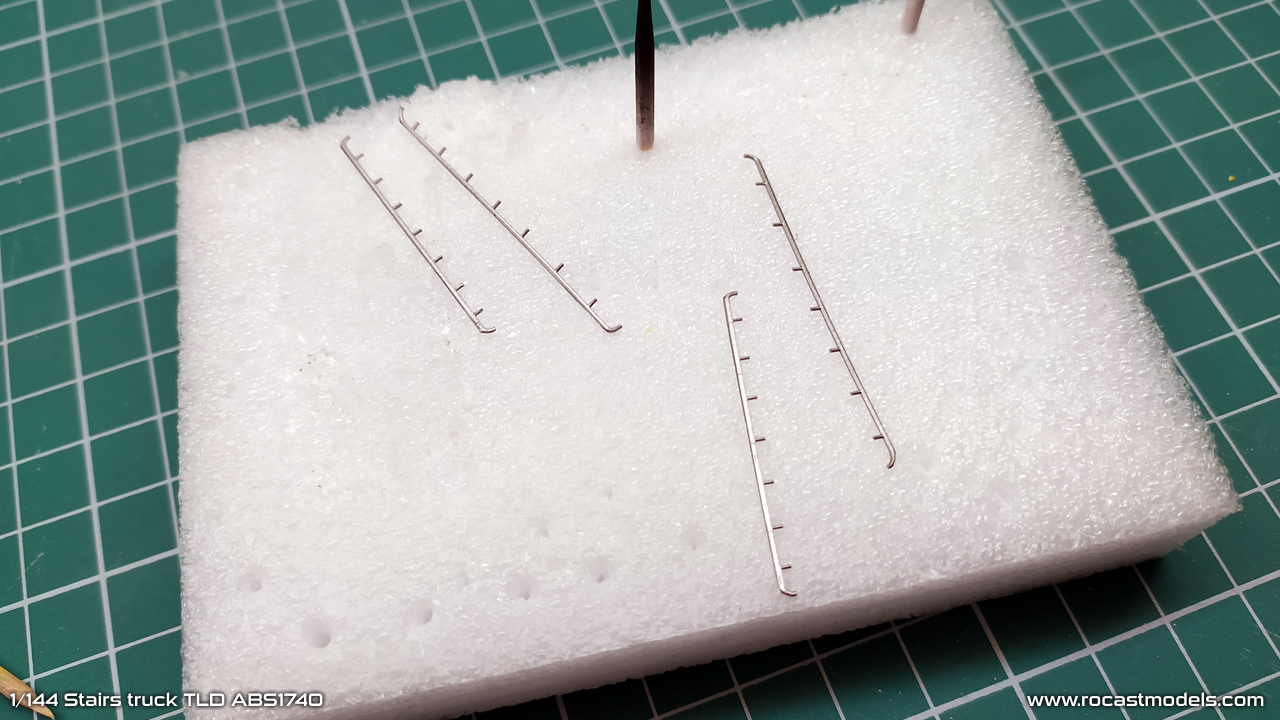
The next step is to prepare the parts that will be used for the lifting system. All of the tubes and rods that I ship are already previously checked one by one to make sure that they slide in correctly, obviously these are cut at the correct size and often times a small burr must be removed, it is worth to check that prior the painting process to avoid any scratch and to familiarize with how the tube/rod union slides.
I inserted four 2,5mm long 0,8mm diameter wire, one in each part as shown below:
Introduce the part with the wire through the chassis supports as shown in the photo and glue the other side of the wire inside the cap, this cap will allow the part to not fall loose from the chassis.
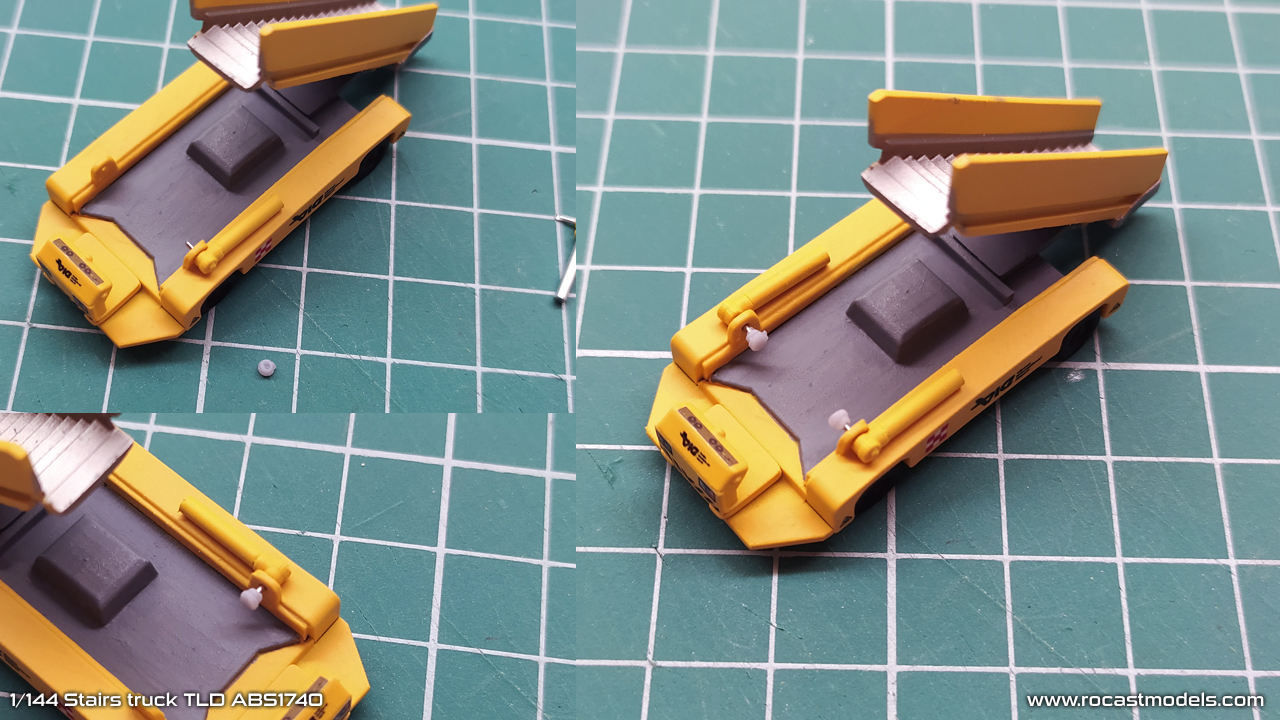
Do the same procedure for the second set of stairs, adding the tubes to the chassis of the stairs.
Once the two tubes are attached, slide in the stairs into the first section of stairs.
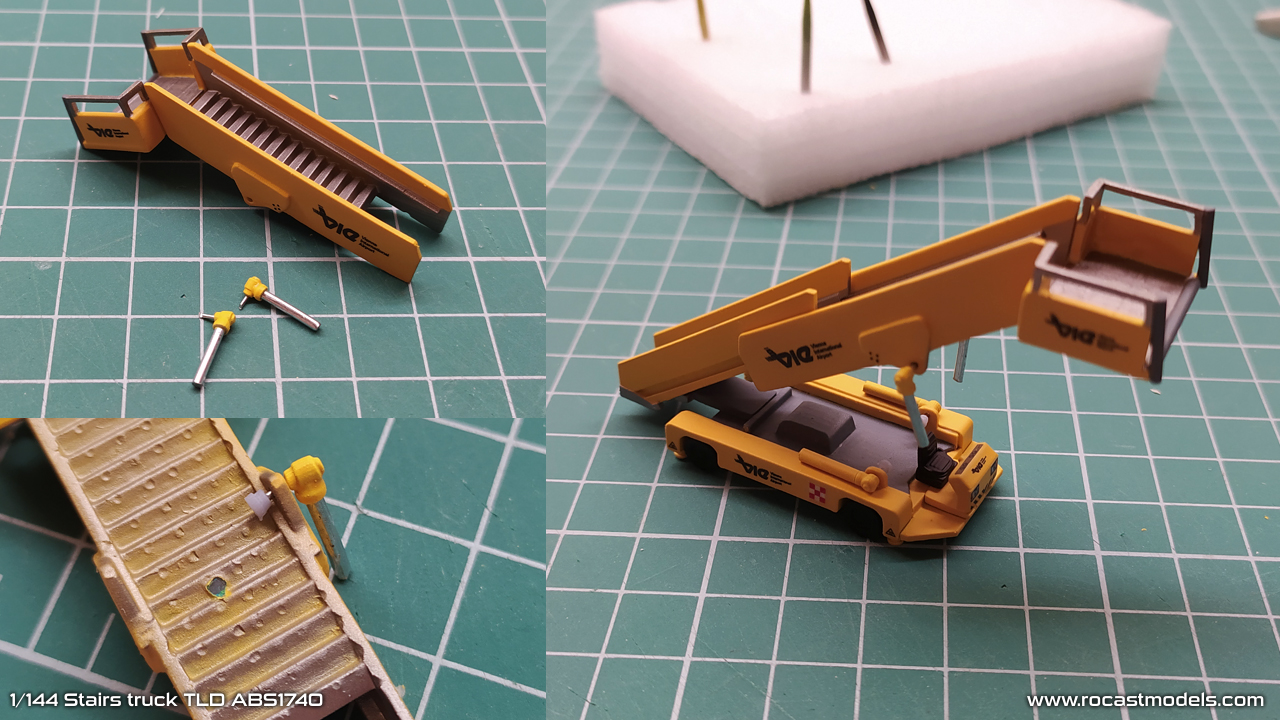
The next step may be the trickiest of the model, you will need the help of the tweezers, first insert one rod in one tube, then flip the model and do the same for the other side.
Once the rods are inserted into the tubes and both are secured, glue the reinforcement cross on top of the tubes, this will keep the tubes straight.
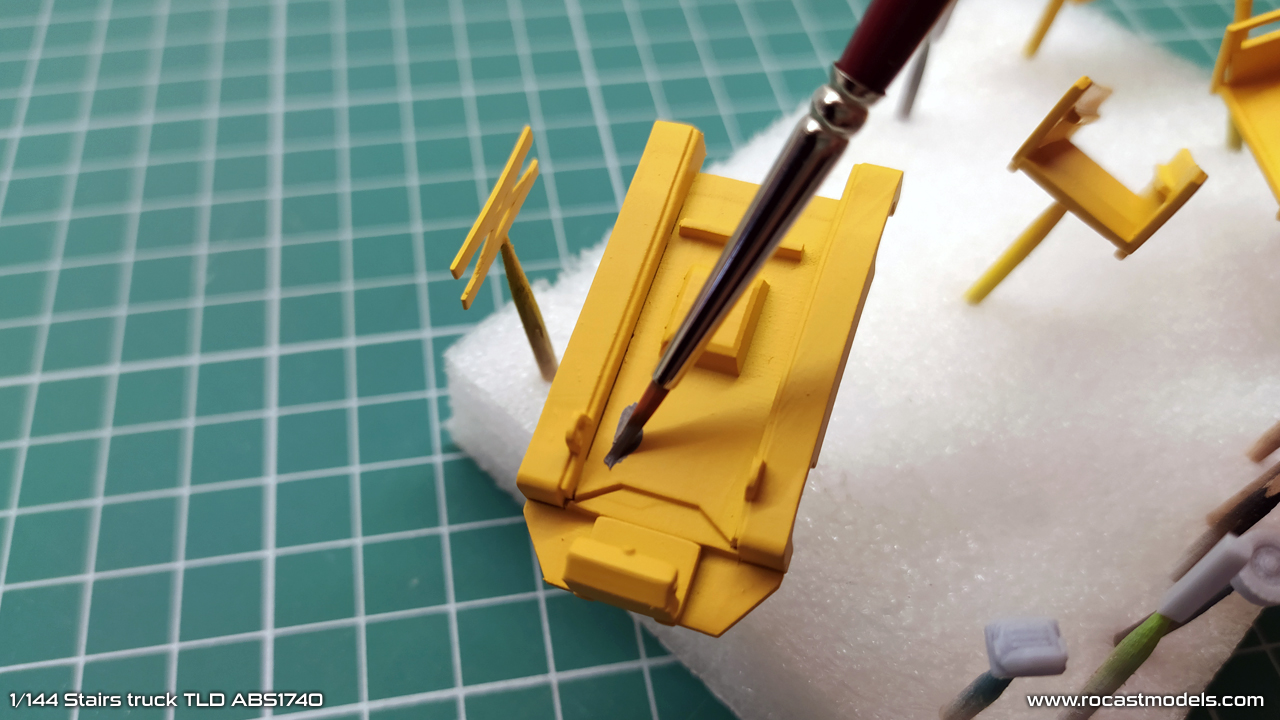
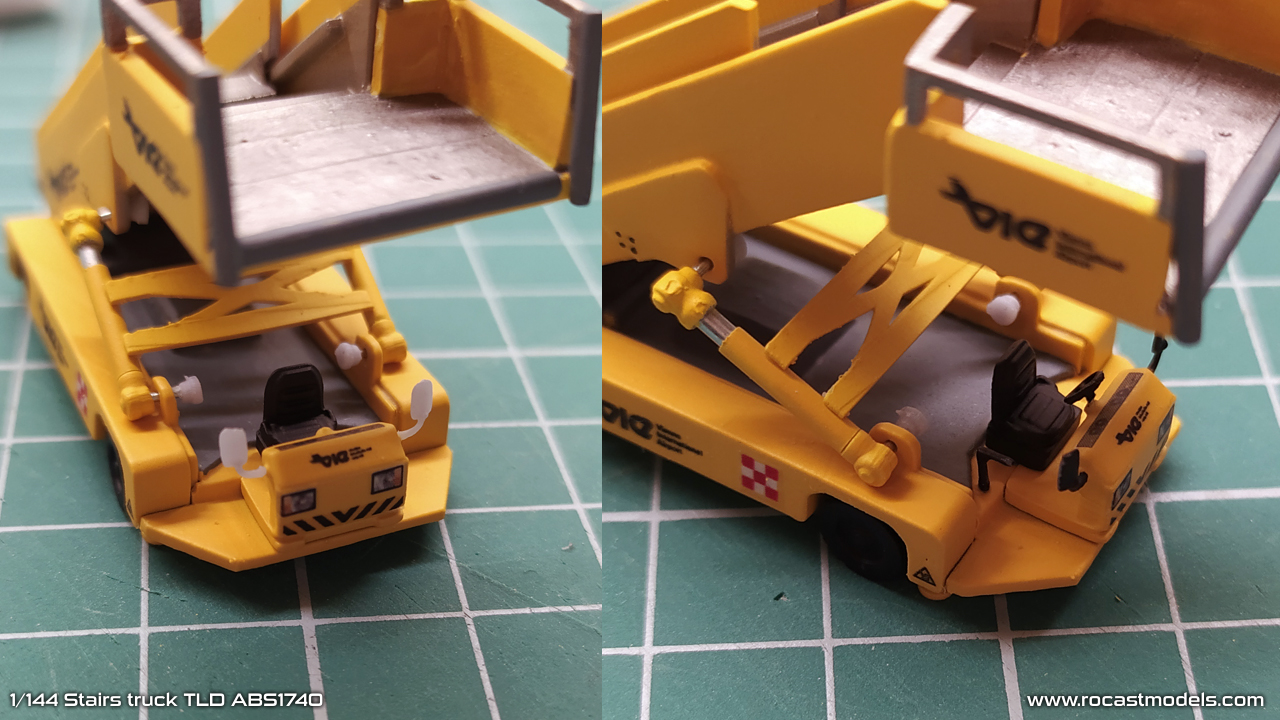
We are reaching the end of the build, so it is time to start gluing the small parts, these are: The wheeldrive, the driving mirrors and the handbrake.
Generally for such small parts, what I do first is glue them into place and then paint them black using a small paintbrush.
In order to avoid painting on top of the stairs when painting the handrails, I prefer to paint those separately. Again, I am using Duraluminium from the Metal Color series.
Due the handrails are thin, I do not use clamps of any kind since they can pinch them and leave a mark, or even break them (the kit includes one spare of each type), what I do instead is hold it with my fingers, paint one side, let it dry (this kind of paint dries pretty quickly) and paint the other side.
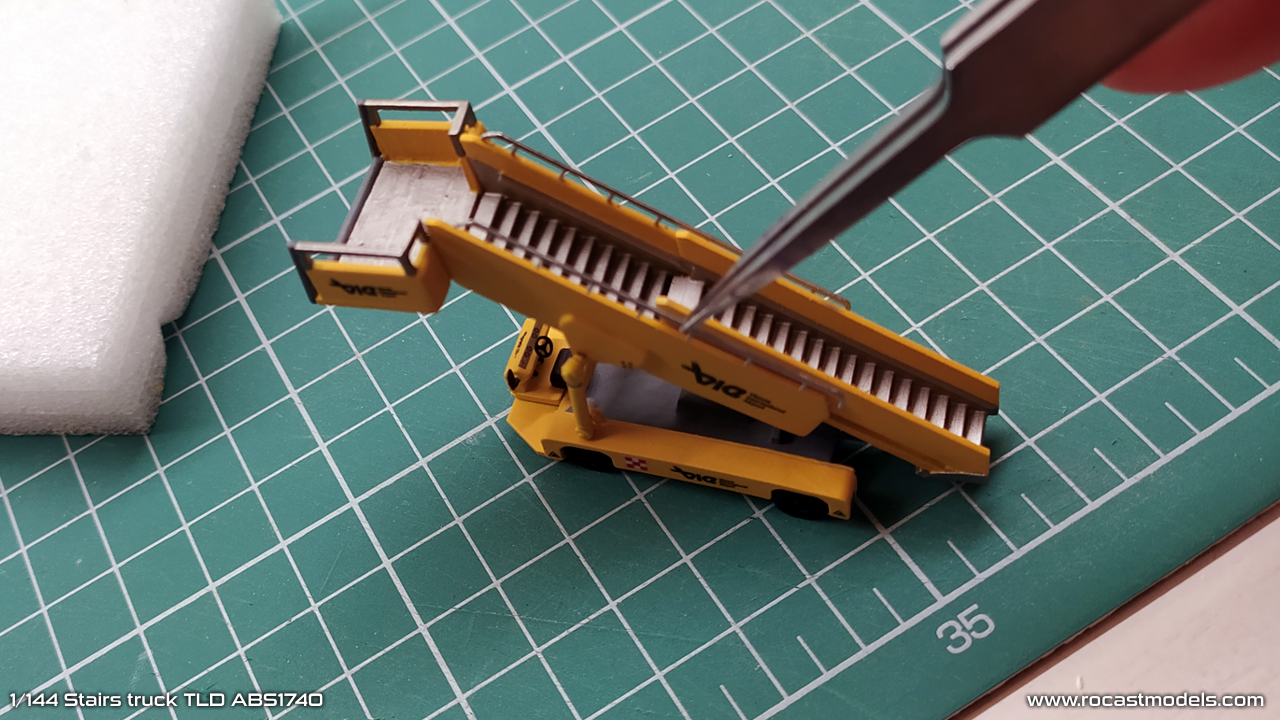
It is time to glue the different handrails on the model. The use of tweezers again is mandatory, the stairs handrails are designed so that they fit perfectly on the stairs edge with each vertical support.
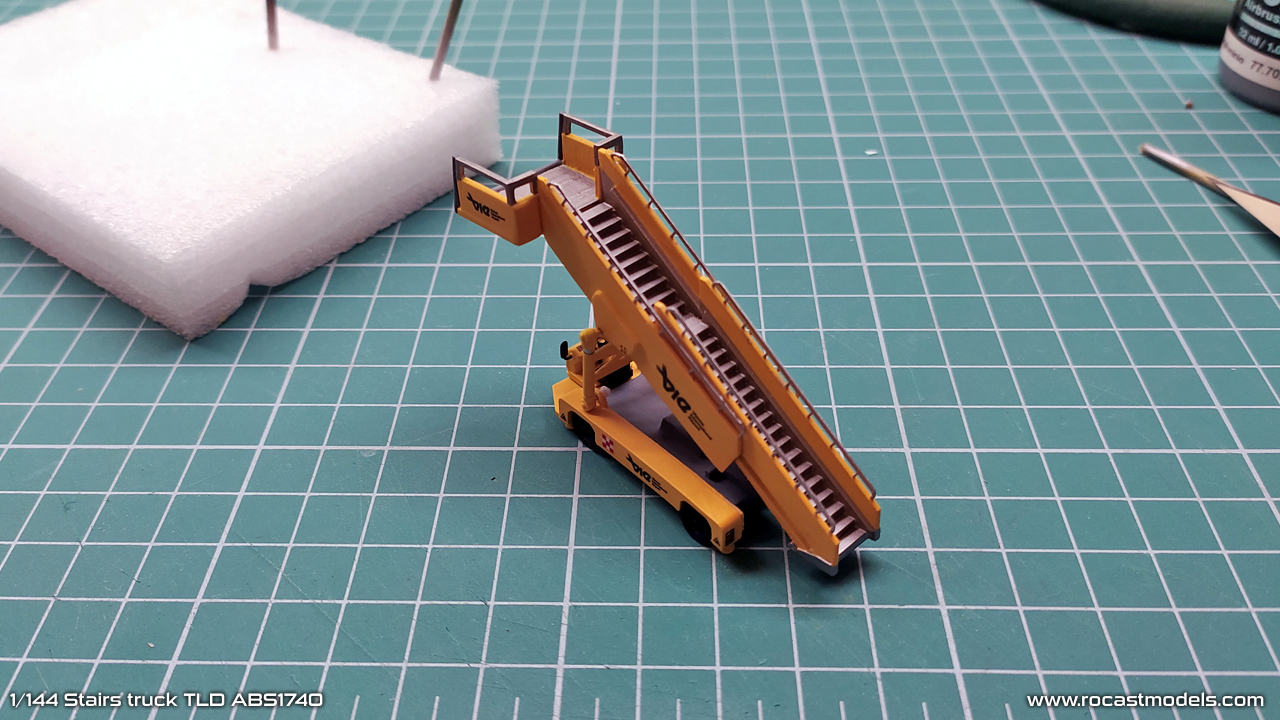
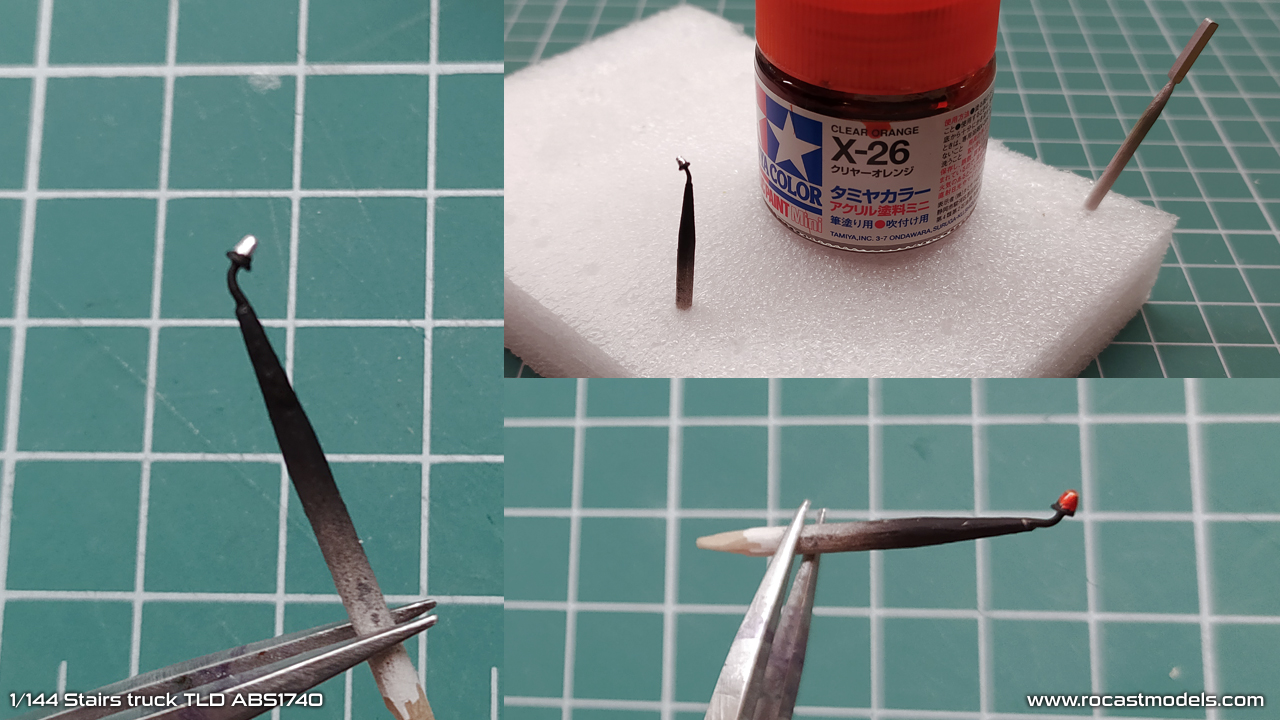
The last step is to glue the emergency light.
One thing that I always do is paint the emergency light first with black color and then a chrome color, for this purpose I use the paint from one of those cheap chrome spray cans, they are not the best for chroming parts since they leave fingerprints, but this part is so small that it does its job perfectly, then once the chrome is applied, I paint on top of it with clear orange, the orange turns kind of reflective which in my opinion does a nice representation of the orange-clear plastic that it is usually used on such emergency lights.
Final thoughts:
Some other advices that I would like to give, not just for this assembly but mainly for other GSE models.
- Always think ahead, the instructions show you how to assembly the model, but each modeler may prefer a different aproach on regards painting. For me, I always find it easier and paint-saving to join certain parts and paint them together.
- Tweezers, always use them to handle those parts, they will become your right hand, without them, it is basically impossible to build those models.
- Paint: You can use any you like, but make sure to not to overpaint, otherwise you may cover some details. It is always best to go with thin layers than just one single thick coat.
- Imagine: Use your imagination, I often paint those models to be kind of generic, because the purpose of them is to be an example, here in this case I wanted to represent a stairs truck from Vienna airport. There are several handler and airline decals to chose from in the online store, yet if you like to have some that aren’t there or available, contact me and we can sort it out.
- These stairs truck fit from widebodies to narrowbodies, however, smaller aircraft may be just too low, in such case, you can modify the second group of stairs (the one that rises up and down) by cutting the rear side (making it shorter) and removing a step so that the overal truck and stairs distance can be shorter.
If you have any question about this build, please feel free to contact me anytime!
Best wishes,
Guillem