


Hello everyone,
As you may probably know, due some issues that I prefer to forget, I had to take the decision to make my own decal prints for the GSE models as well as for the aircraft liveries.
I have started to do some tests with the printer and so far I am happy with the results.
At first glance, can you tell which one is printed from my printer and which one from the expensive printer at the companys? (apologies for the quality of the photos).
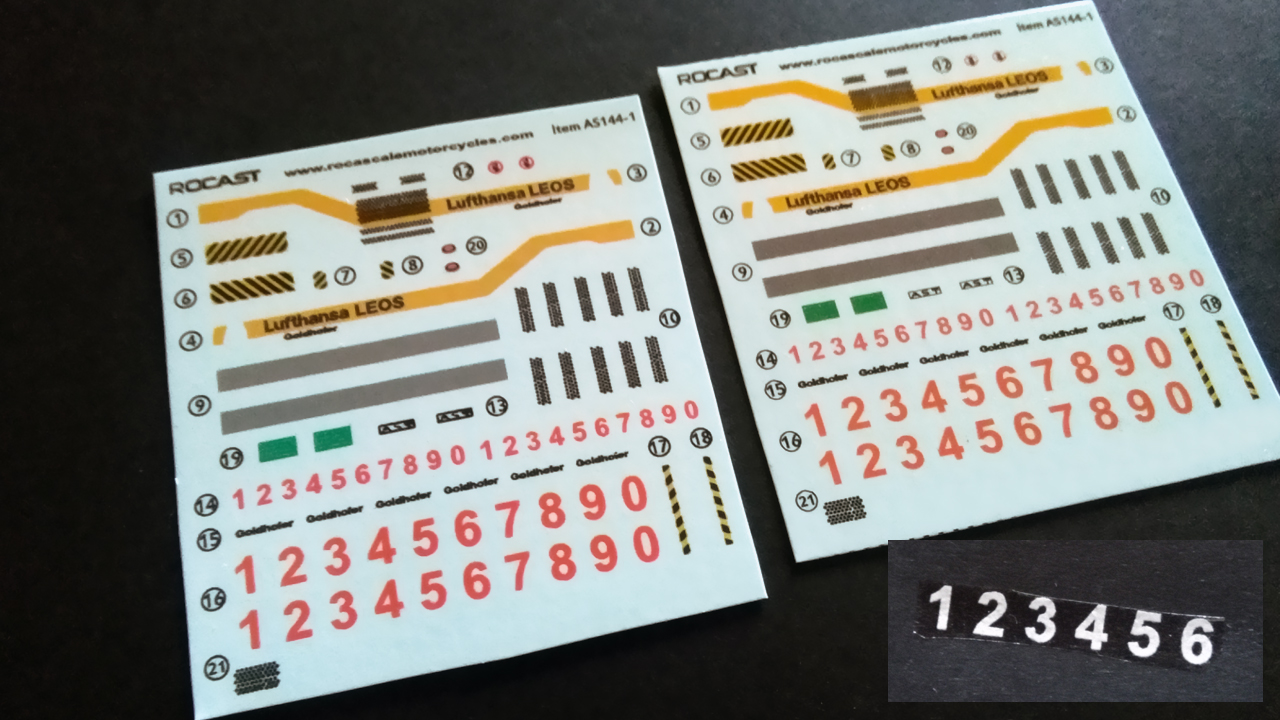
On the left, the one I printed, on the right, the company’s.
Naturally, there is more than a first glance; a higher price printer which already includes a white color from manufacture will always be superior to these more affordable printers.
These highly priced printers can print white + colors in a single pass, which means that the white underlaying color would be perfectly placed below the colors, there are many other pros on the expensier printers obviously, but if we compare the overall look/quality, you can still print very good decals at a cheaper price. I am not criticizing the expensier printers, but I have been proven that even expensier printers can have issues in some areas.
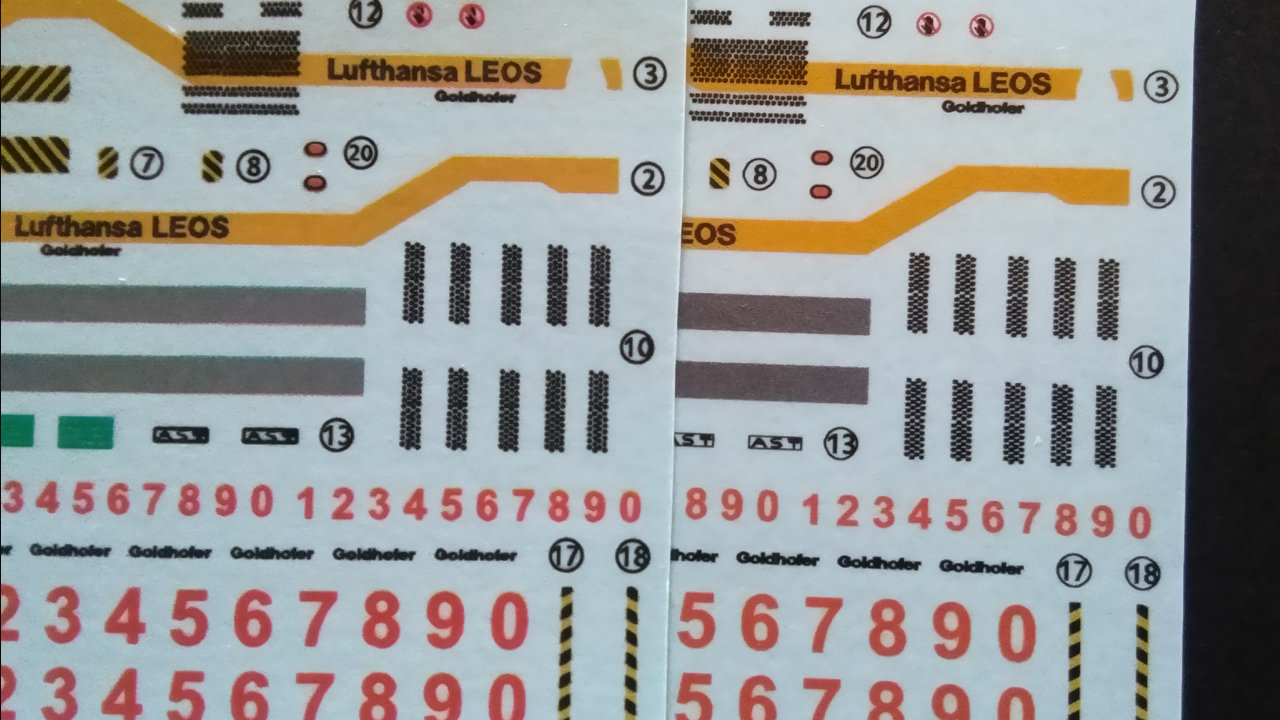
Image above is zoomed about five times the decal size.
There is one thing that I am still working on, which is the sharpness of the colors (specially black) when there are lines close to each other, this is something I noticed in the settings and I am still configuring these parameters. I am still familiarizing myself with the different setups and there are several options that need to be checked.
One of the things that really surprised me is the opaqueness of the white as you can see on the first photo. These numbers are actually a decal placed on a black paper, and at first instance, I am also happy with the decal thickness.
Speaking of the white color; it is very possible that I may separate the white underlaying decal from the color decal in some circumstances thus placing first the white decal (as a primer) and then the color decal. This would not be an issue if a decal logo is bigger since you can reduce the size of the underlaying white, but the majority of the details are quite small, some lines are 0,08mm thus even reducing the artwork, it would not perfectly fit under the colors in a second print pass.
I personally don’t think that would be a bother, since this would happen only with decals that currently have a visible white and that are mixed with colors, there are very few decals currently going on dark colors, most of the airliners have white colored fuselages.
The main issues I had were with paper jamming after or during the print process, but that is something related to the print setup and specifying a proper paper type in the settings solves the issues.
Metallic colors won’t be present on my decals (at least by now). That is something I had to think about and I took the decision to not to include them, that will also be reflected on the final price and I would like to give a comment on metallics.
To be 100% honest, I think that metallic prints looks cool, however, about the windows frame and from the realism-scale point of view, these may not be very accurate since the chrome-like shine may be unrealistic for the scale, when you see an aircraft in real person, the window frames do not reflect like a mirror, it is a more dull color which actually happens anyway if you clearcoat the model, modifying how the light reflects on the metallic particles of the decal.
The reason why I used metallic in the previous decals was because I had the chance to, and because it is what most manufacturers use, but the same way as the reds for the several stencils have too much contrast for my liking, just because a manufacturer does include metallic color doesn’t mean that is the way to go.
That is speaking of window frames and from the colors I previously used for that particular printer, however, it will be missed on the leading edges of the A350 decals. Although it won’t be the same, I am not disregarding that particular decal, as I am working on a photorealistic leading edge. In the end these are options that are included on the decal set since in most cases the leading edges had to be painted.
Please, understand that above images are tests that I did just in one morning time. I am going to try some other settings and try to improve the edge sharpness. Overall I can say I am positive with the results and the decals are going in the right direction. Would like to take the chance to mention that besides the Air China A350 with the Expo 2019 colors, I have also completed a Skyteam Vietnam decal set as well as working on a new A320Neo livery.
All these changes actually took time from the stock making of the GSE models and time form the 747F detail set (as well as other items on the list), but I hope to update the 747 cargo progress very soon.
There will be some time required to modify the artworks to be printed in the new printer, although the printing company thought was my sensei not much of what he instructed can be rescued/used for the decals, in the past I was much more limited using dull Pantone colors, but now I can adjust better these colors to try to match those of the real aircraft, so I will be changing colors in future liveries as I won’t be printing Pantone anymore.
Best wishes,
Guillem