


Hello everyone,
I would like to upload some of the progress that I was able to do with the 747F deck project on last weekend.
This week is a little crazy since it is holiday today and it will be extended till Monday. However, there is not much time to lose so even I reduced to 3rd gear for being national holiday, I still keep on preparing units and working on the 747F project.
Currently making more baggage carts, belt loaders, AST-1 and catering truck. I am also planning the Leap 1A engine for the Neo family, project that I set date to be ready on February at the latest. I will be using the PW as a base instead of having to do a full scratch built like I did with the PW, and although both engines are quite different when looking carefully, it is better to start with some shape (specially pylon-wing union) than starting from zero.
Now onto the progress that has been done on the freighter project:
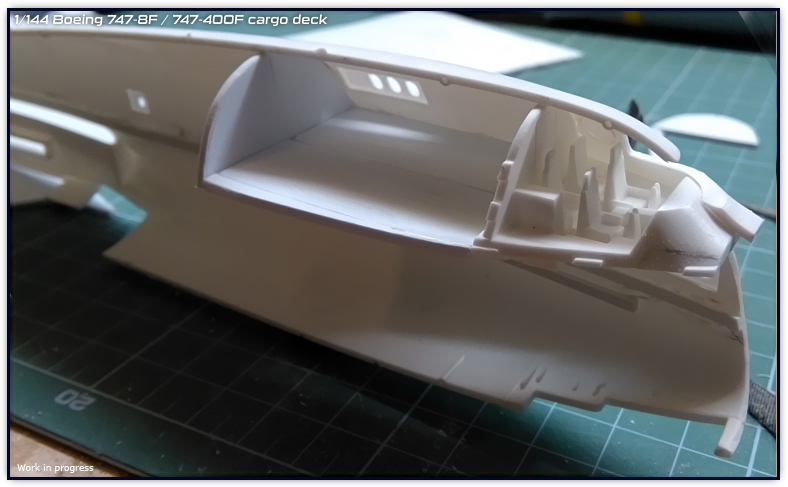
I have made the floor of the crew rest area which is also the ceiling for the cargo compartment, this was needed as it is also a basic structure for the interior. Not planning on detailing the crew rest area since it won’t be seen from the outside. I may leave the holes for the windows for those who prefer using the clear plastic, but for my build I will have them covered and a decal will represent them.
Revell made a mistake on the upper deck windows, since the 8F is still using the traditional -400 windows for that area instead of those from the 8i but made it right on the L1 door window which also preserves the “old” window style.
After having made the crew rest area, I attached what will be the ceiling (still not all of it is placed), since the ceiling shape change at about section STA1500 towards the end of the fuselage. By adding the ceiling first, I can now see what sizes the side walls are going to be and add the detail on that particular area. The upper side of the ceiling (the one that isn’t seen) will be solid and have the same shape as the fuselage so that it can be easier to place on the concave shape of the fuselage. There isn’t too much space on that area so it won’t be a problem on regards material quantity.

This cargo set will also include the cockpit because there is a lot going on on that area. As you can see from the picture above, the entire base of the cockpit will be putty-filled so that the ceiling is flat on both the cockpit and crew rest area.
Cockpit base will also include all that detail on the edge that is actually seen from the outside. I also marked where the ladder will go, actually corrected instead of standing at the front of L1 door as I mistakenly marked firstly.
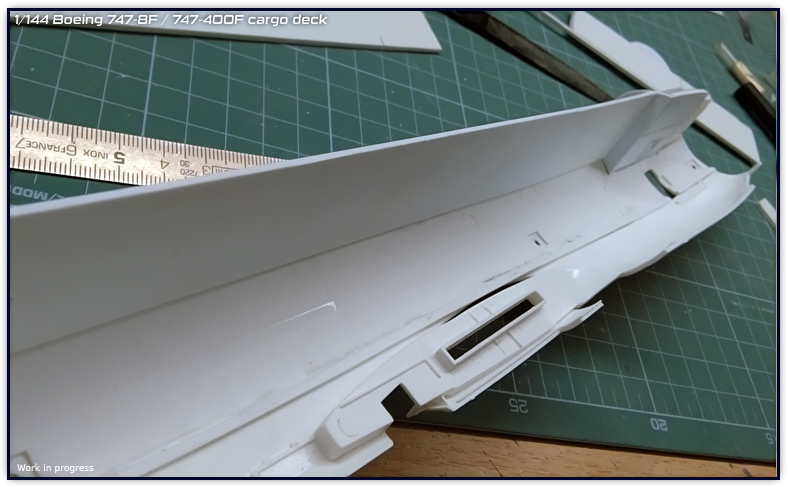
I am also not forgetting the cargo bays, I think that it would be a good idea since I have this model open in such a way, to include also both cargo bays. This will also help me to represent the new cargo loader which will feature these different sill height positions, so my idea is a diorama with four cargo loaders fully loading this freighter, nose door, side cargo door and both cargo bays.
I am advancing a little slowly because these modifications require planning and sometimes things do not always come out right at first.
Hope you like this project so far! I am really looking forward to it because it will also give me the chance to create new GSE specifically for loading such giant birds.
Best wishes,
Guillem