


Hello all,
Unusual time for me to give an update as I usually write on the weekends, but I wanted to give an overview on how are things and the latest model I tested/build/completed.
Prior this, I wanted to comment a few points:
- Very soon I will change the livery decals from the 8 micron film to the “standard” 13 micron decal film. The reasons are; 1) availability; to me it is a bit harder to find this type of paper within my reach, meaning, to have it readily available anytime I need. The second reason is that it may result harder for some modelers to use it on bigger decals. I have been testing the standard 13 micron decal and to be honest, it still gives very good results on terms of thickness, still thin, but it seems to keep straighter once starting to be removed from the paper base in comparison to the 8 micron film, where it may just be a bit easier to get folded if not being careful.So what about the smaller decals? I have done a precise test since I was building the belt loader and wanted to give it a shot to see how the “standard” 13 micron film behaves on smaller decals of about 3 x 1,5mm, the results were satisfactory, I was very happy with how it worked, still without visible edges, so I thought that all in all and for the purpose of the GSE and airliners, the 13 micron decal film seems to be a better option overall.
Talking about decals, I am redoing the LD3 container decals with the airlines from the previous LD3 due stock reasons, since the decals I have now (from the original batch) will not last forever.
I am also creating a separate sheet of decals with numerous airline logos in case you wanted to customize the GSE models, so you will find Delta, Emirates, ANA etc logos in different sizes on the same sheet (one carrier/sheet).
Plans to resume the 777-300ER (and so forth) decal sets will continue once I get things done with the GSE.
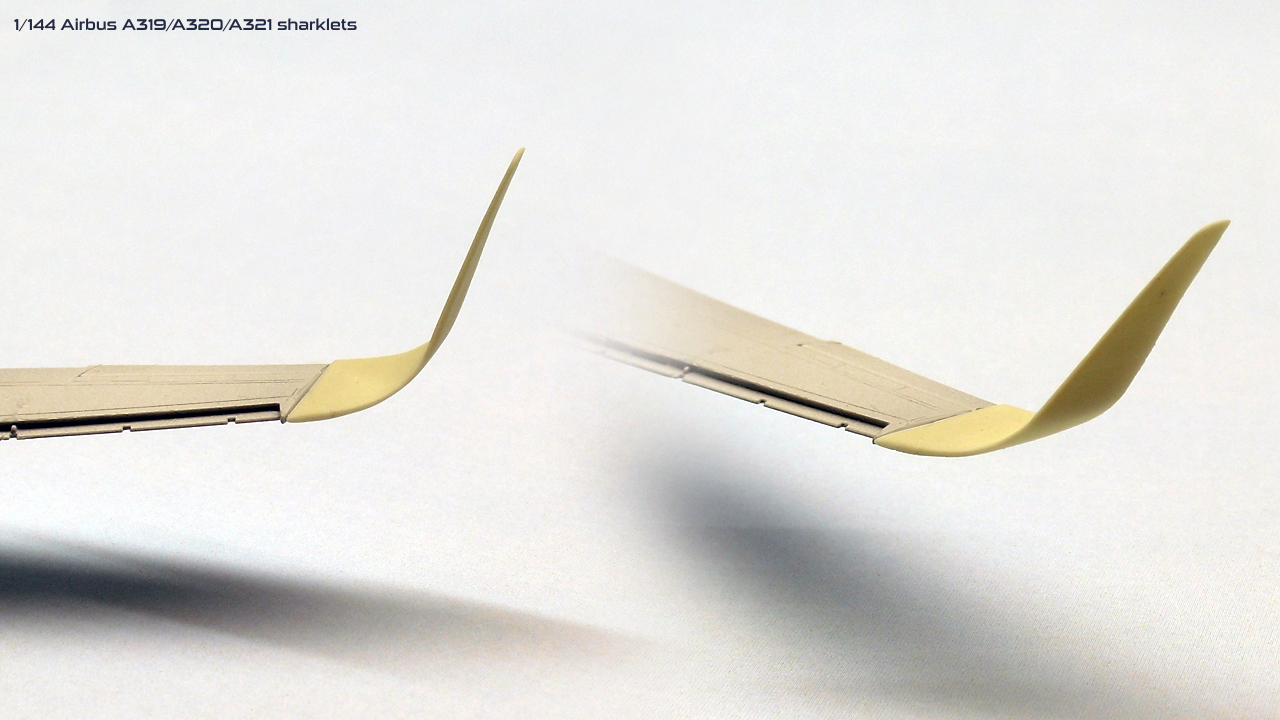
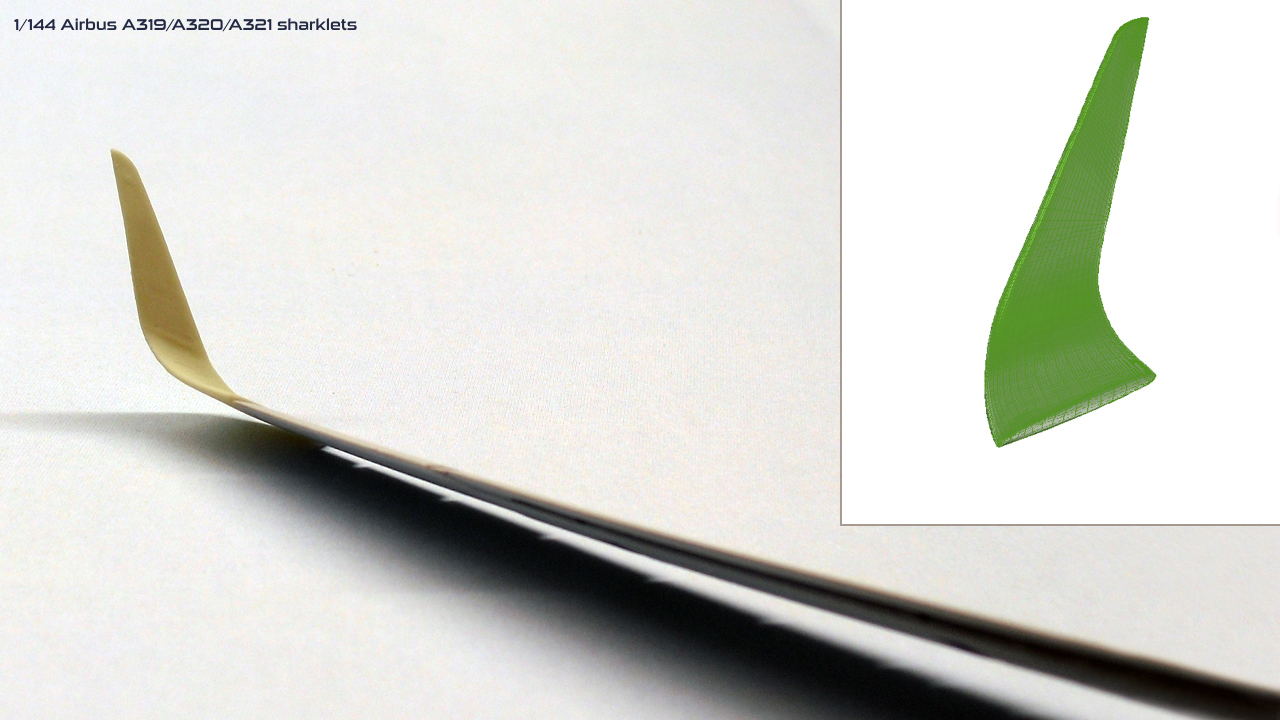
- New Airbus sharklets, what about it?
Some time ago, a good friend of mine contacted me with a 3D model that he created based on the geometry of the Airbus A320. He was very kind enough to send me the file for me to check it out and distribute the finished product to the modelers if in the end I was able to make it in 1/144. I decided to give it a go and modeled my version (working side by side with the original), so that the thickness could be viable in the small scale (it was originally in 1/1 size) and made the dimensions were it connects to the wing as per Zvezda’s A320 model size, so this sharklet is, the best representation (and the closest) I can make of the small Airbus family sharklet.
Similar process will be carried for the A350 “new” wingtip. Now, I am a bit unaware of model kit news, but I think Zvezda will or did release the A350-1000 which should have the new sharklets, so my intention is to produce the new wingtips for those having the A350-900 kit.I am considering providing airline decals together with these A320 sharklets, which is something similar I did and will continue to do for the A350 sharklets.
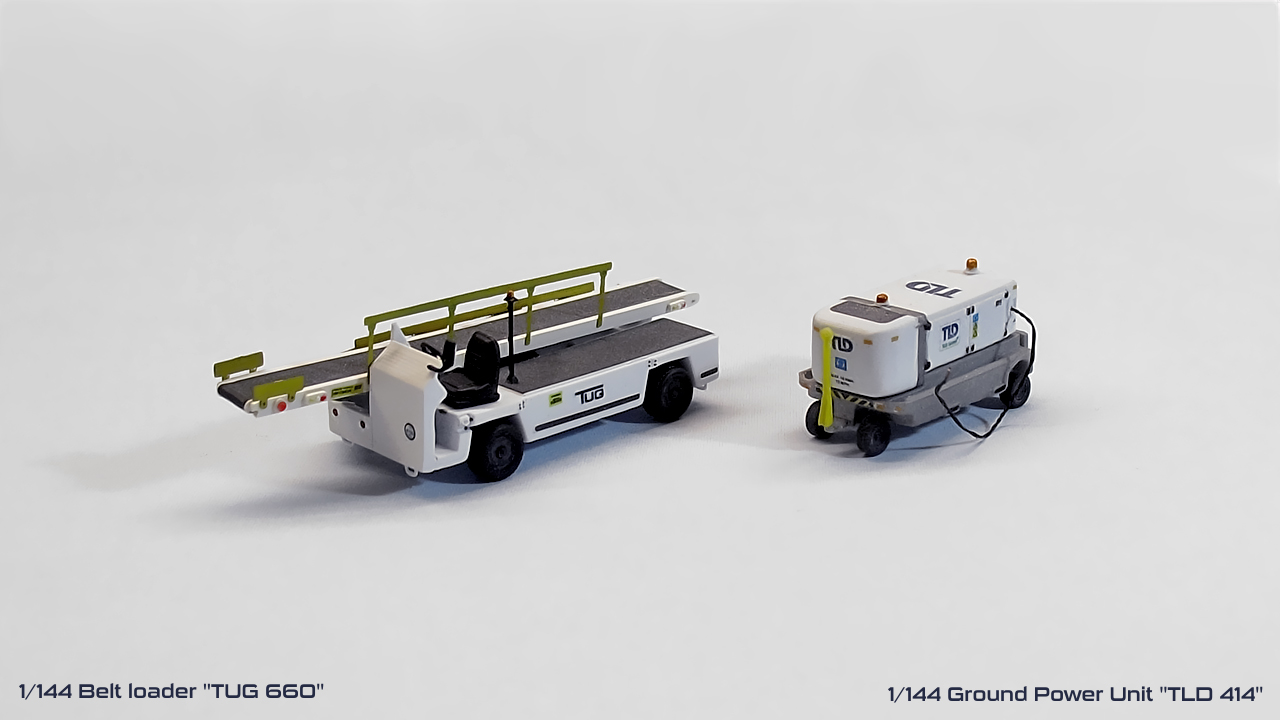
- GSE models, the TUG 660 belt loader is completed.
It is very important for me to test every single model that I set available, the last thing I want is for the customer to find problems while building the models, and to be honest I did have quite a lot of fun building that small little thing!
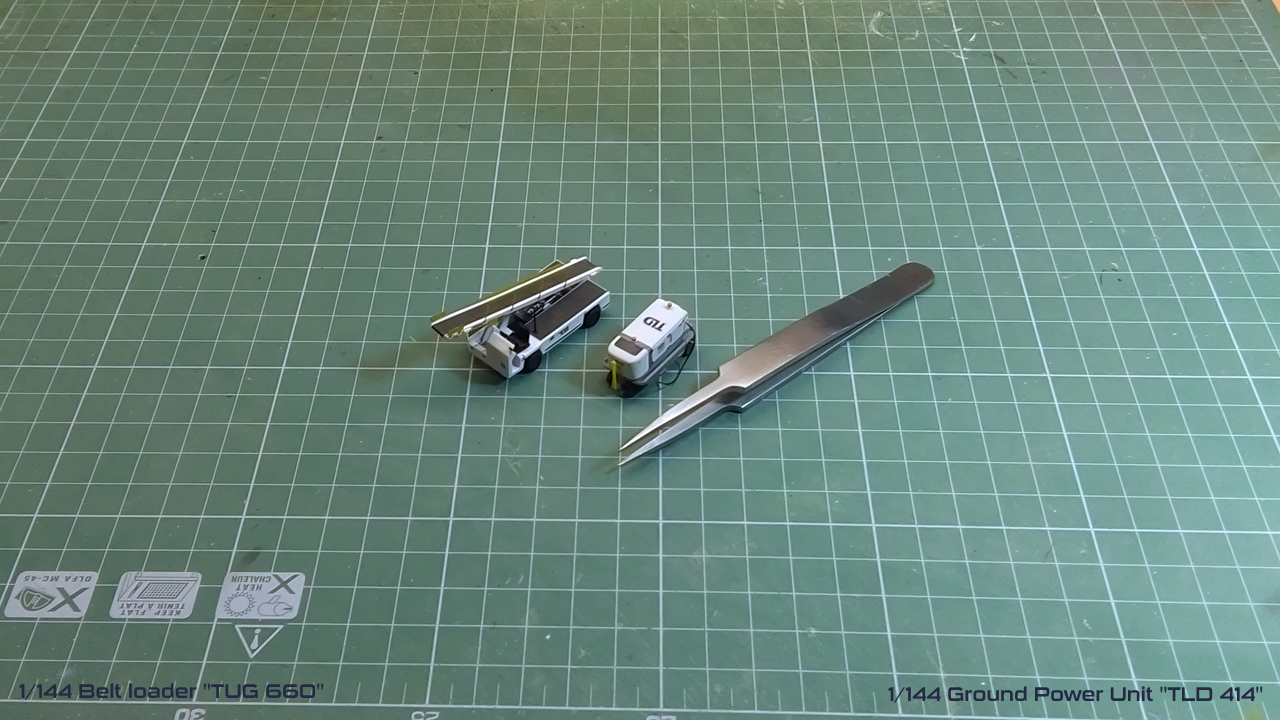
Do not forget, you may see here it all big and in detail, but the model it is actually about 4cm long, I tried to give this view on the last photo.
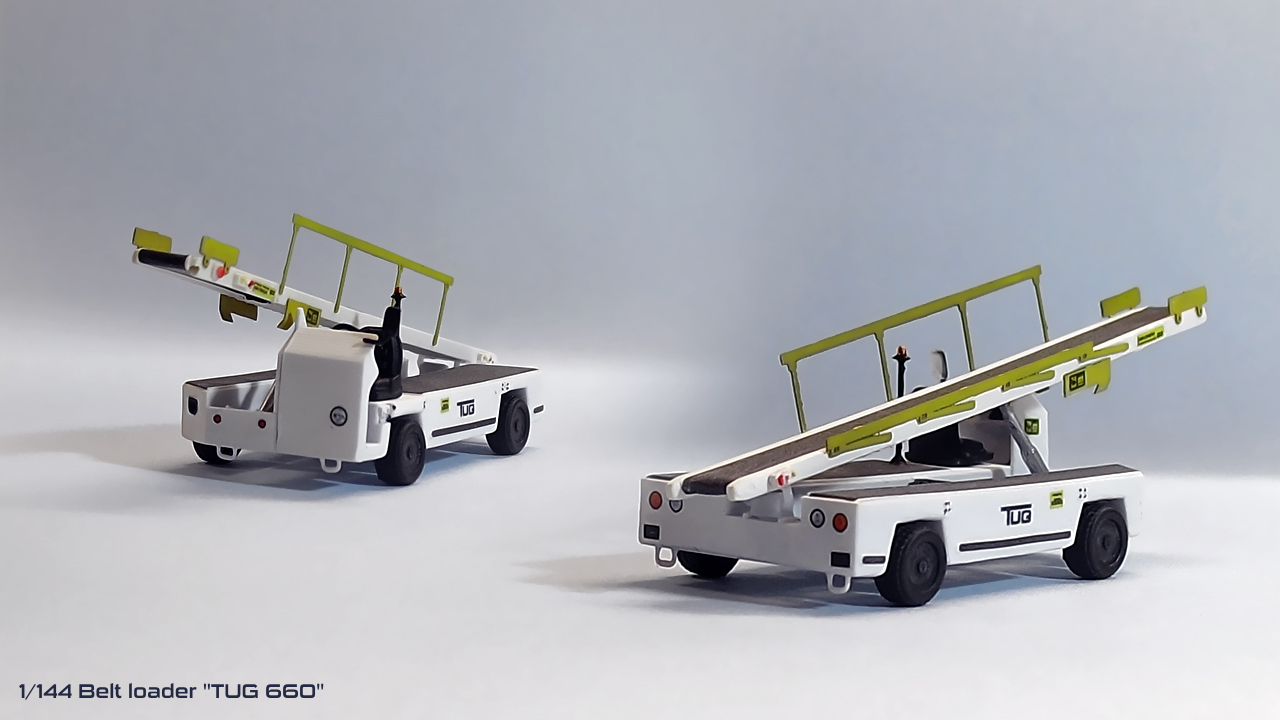
One of the things I find useful on this model is the idea I had on making the anti skid areas as well as the belt are actually a decal. This way there is no need to mask, no need to hold your hand tight to paint those stright marks, so the decals will do its job, save you some time / paint and give better results.
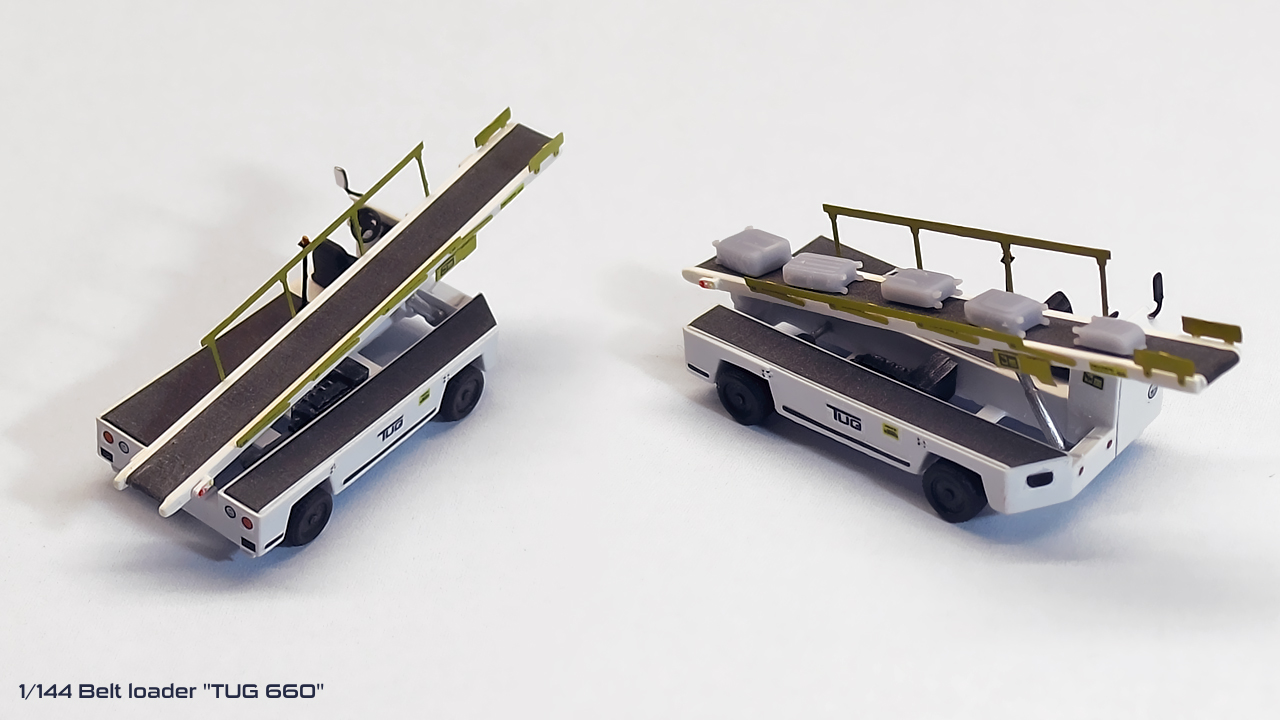
Headlights and tailights are actually photo real, and the PE includes two types of handrails, deployed and undeployed (both versions in the example photos).
Also, not visible in the photos (yet) there will be included a driver figure, baggage seen in the photos will also be included. As usual, the conveyor can be raised or lowered at desired position.
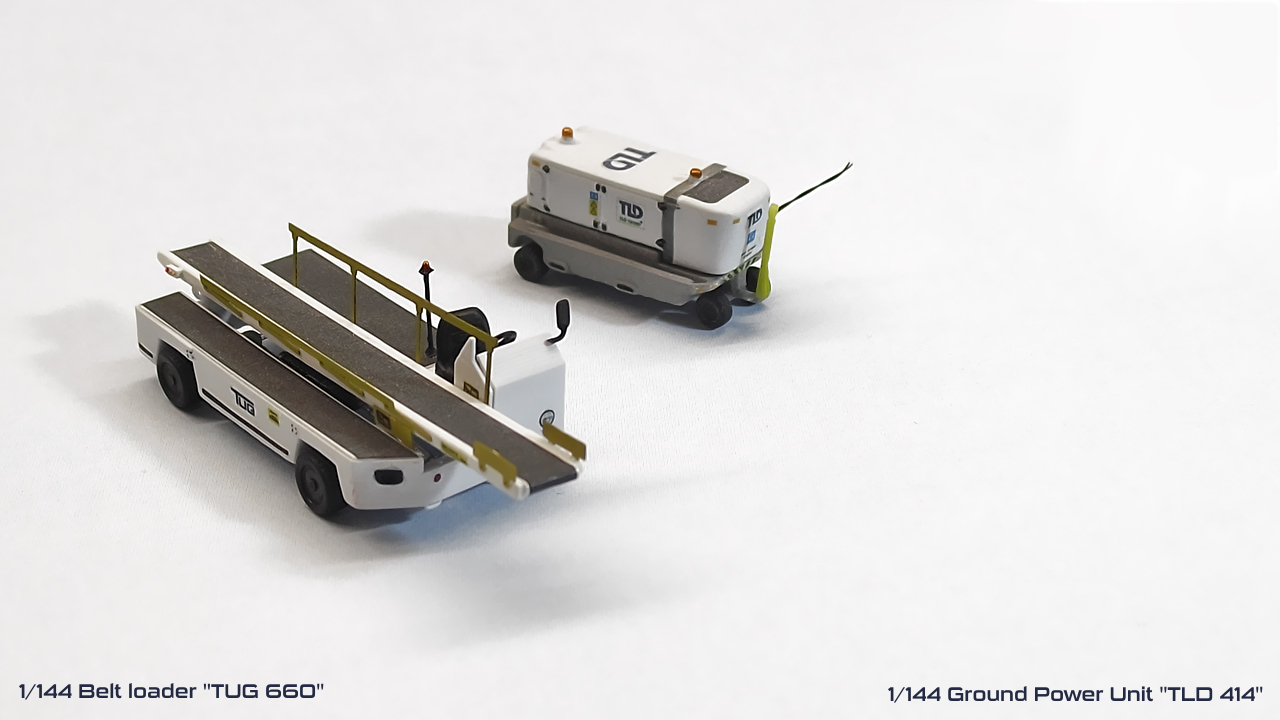
Here are the two finished models I have at the moment, yes still a lot of work to do and yes, not sure I will arrive on time by the end of November, but I am not going to rush to check things, I already started the stock process of some of the models.
I really do not want to disappoint anyone for the time it is taking me to do all of this. I want to present things as best as possible, not for the photos but for the customer to enjoy building such tiny kits, these are not 3-piece models, I actually call them kits because the belt loader has no less than 24 resin parts, 8 photo etched parts and decals.
I am continuing making units, but for sure this weekend I wanted to test/complete another item, so I may give a try to the JST-25 tow truck, which I already assembled before, but need to have it painted/decaled.
Thank you all for your patience, I should really give an update to the frontpage of the store… but haven’t had even time to do that yet. I may close the store for a couple-three days prior setting things back in stock, so if you find that, please bear in mind it is due the addition of the new items.
Wish you all have a nice weekend!
Guillem