


Dear all,
As I am finishing establishing the new equipment (so far everything seems good, fingers crossed) I am able to produce quicker than before, however, there are a few things that need to be changed since the new equipment has a bit more power, thus some adjustments with the settings need to be done.
Here we have summer and working at the top floor is always… an adventure. I did manage to keep the room cooler so work continues as always.
With this entry I wanted to explain the comeback of the 747 cargo project that was started a long time ago.
I have been cutting Revell’s and Zvezda’s fuselage as I will start working on the cargo holds soon. As you can see, this time I decided to go with another strategy, very similar to a model ship’s hull:
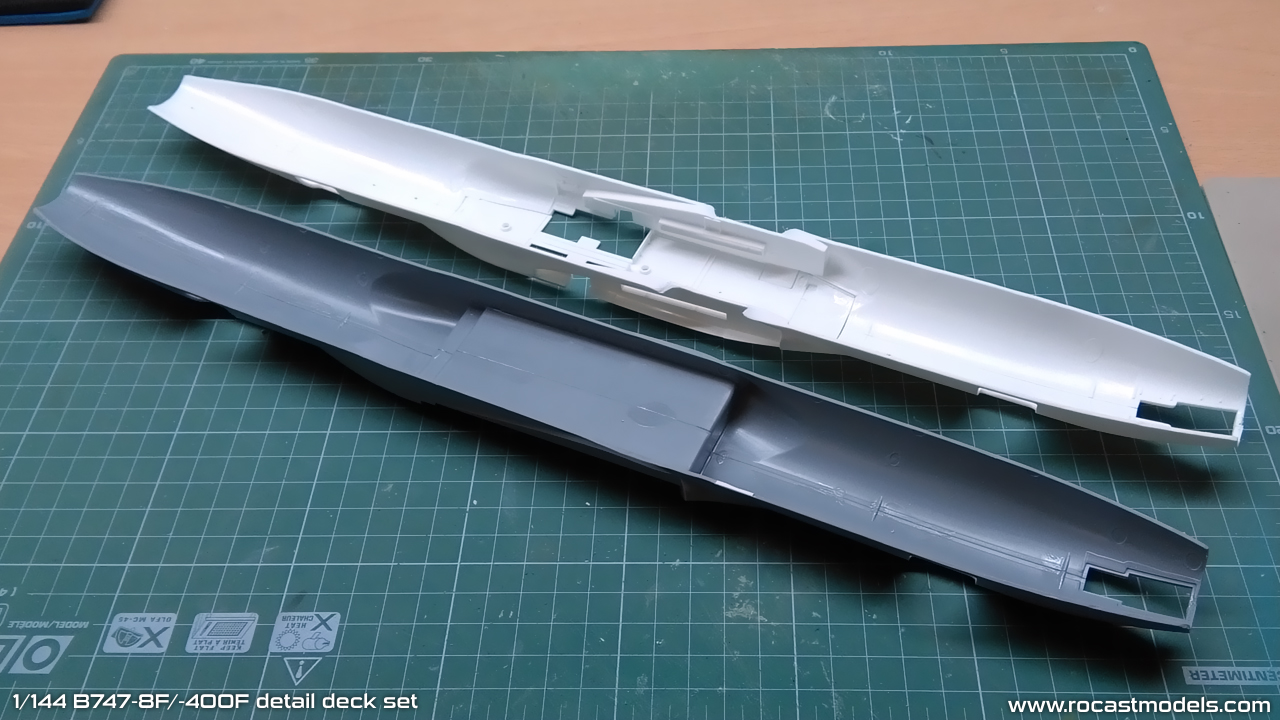
By cutting the fuselage this way, I have full access to the cargo bay, this way it will be much easier for me to work with it and add as much detail as I can, this will also be very useful in the building process since access for painting will be possible.
The main deck will sit on top of two guides I will place on each side of the fuselage (or on top of the side walls), so once the cargo holds are painted, the main deck can be painted/decaled outside and placed on top.
The finished product will include both halves, top and bottom fuselage, however, I will also put available the underside of the fuselage, for those who want to have only the cargo holds on a passenger or a “closed” freighter.
I will not compare the two kits since each has its own pros and cons, but what I will say is that for me, one will be a bit “easier” to work with while the other will require some putty under the belly, but that is not a big deal, as I said, both have pros and cons, some lacks a bit of detail on the tail section while the other has more lines engraved, plastics are different, one sands better than the other.
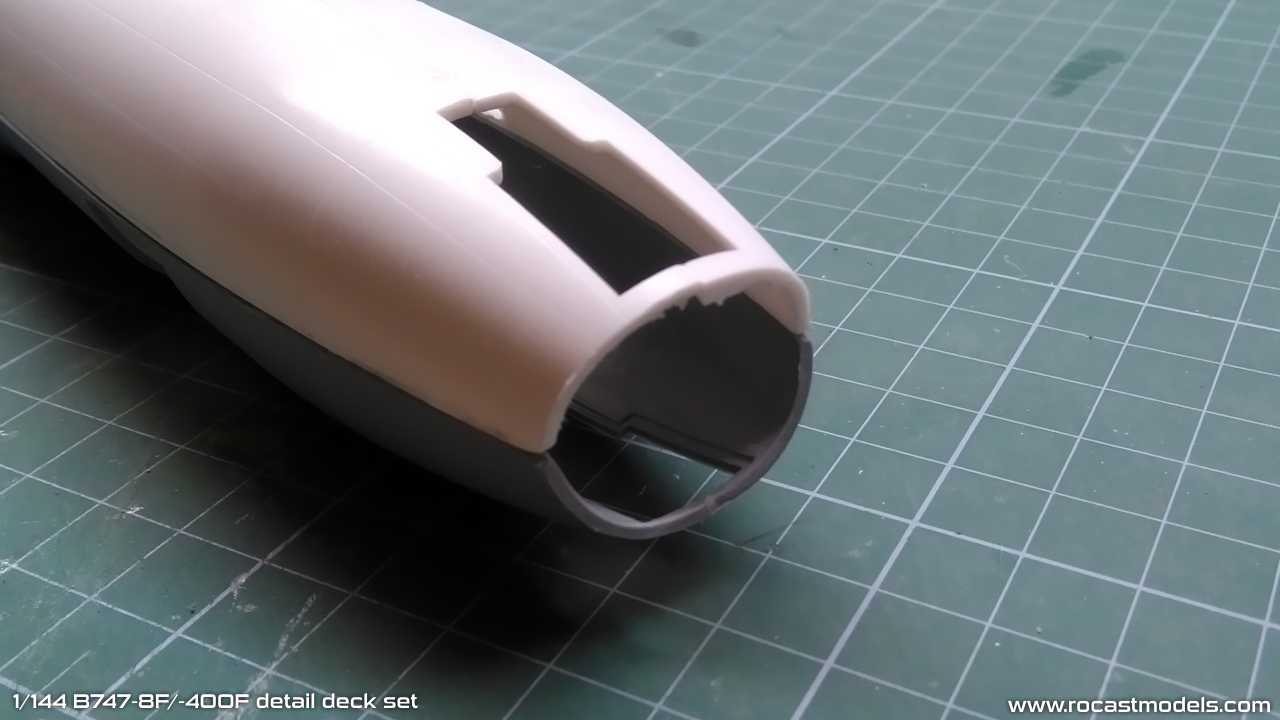
In the end this will be a resin kit, the center union will already be sanded down, so the only union that will require putty/sand will be the horizontal one. At first, I won’t be including the tail and tail cones, since the bulkhead will be attached to the end of the fuselage and will rest inside the tail cone.
I wanted to cut the fuselage as further as possible towards the tail, because I would also like to make the BCF or BDSF freighters and those have the original passenger doors and I did not want to miss fuselage section for the 5L door.
Both are fantastic kits, and the cargo set will be done for both equally and at the same time. The reason for making the Zvezda version as well is to convert the -8i model into the -8F model, for several reasons, availability of the model kit, modeler’s preference (for plastic etc) and prices at which these kits can be found.
The two fuselage shapes are practically identical:
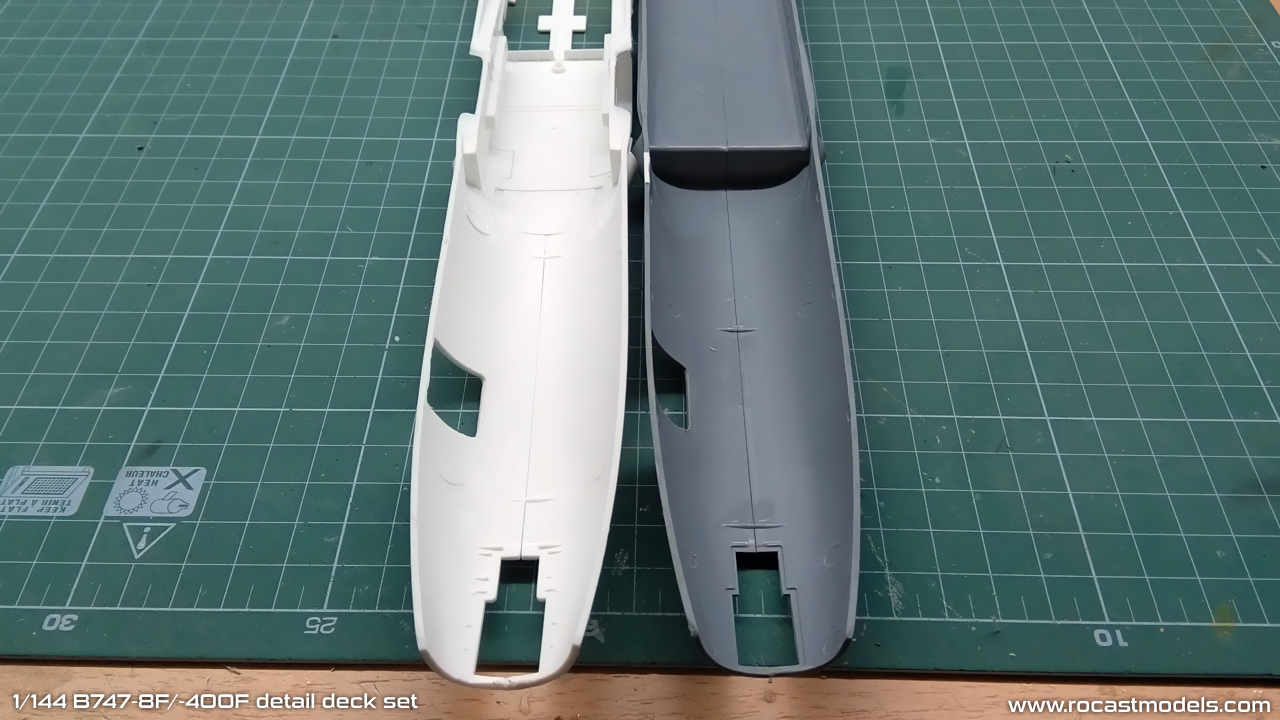
Putting the fuselages on top of each other, they match very well, there are however some differences on the cargo doors, I have to double check this, but it is possible that the positioning of the cargo doors is slightly different from each kit. Speaking of doors, I still have to open the bulk cargo door, area which now will be “easier” to work with.
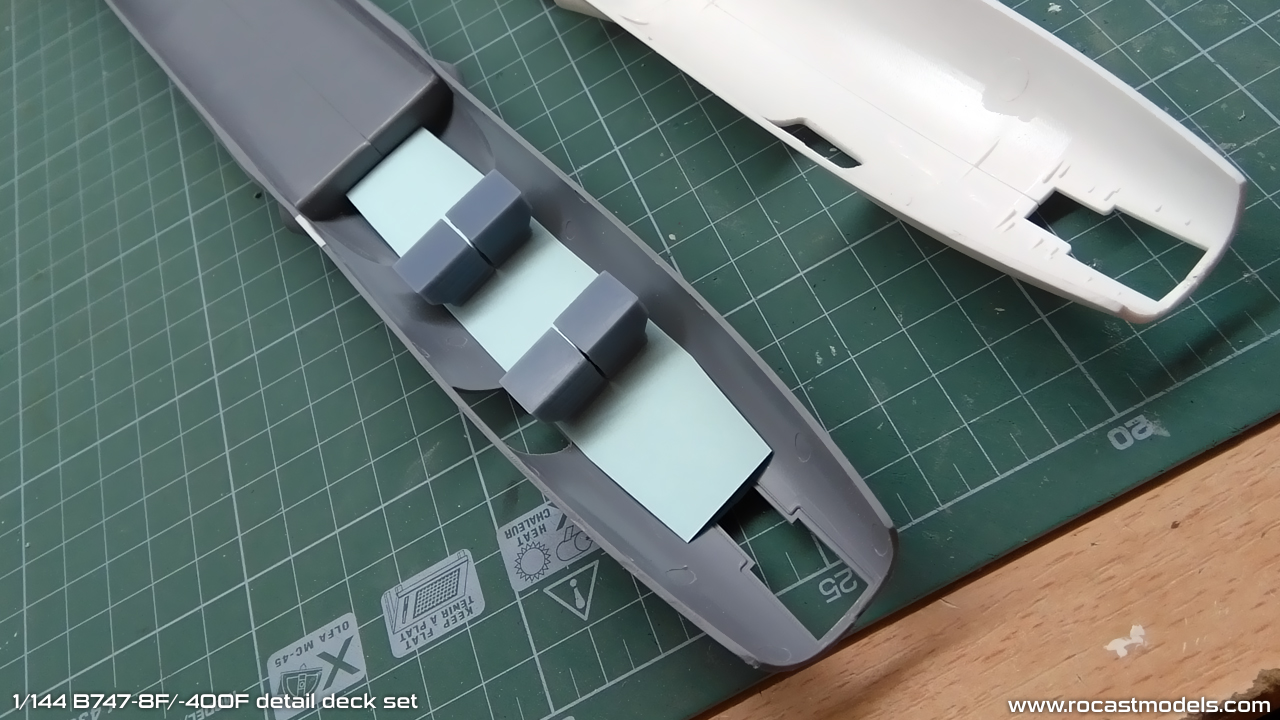
Above image shows a test I did to find the floor level, obviously there is still a lot of work to do, but I am very optimistic with this project and will focus all my energies into it.
The next step will be to scan the model and get the shape of the main deck, once the main deck profile is drawn, I will work with it in 3D and by the time the cargo holds are ready, I will be able to progress with work upwards and onto the other half of the fuselage.
Hope to progress a bit more soon!
Best wishes,
Guillem