


Dear all,
I hope everybody is doing alright.
Around here, I am being very busy finishing the new products that I plan to release before Christmas, these will be the latest of 2020 and I am already having the mind set for future projects to come in 2021.
It is a bit pressuring time for me to get things on time, for sure I hoped to have the stock of the new stuff ready around this time, and although things are finished, it is taking me some time to wrap everything up, that is; finish the promo product, design the instructions and prepare the product page. This means that the next two weeks are going to be very dense.
This comes at a time when I have to prepare stock units for some items currently out of stock, so although I will be restocking (in a small quantity yet) the stairs truck, worker figures and baggage carts on Friday, during the next weeks I will be preparing units of the rest of the models in order to have everything available by the time of the 787 galleys and 1/144 cargo loader’s launching.
Please note that this as well as the center galley will fit on both Revell and Zvezda 787 (no matter which variant).
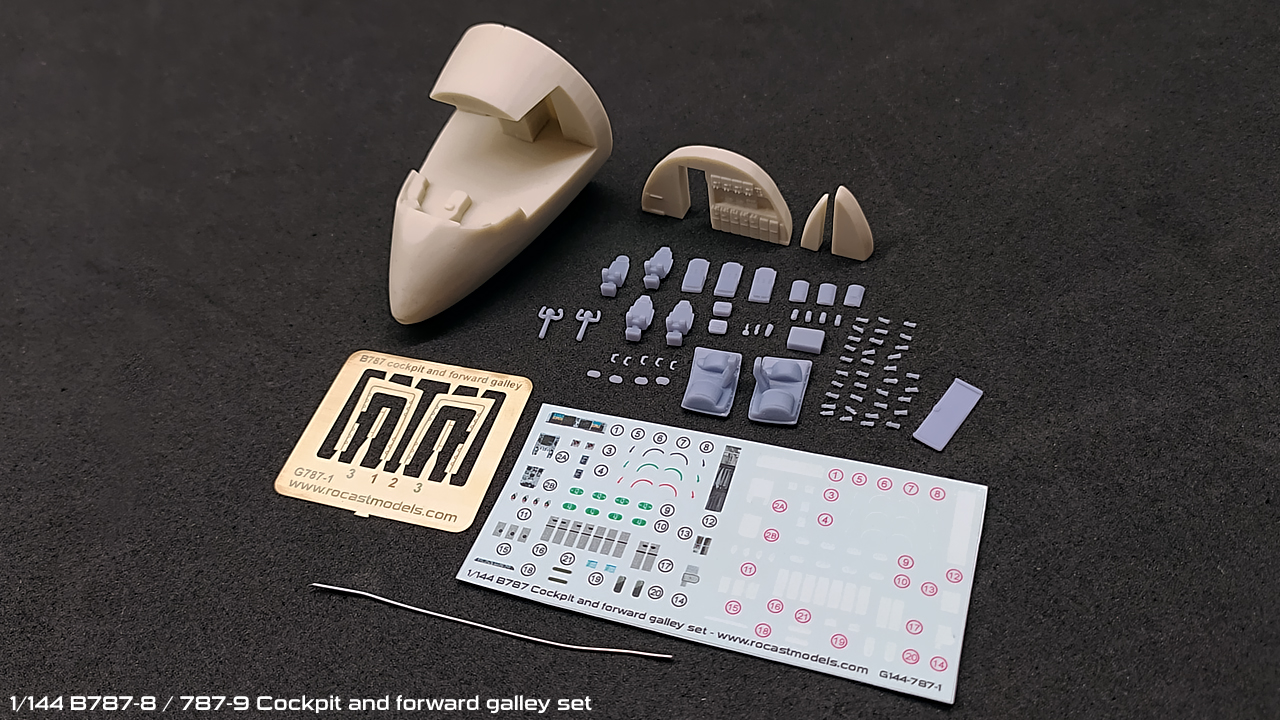
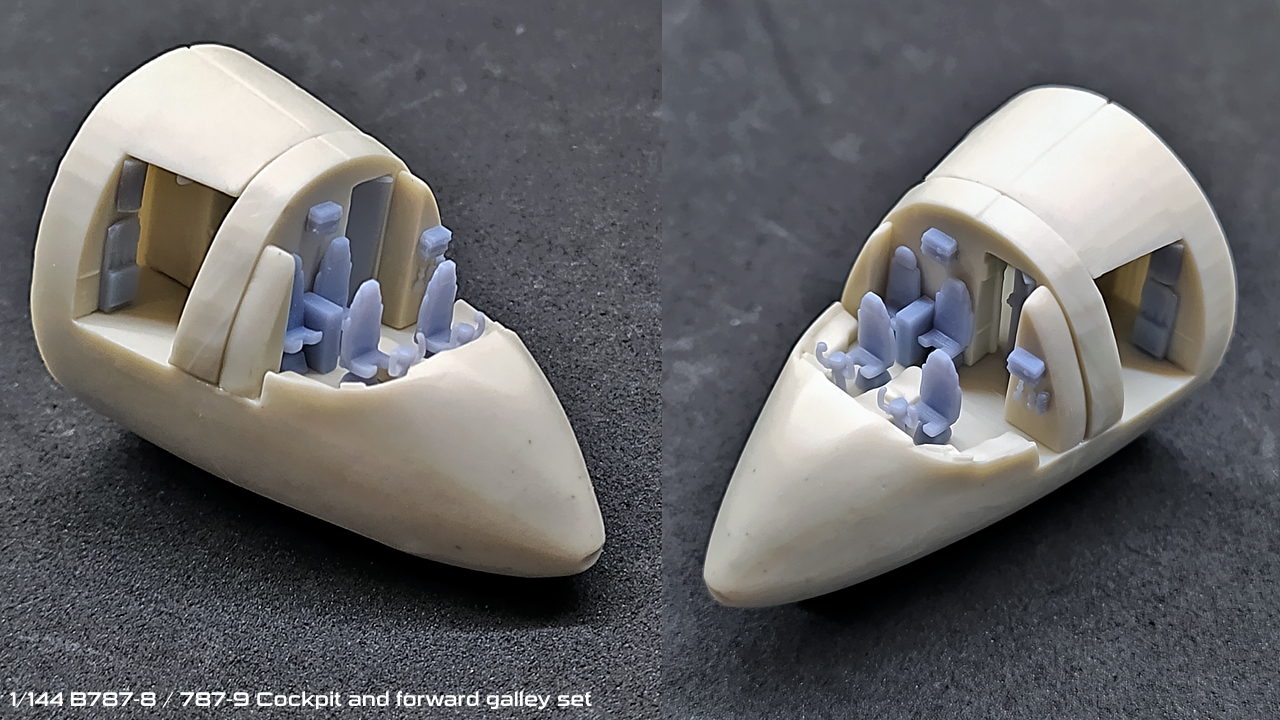
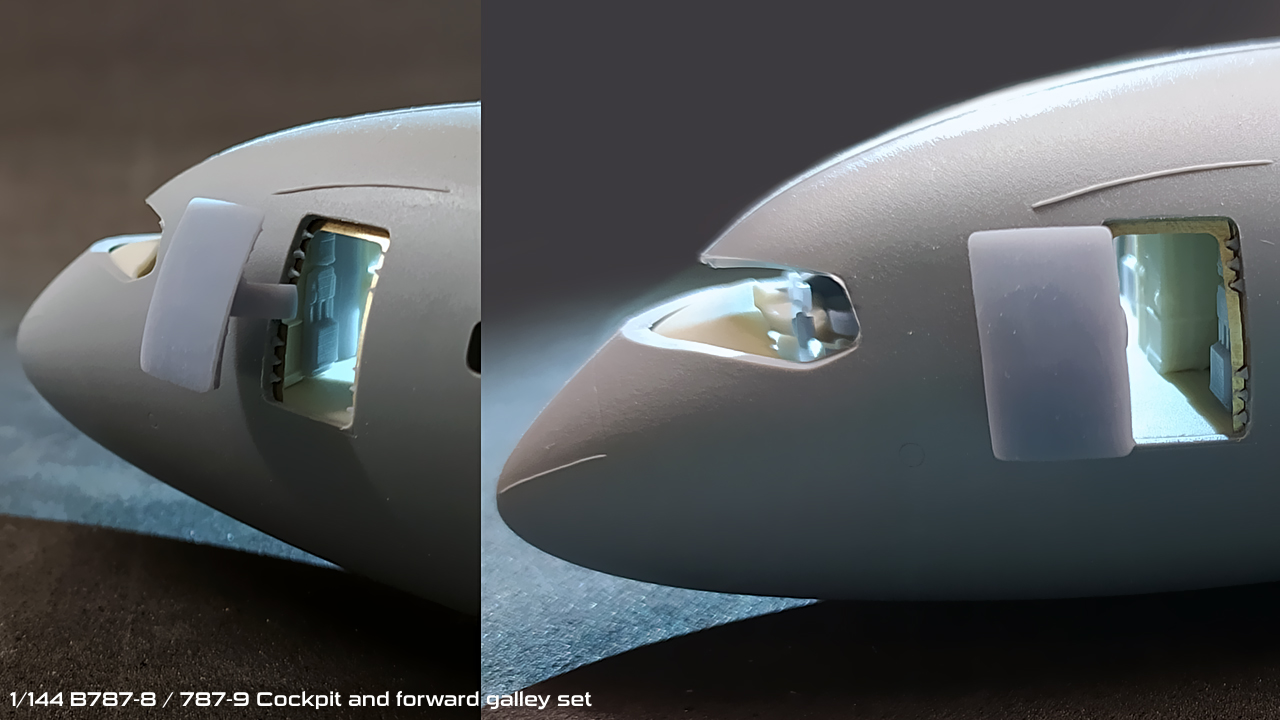
The set is composed of different parts; cockpit seats, flight crew seats, door latches, doors, cockpit and galley details, PE and decals.
I have learned a big lesson on making interior parts for fuselages, so this will hopefully allow me to continue with the 747 cargo model and to make cargo holds in the near future.
Why did I decide to make the entire nose? The reason is simple; positioning. I have had a hard time with this, the first prototype had only the nose cone and a flat floor, but its positioning was harder because of the entire set rotating too easily, so I had to figure out how to make sure that the floor level was actually level at both doors since the galley was to be added to one side of the fuselage first, so by having the whole shape of the interior, there would not be marging for error and thus one and only one position was fixable.
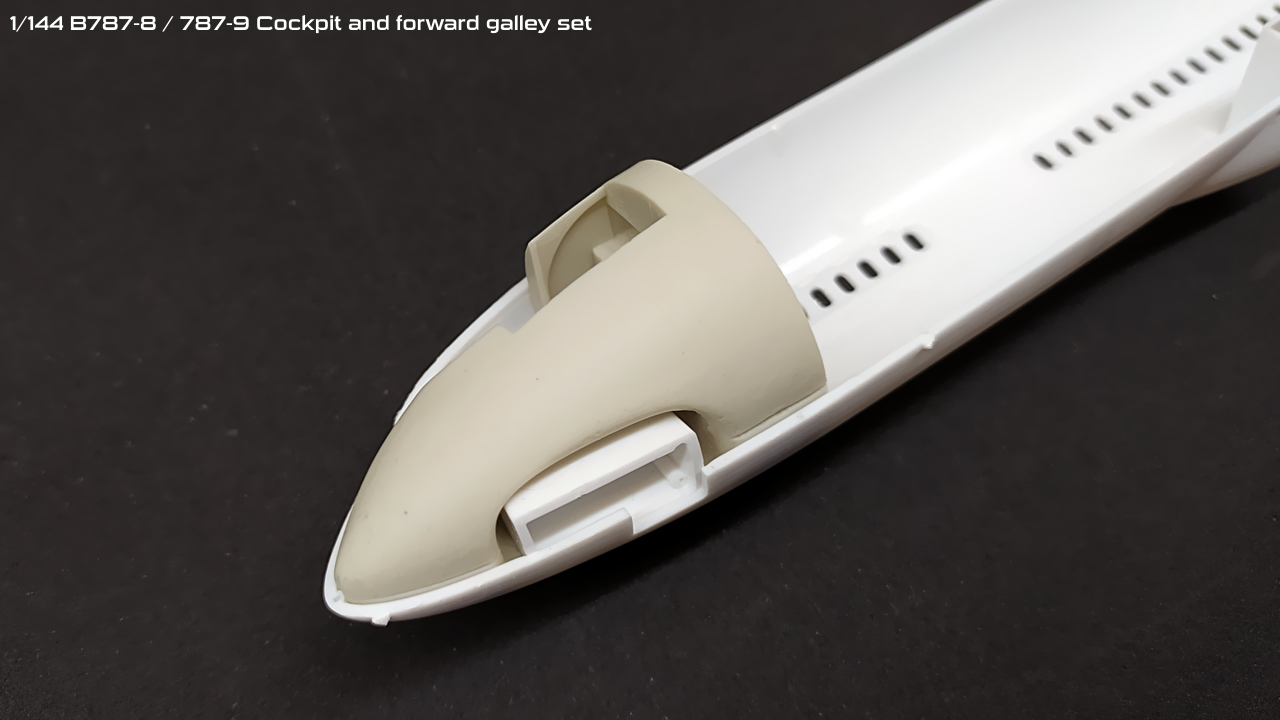
Besides the center marks that will help the positioning, there is also an empty area so that the nose gearbay does not interfere with the galley/cockpit.
In this case, the nosegear bay is glued first, then the galley and cockpit resin part is placed by simply rotating it so that the nosegear bay fits inside the hole.
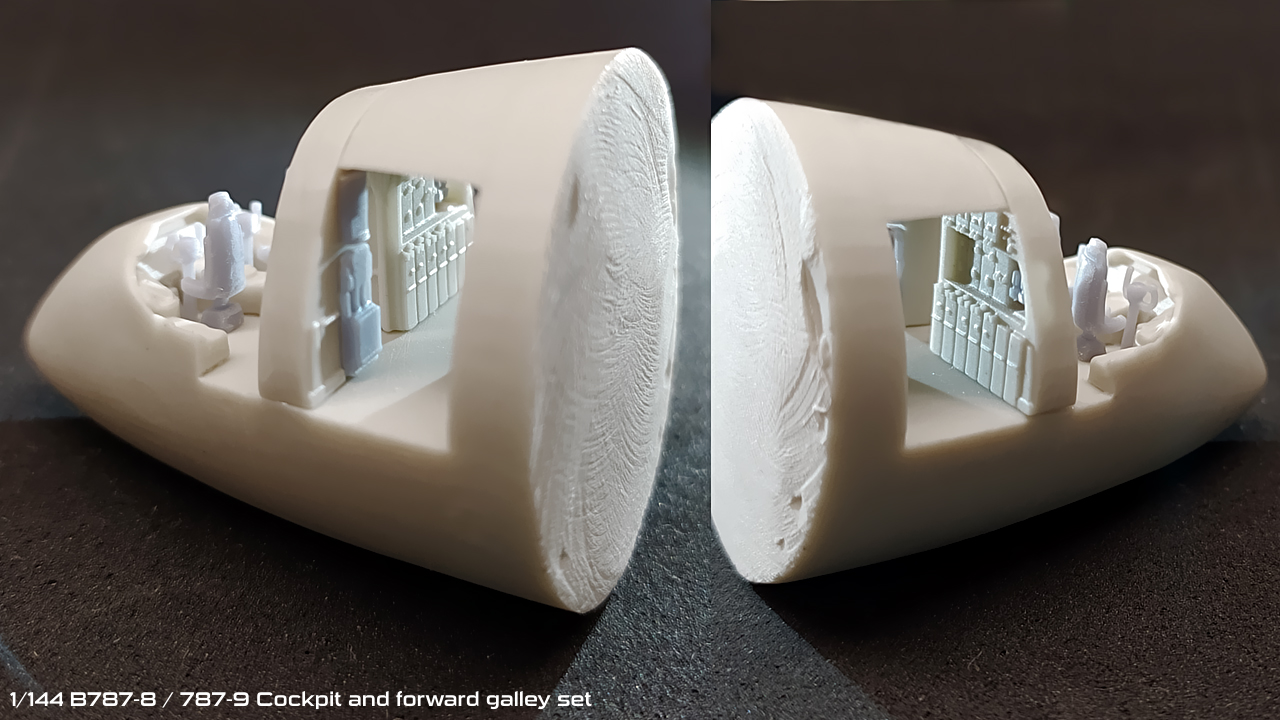
The whole structure consists of the cockpit which at the same time is the galley floor and the rear wall of the forward galley, then the front forward galley which also serves as the cockpit wall.
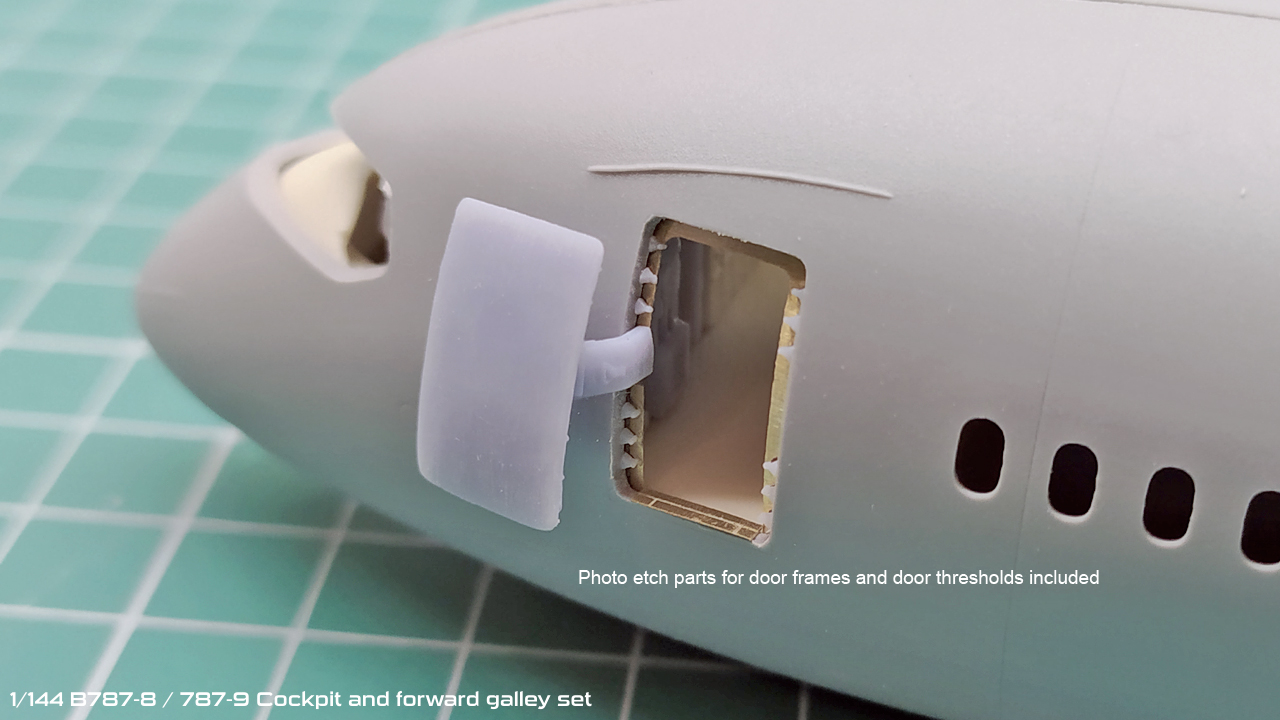
The photo above shows the PE door threshold which (besides being in the real airplane) it helps to hide the plastic fuselage / resin galley union, making it feel like being the same structure.
Obviously, without any paint or decal on this set, it looks quite dull and boring, but imagine the galley floor painted, the food carts with their decals on, the decals for the cockpit will also make it more lively.
I am at the moment planing to make a painted one so that I can see the end result, I will be sharing this sometime before the release date.
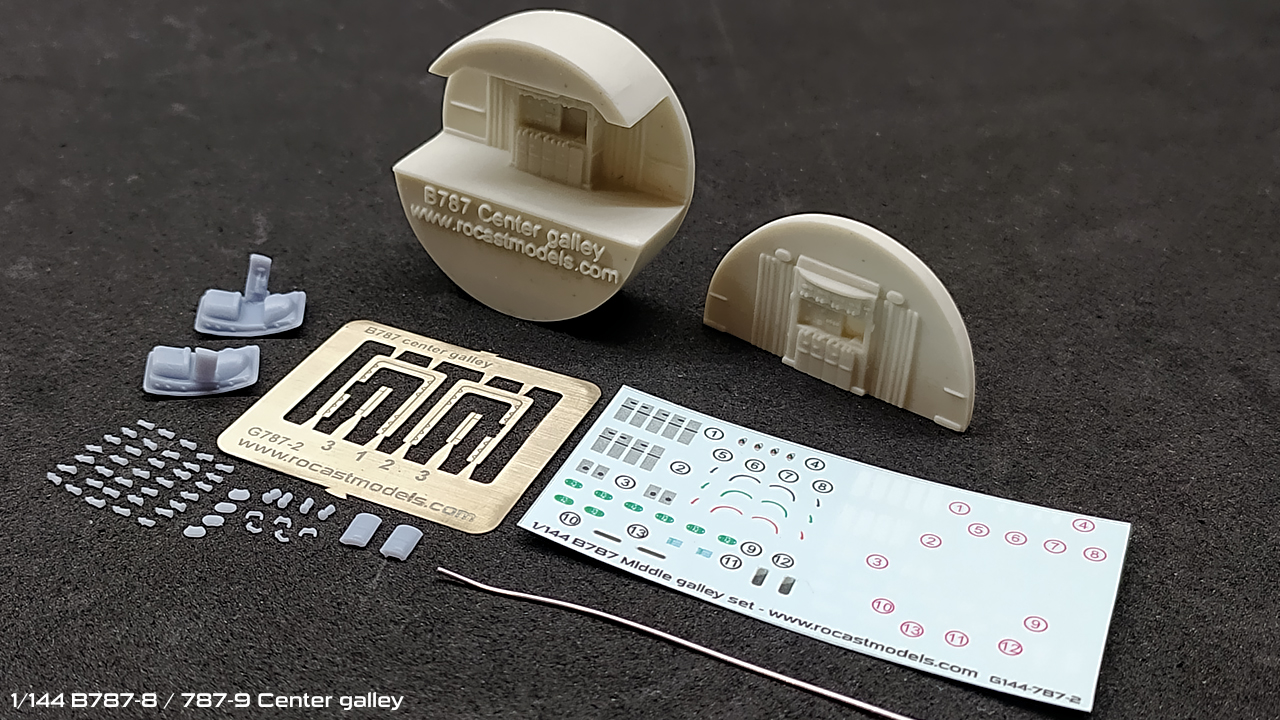
For the center galley, the principle is the same, the round structure goes inside the fusleage to avoid missmatching, again I made the same mistake in the first place by having only half of the “cylinder” it was much harder to position, but having the whole round shape make things simple and effective.
The detail parts included are the same as those for the cockpit / galley but without the cockpit parts, that is; coffee machines, door handles, exit signs, cabinets, doors and latches, as well as PE and decals.
For the cargo loader, I wish I could have had a 100% finished version to share, however, I have been finetuning again, this time adding some kind of “blockers” that will help to keep the platform and bridge at a desired height.
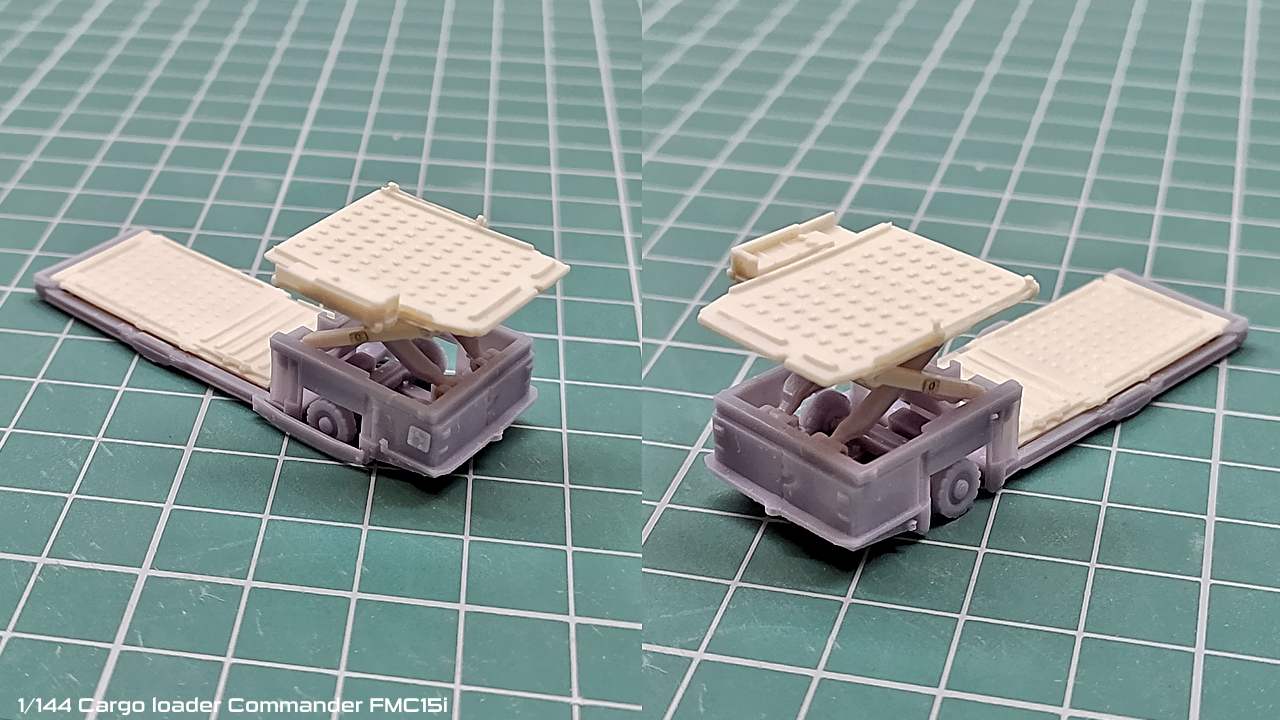
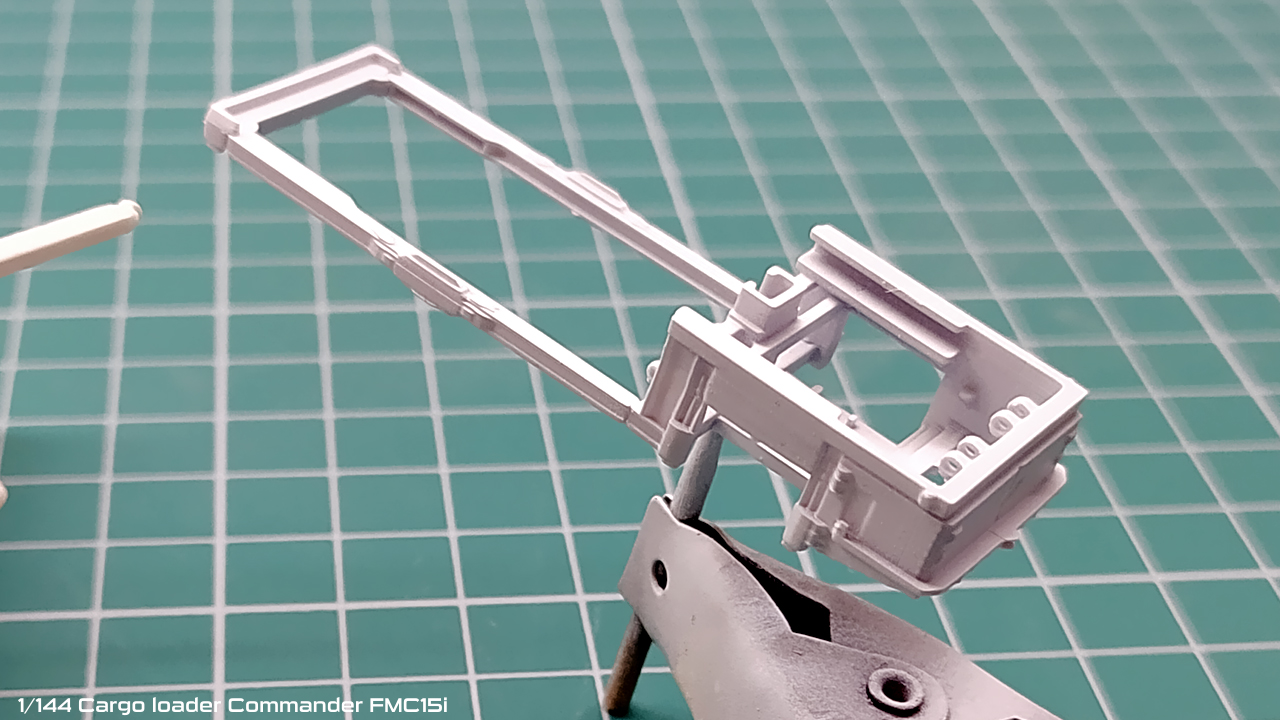
I must say, to make this model I have been using a lot of photo references and dimensions that my friend Mike took for me, that means that I was able to detail the Perkins 4236 D engine or even make the tyre pattern the same way it is on the real loader, also the platform rollers are positioned in different directions as shown in the manual illustrations.
Naturally, being such a small model, there have been things that I had to disregard because it was just way too small to do. This lead me to have to make some kind of “blockers” because in real life, the actuators and the hydraulics are what keeps the platform and bridge up, but here is all mechanical movement.
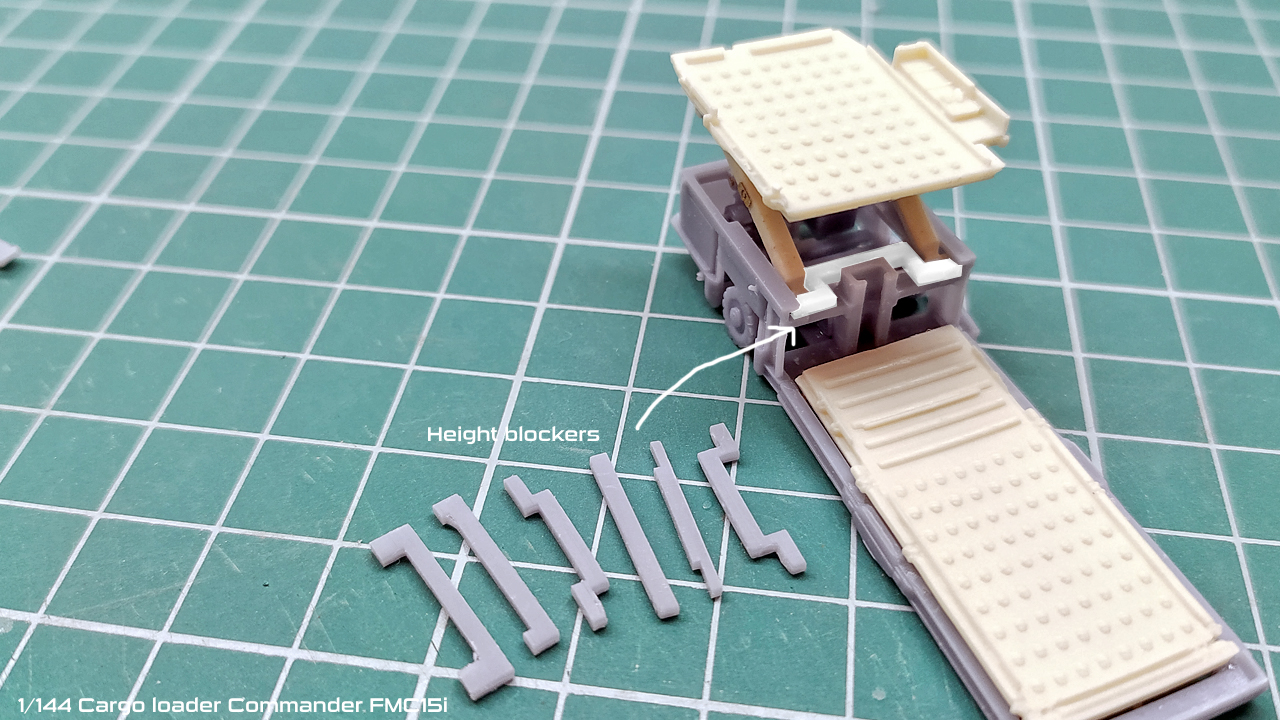
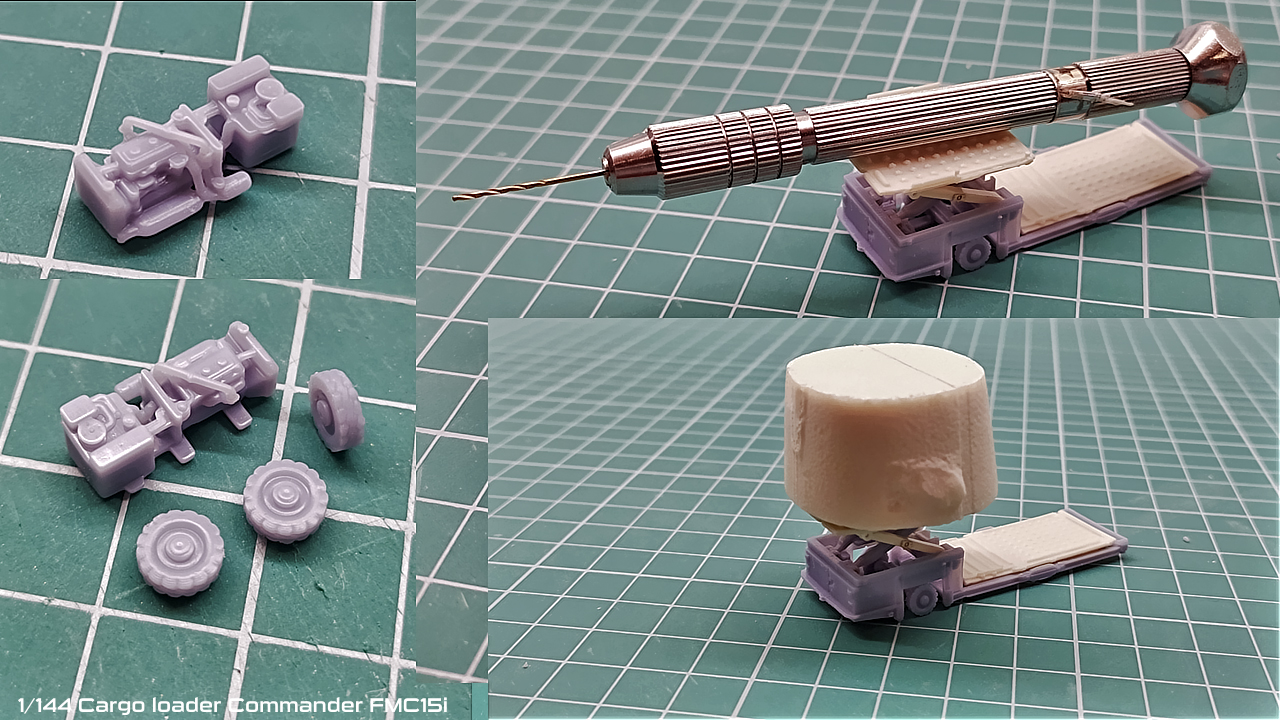
I came up with this solution which will help the customer to set the platform and bridge at different heights, being realistic, 24 mm should be the higher position, yet you can get it a bit higher as well, but not as much as it will be once I make the double sill accessory. Once the blocker is painted the same color as the chassis, it will pass as another part of the structure.
Also, for the firsttime in any GSE kit I released, I will be including all the pins and axles needed in a form of a 0,7 mm solid brass rod, this will be 100% stright which is very important for this particular model.
Here you can see it in action holding up more than enough weight:
Not only was a challenge to design everything so that parts could fit on each other, but also keeping in mind the minimum platform and bridge heights, maximum heights was also a difficult part to do.
The model has many more details that are unappreciable in the 1/144 scale, but it was designed at its fullest, so when an 1/72 scale is released, that detail that was once made will come alive. For instance, the rims have all their nuts, but in 1/144 this detail is not so visible and if it were, it would not be in scale.
So this is how I have the model at the moment, I will have it done sometime this week. The decal set includes several details so it will take me a while to get it done.
But work does not end here, I am going to have a lot to do with the instructions, these will be very detailed, including in scale 1/144 diagrams that will help glue the chassis stright, I will take into consideration the order of assembly and advice when would be a good time to have things painted prior proceding to the next step. As this model is all about joining parts on top, having things preparinted is going to be very helpful, as in the photo above, chassis and body are joined and painted together.
That is all for this weekend, I would like to mention that I keep working on the livery decals, taking my time to test dimensions and positioning so the next couple months are going to be very busy with this as well.
One last thing to mention about the 787 galleys is that I won’t be able to have the rear galley by the launch time of the forward/cockpit and center galley, it is virtually impossible for me at the moment as I am busy finishing those items, but it has been started and will be done at the early 2021.
Take care everyone.
Best wishes,
Guillem