


Hello everyone,
It has been so long that I can’t remember when I wrote my last update, I apologize for this.
I have been focusing on work, trying to get things progressed before I could show anything. It has been and still is somehow a hard time, I feel I am not reaching to anything progressing with everything at once, so I will need to clear things out once I am done with the 787 items. I am also needing to readjust the space, the molds and the 747/787 parts are taking up quite some space.
Today I am presenting Part 1 of 2 from this new update, I am planning to write part 2 tomorrow which will include finished things this time.
In part 2 I will also talk about things related to the store and what are my plans to keep you all more up to date with the current projects.
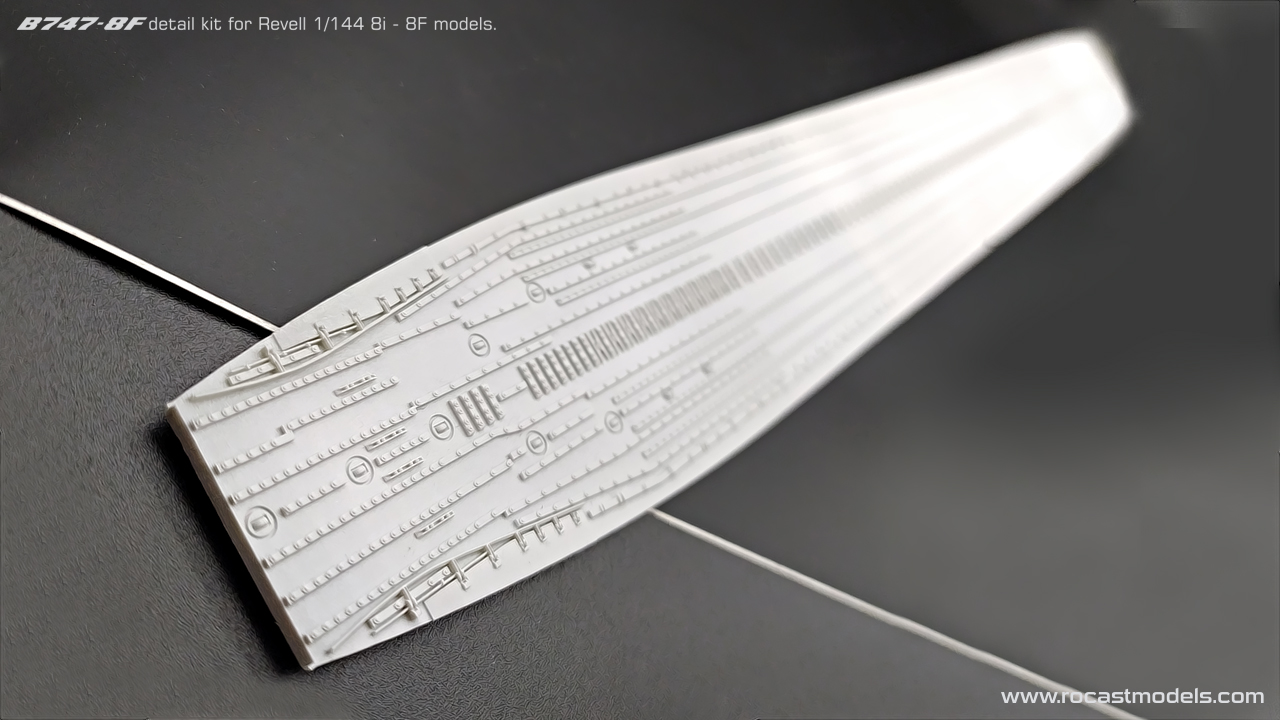
For now, let me start with the B747-8F project. It has taken me a very long time to make all the molds, up to 14 molds.
A lot of issues were found on the way, so I will mention along the photos:
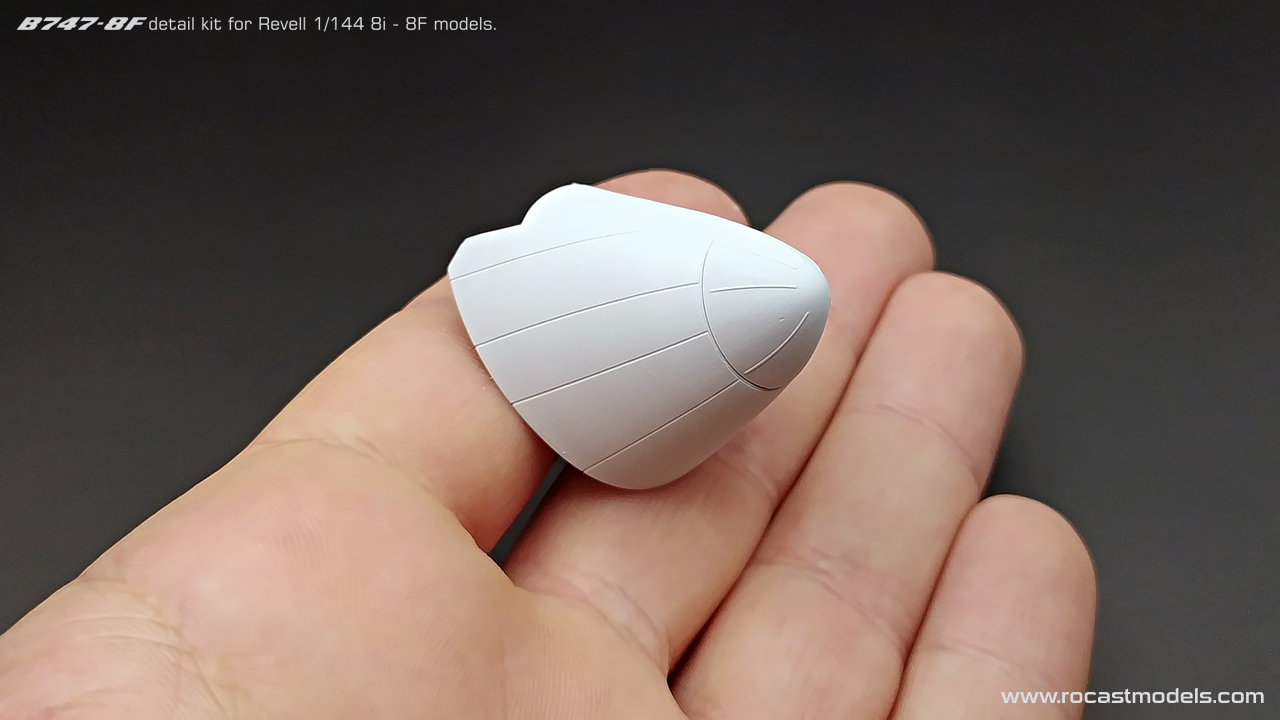
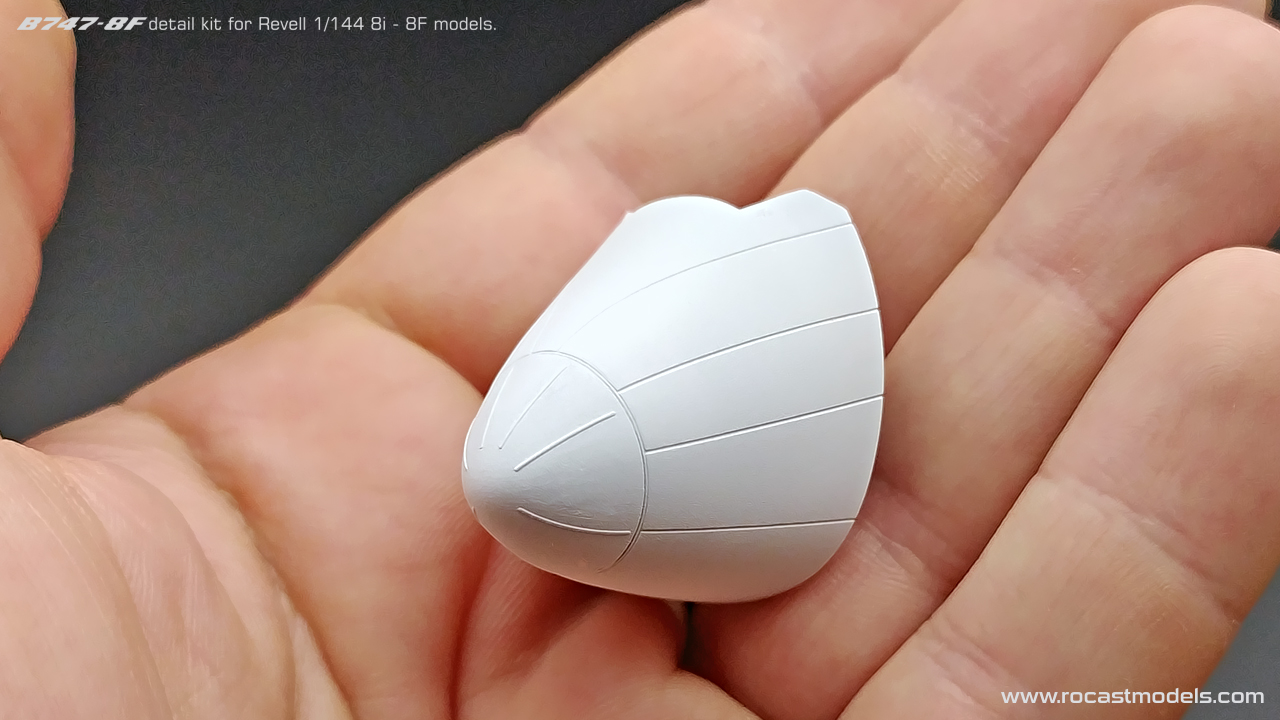
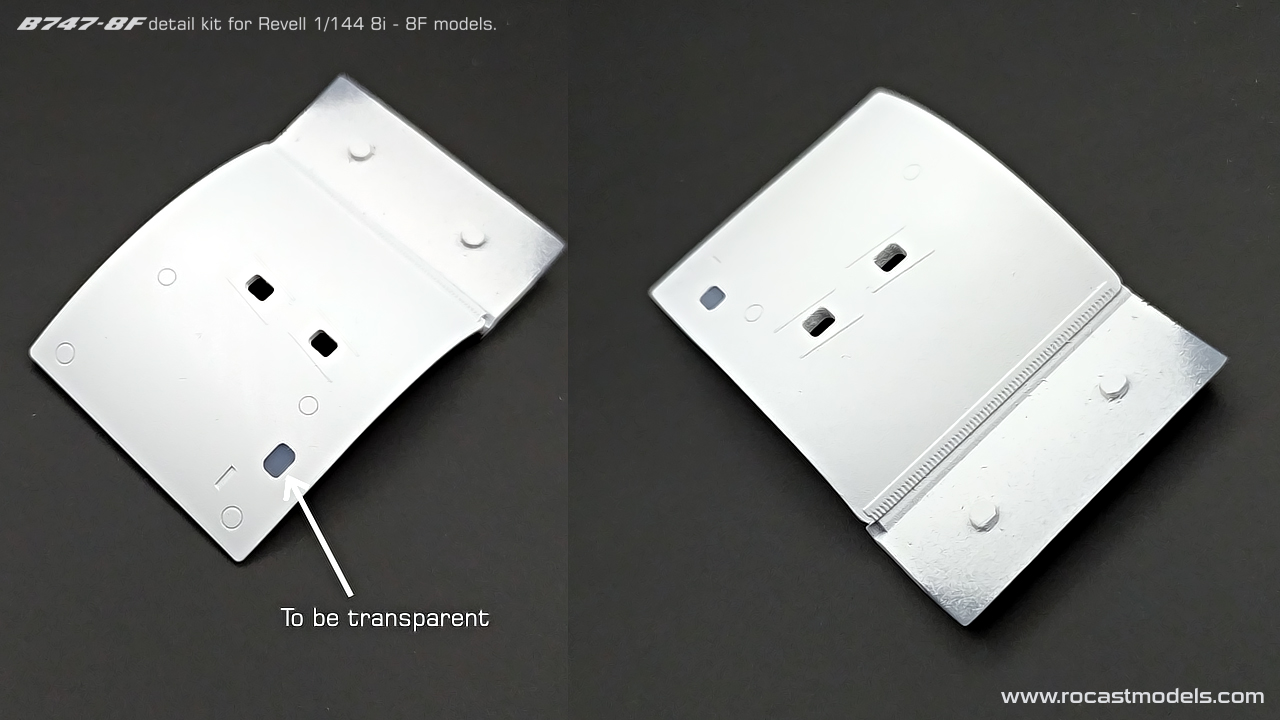
This is the upper deck completed. When making the cockpit clear, I found an issue. The clear resin was absorbing the dye used in the silicone’s hardener, so the part was not fully clear but bluish, the hardener of the silicone is blue in order to see when it is properly mixed with the white silicone. This will be solved by switching to one of the other silicones I use for mold making.
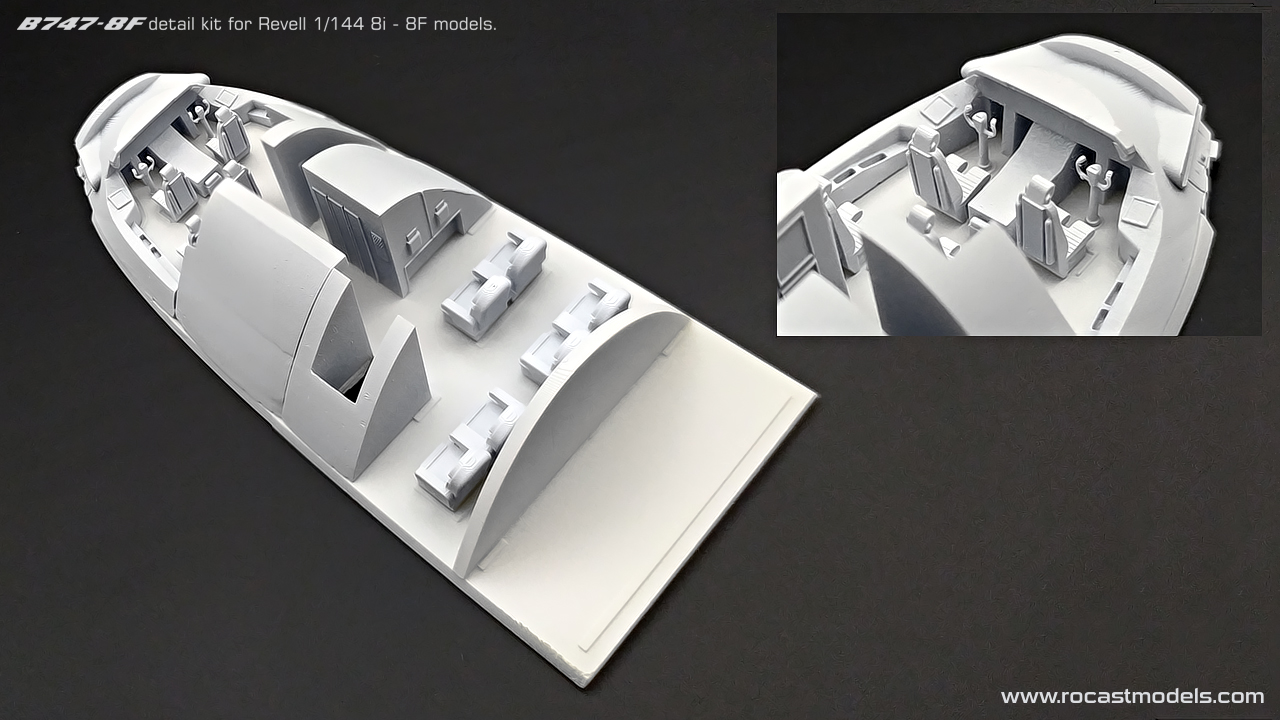
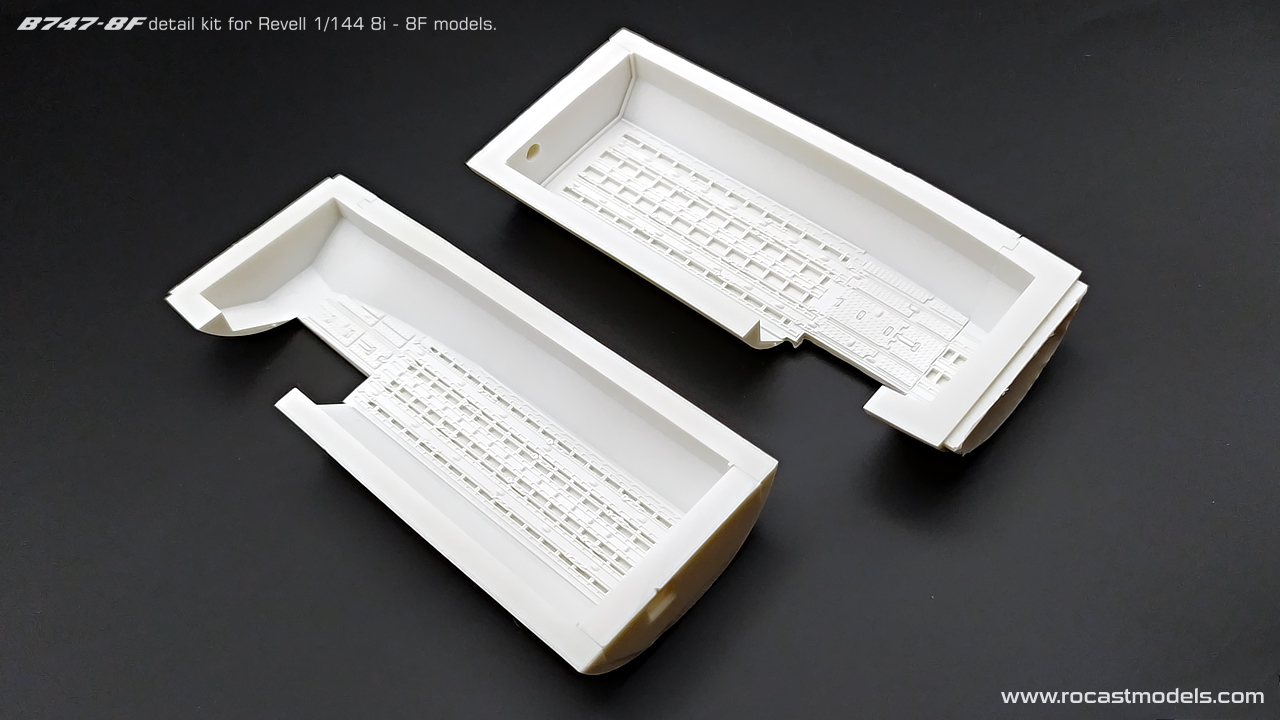
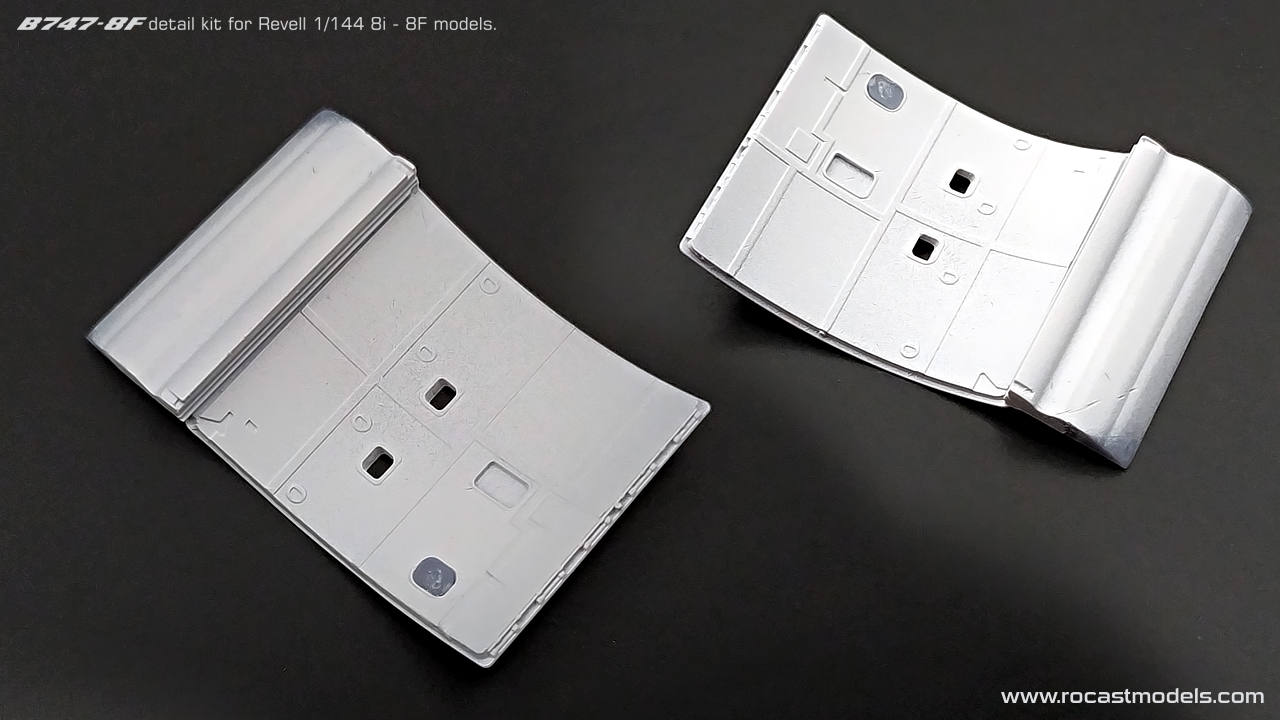
Another big problem that I found was with the cargo hold ceilings. They were too thin and long to be printed properly, so they were hand made with a plastic sheet of the exact same thickness as the design. Ceilings are not seen in photos below because they are just acting as a cover for the holds. These are not 3D printed parts, but actual casted resin/production parts. A complex mold was needed to make these cargo holds.
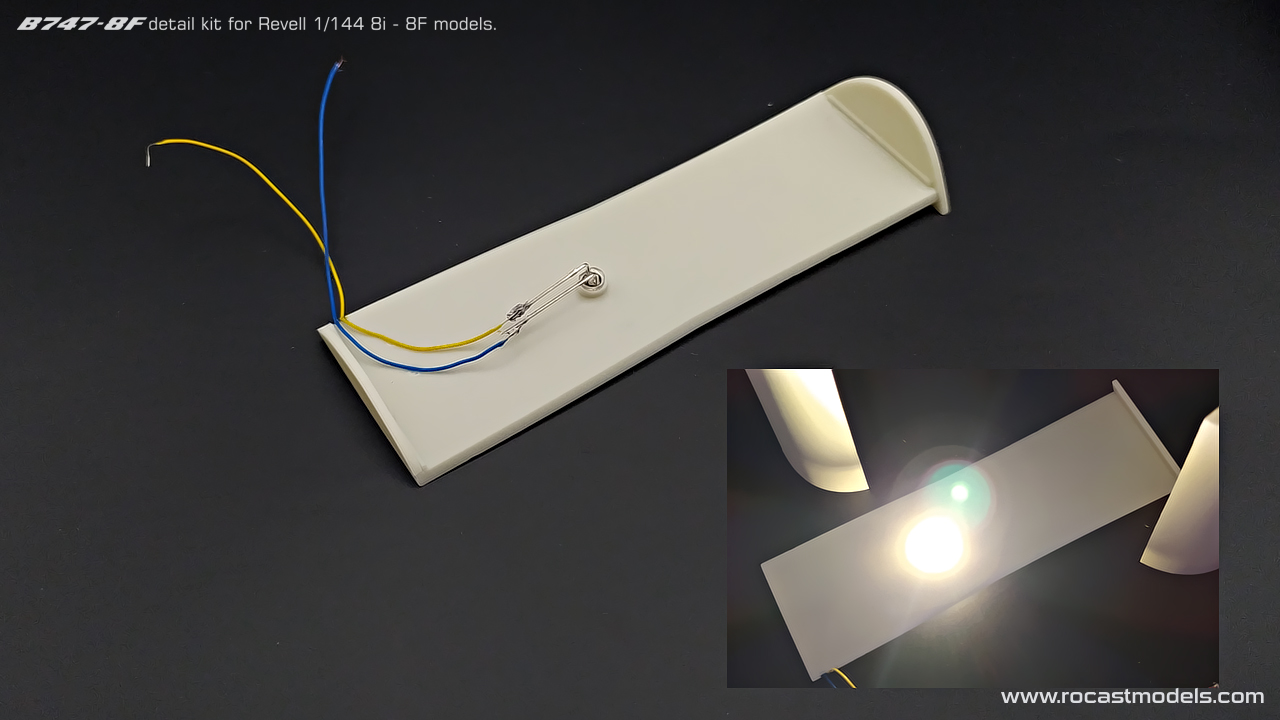
Another area I am testing is the LED lighting. This is the LED that will be used as ambient light for the main cargo compartment. I will be providing warm white and white LEDs to choose from in the lighting setup.
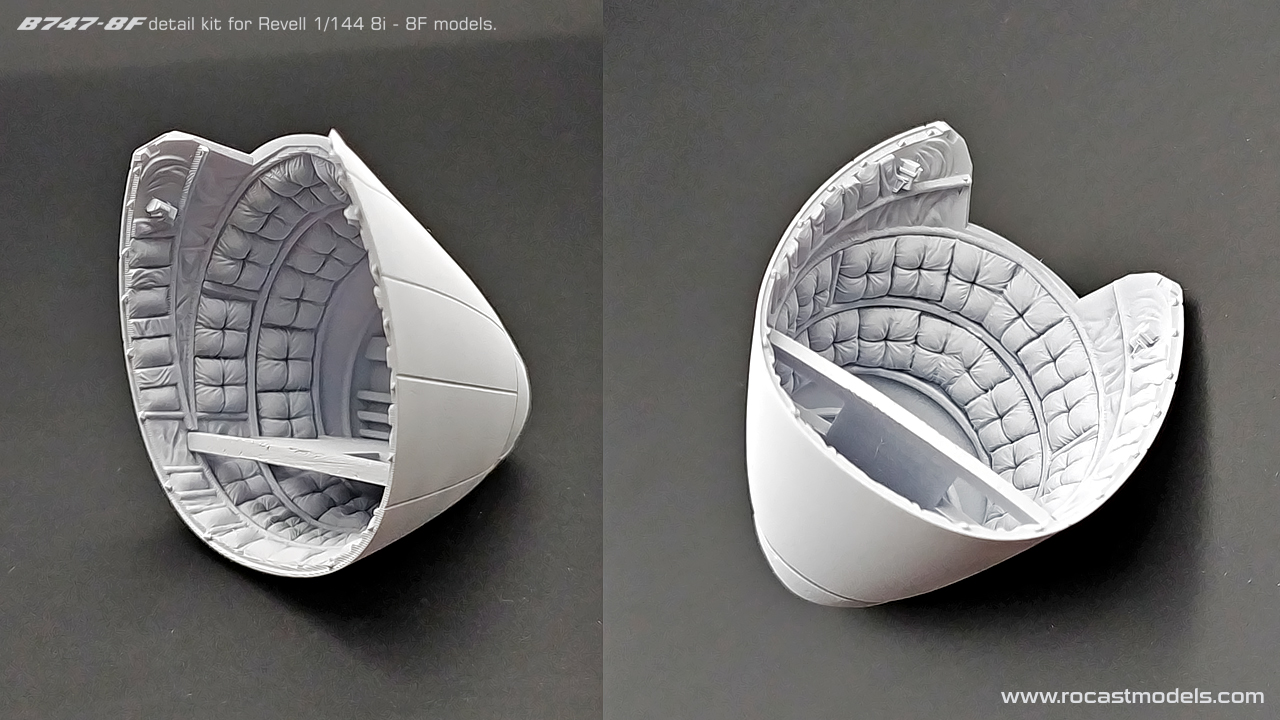
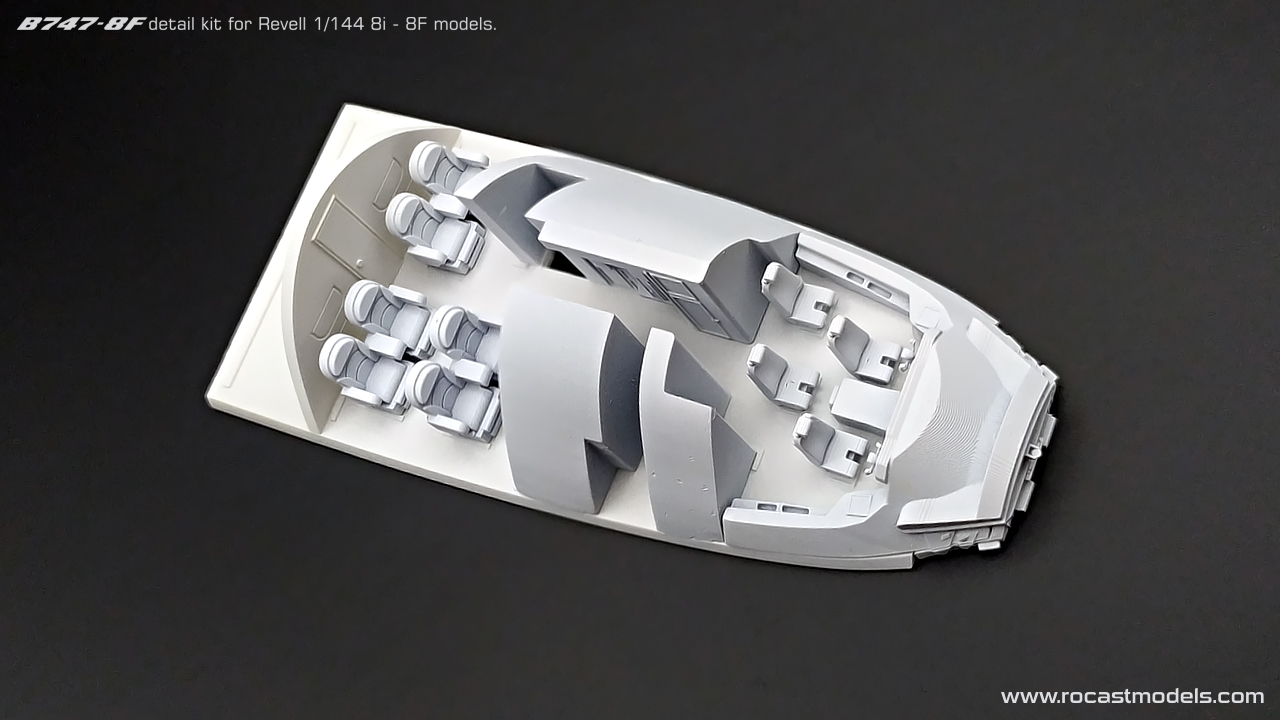
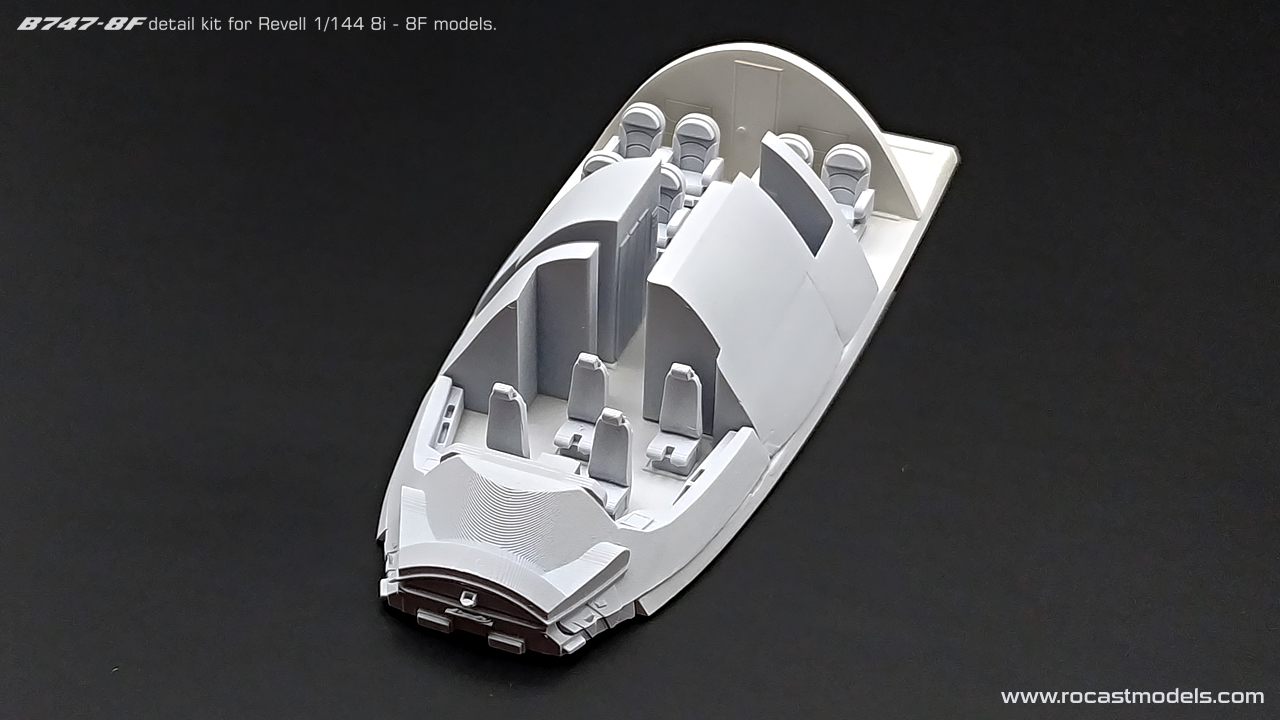
The main deck was finally casted and assembled. These parts are different from those you saw in the previous entries, those were the 3D prints, but these are the resin casted versions. The fitting was tested, it fitted nicely and the deck is fully flat to the base.
The side cargo door also gave me some issues, the way I was printing it resulted in the door warping in a C shape, so I had to re orient the piece until the result was successful. Note that the window at the door (and as well as all the other windows) will be fully clear.
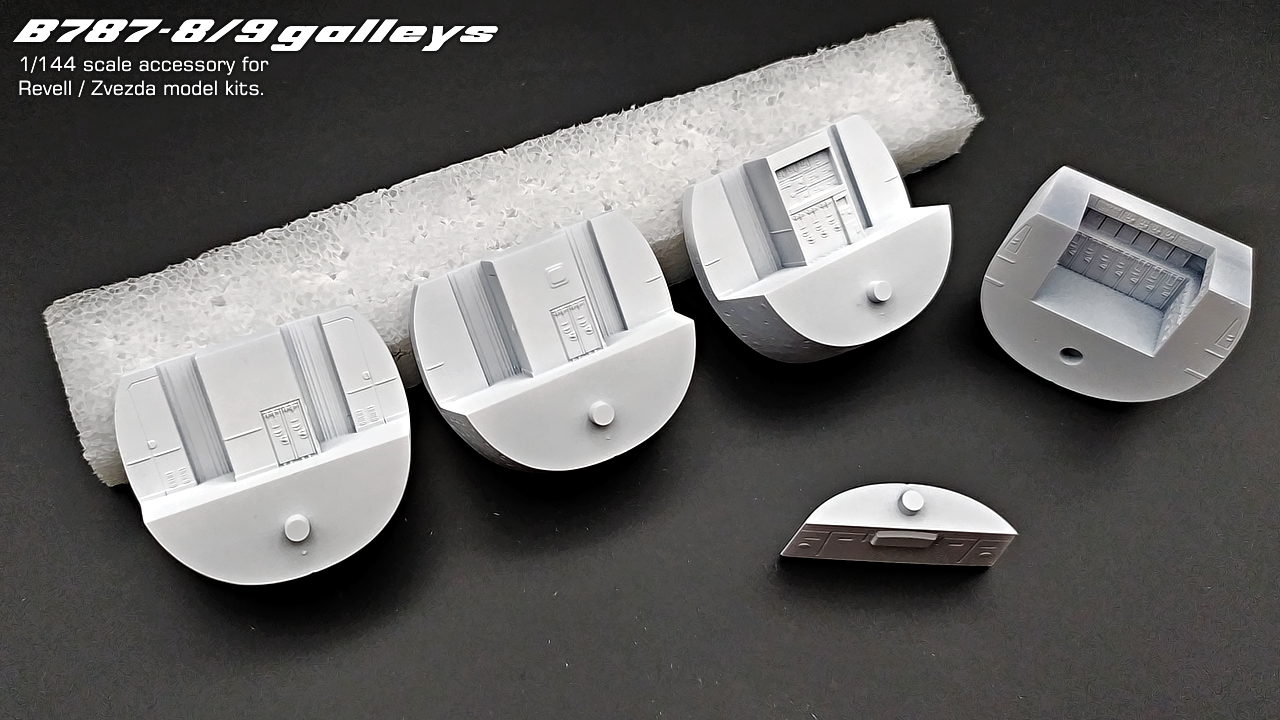
Now onto the 787. I tried to push this project forward as much as possible, because it was a remodel from previous items, I will not enter in details since I mentioned this in the past in previous entries.
Here is the work of the new cargo holds:
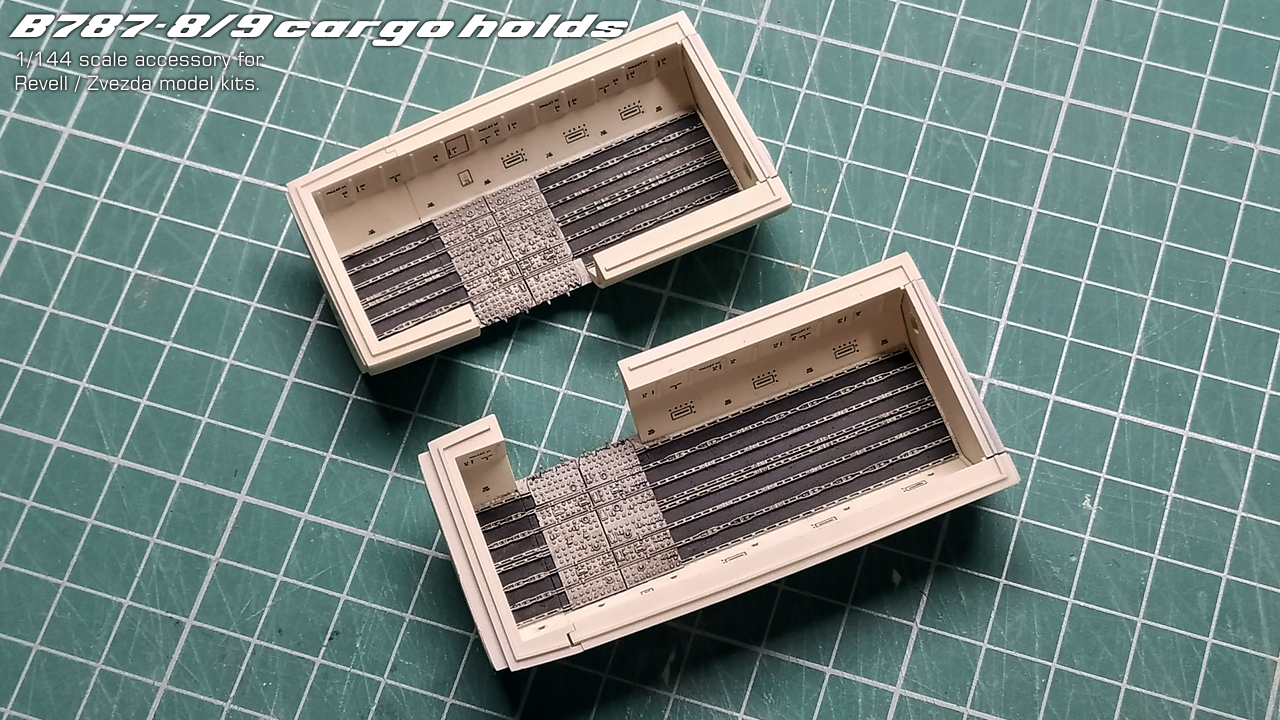
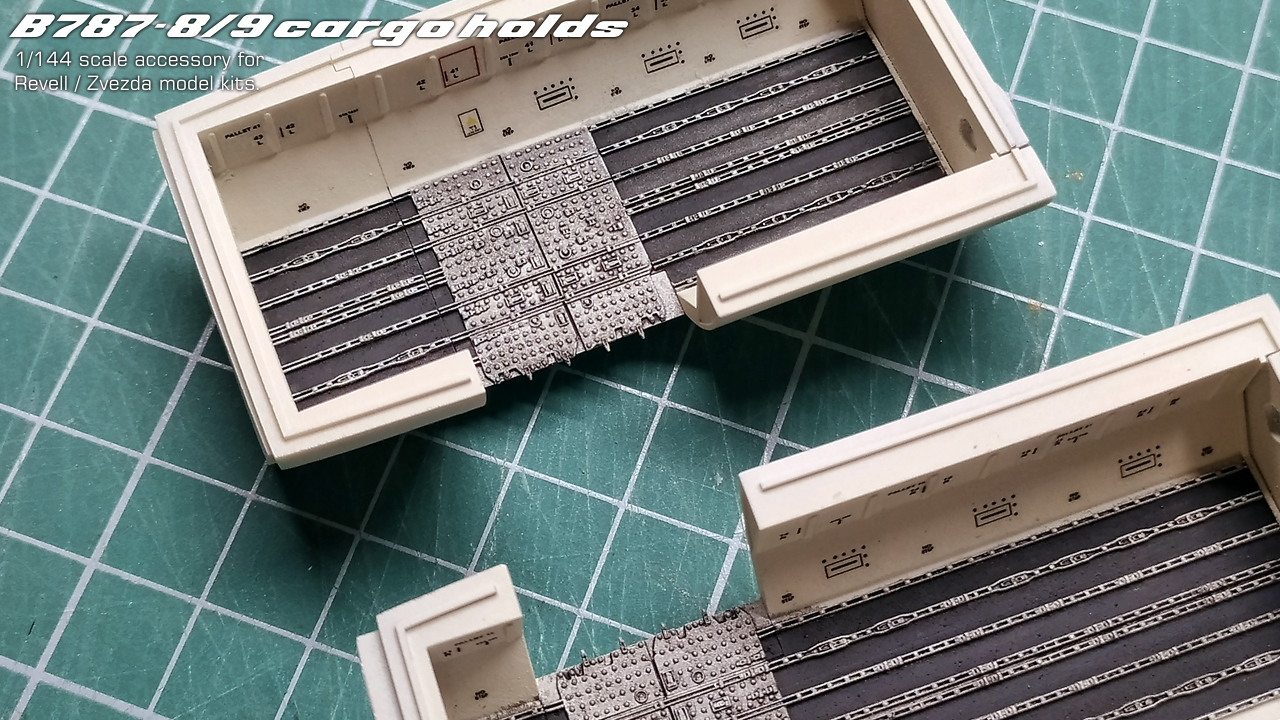
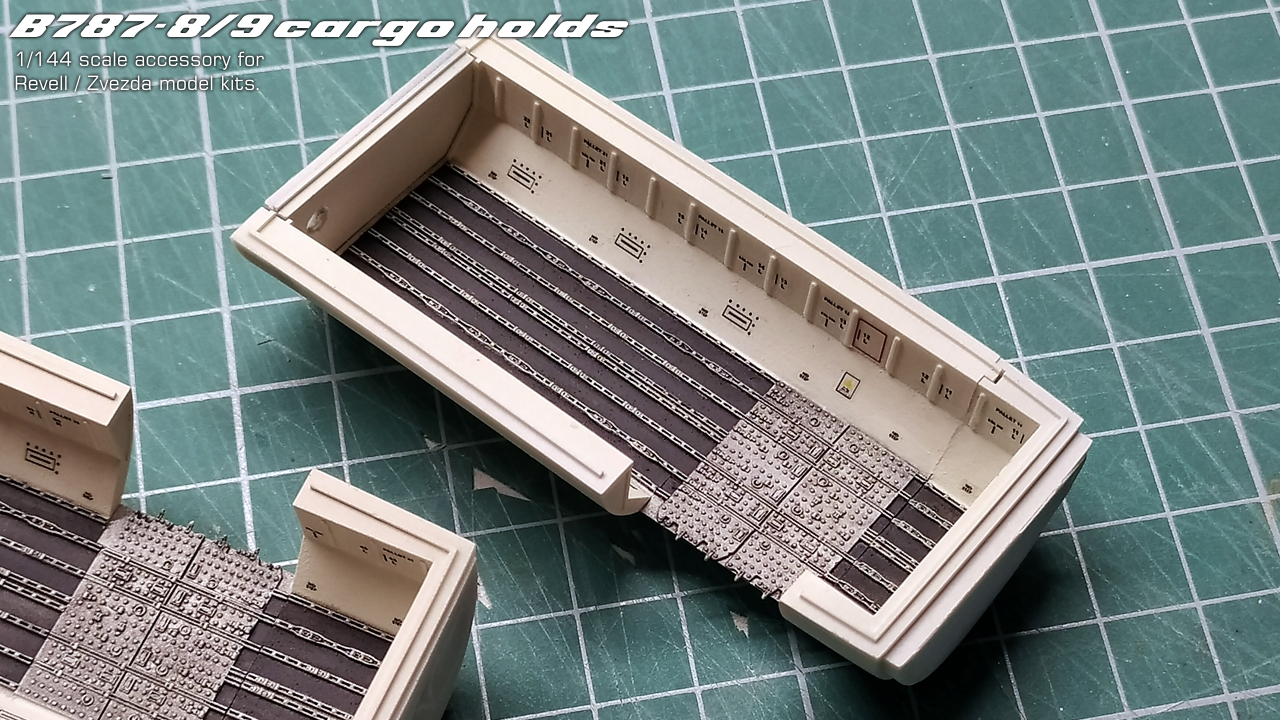
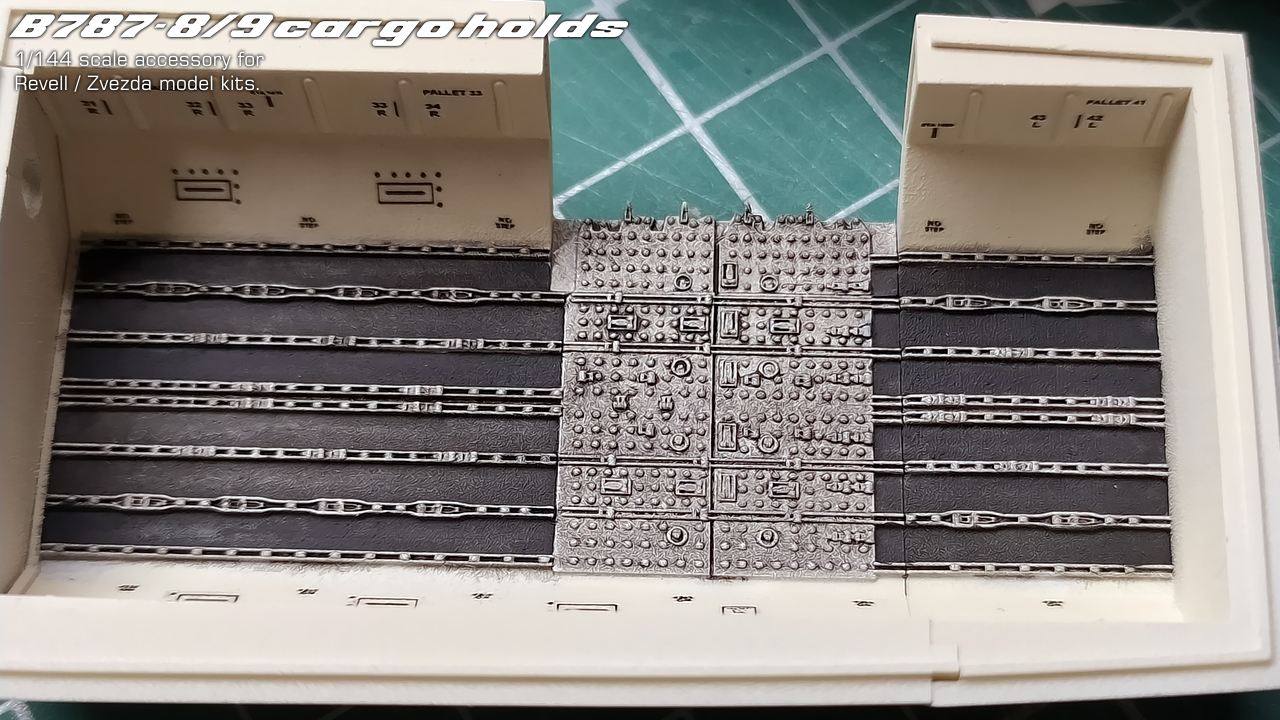
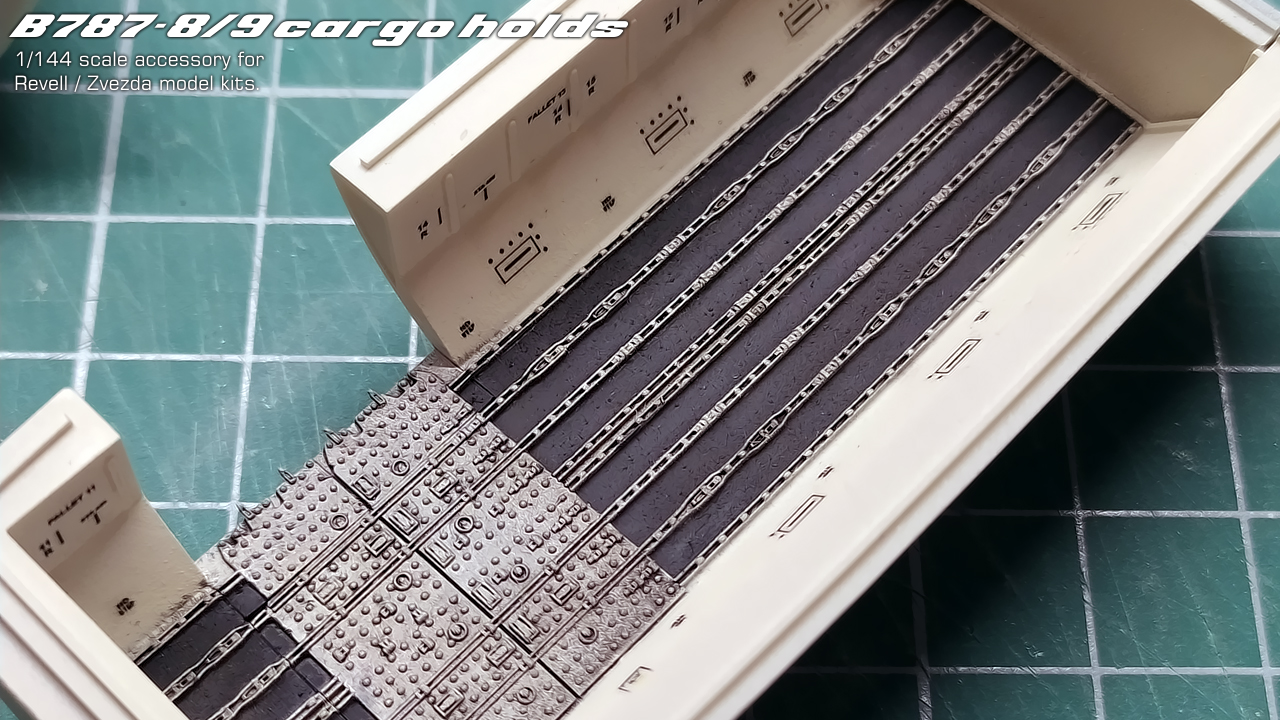
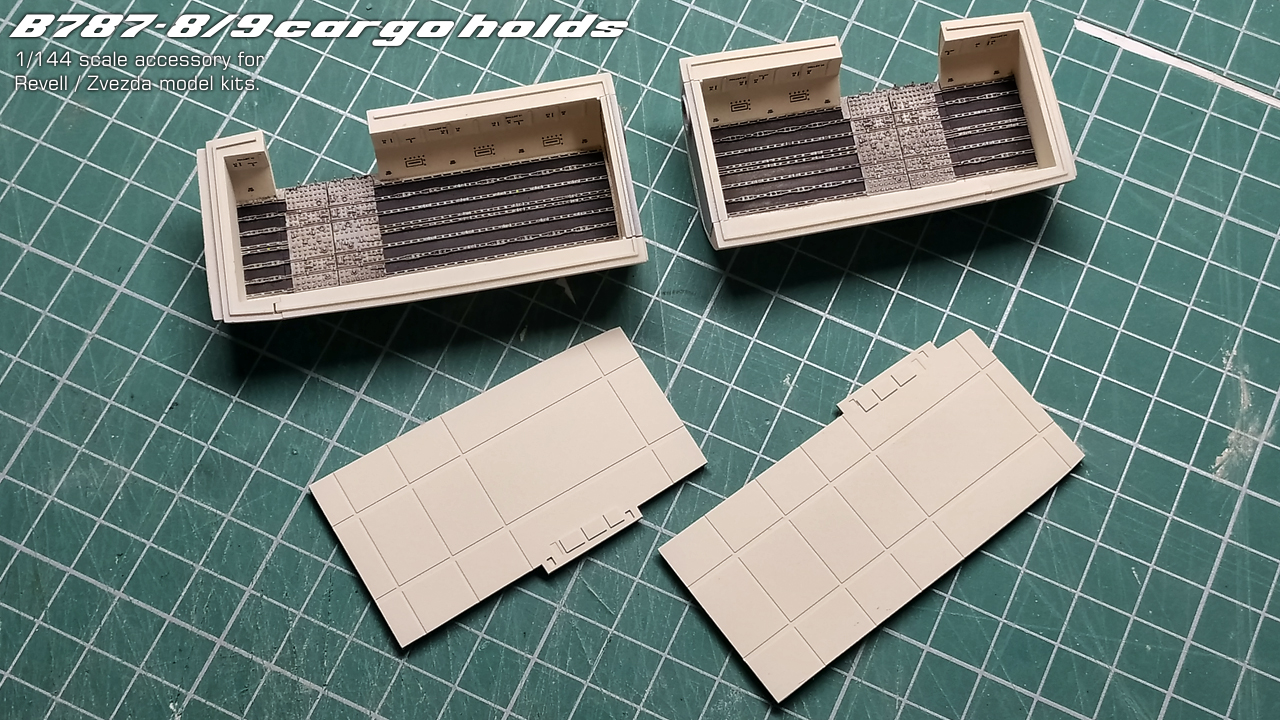
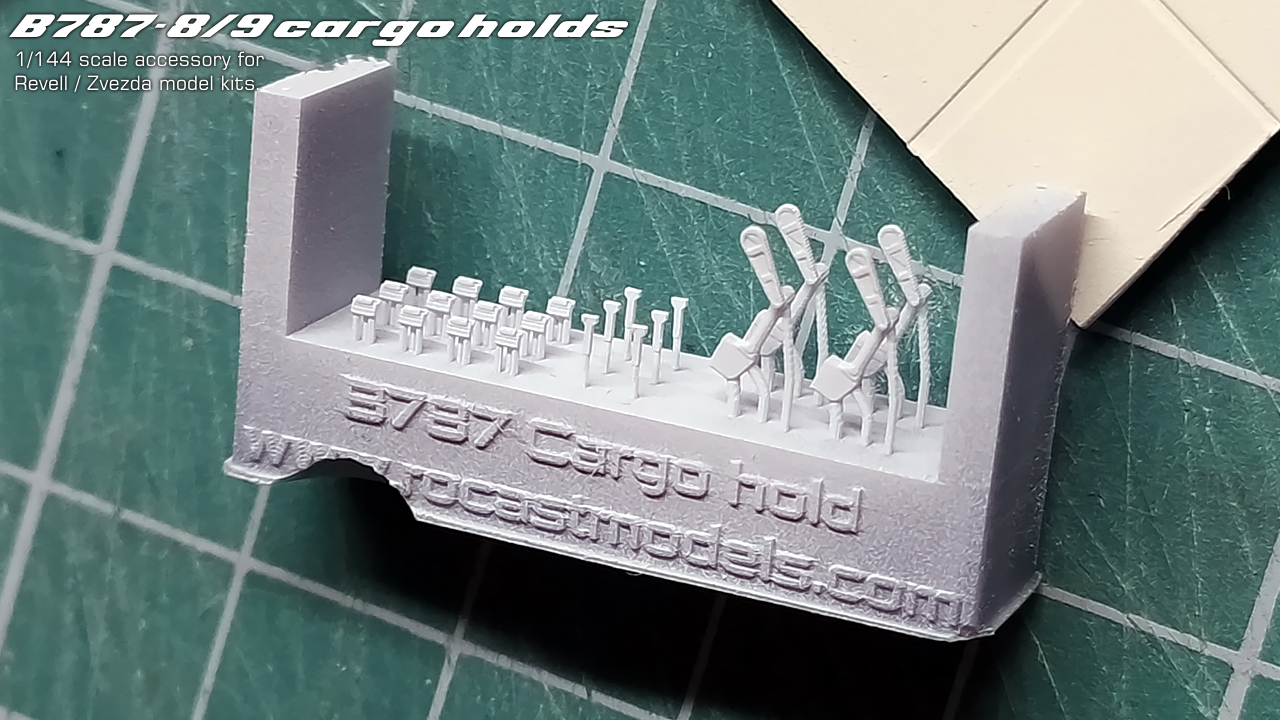
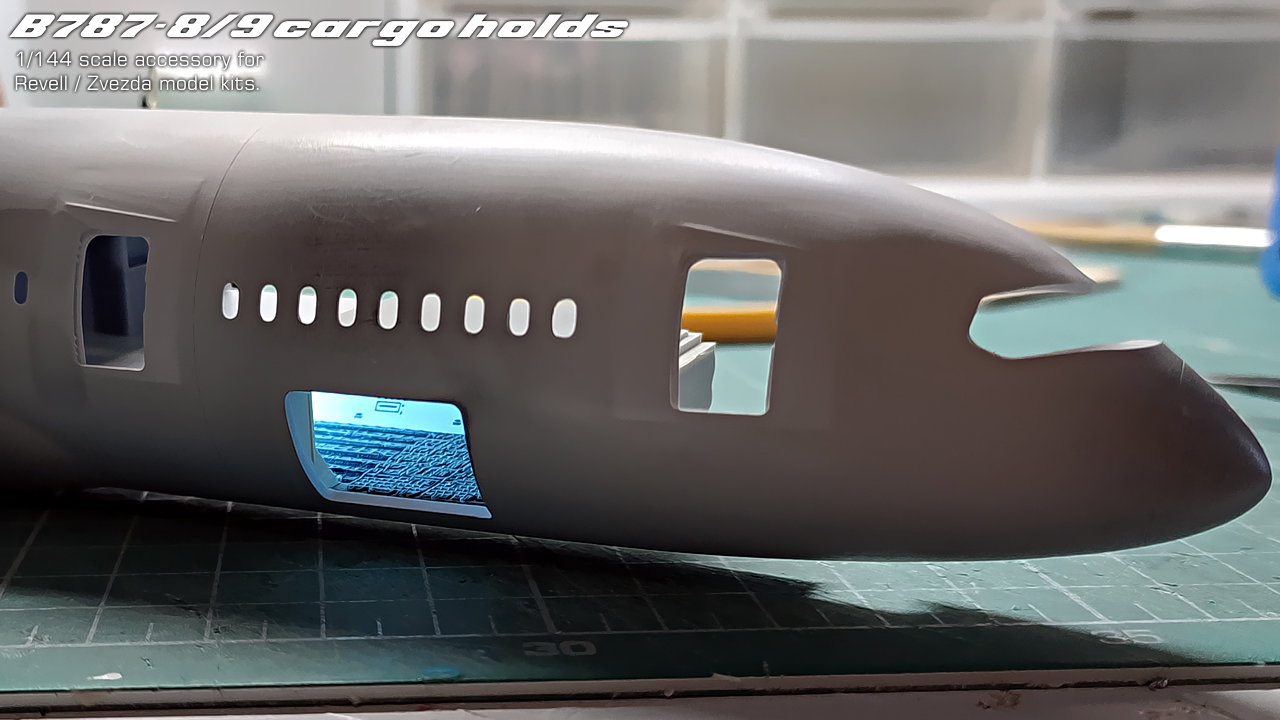
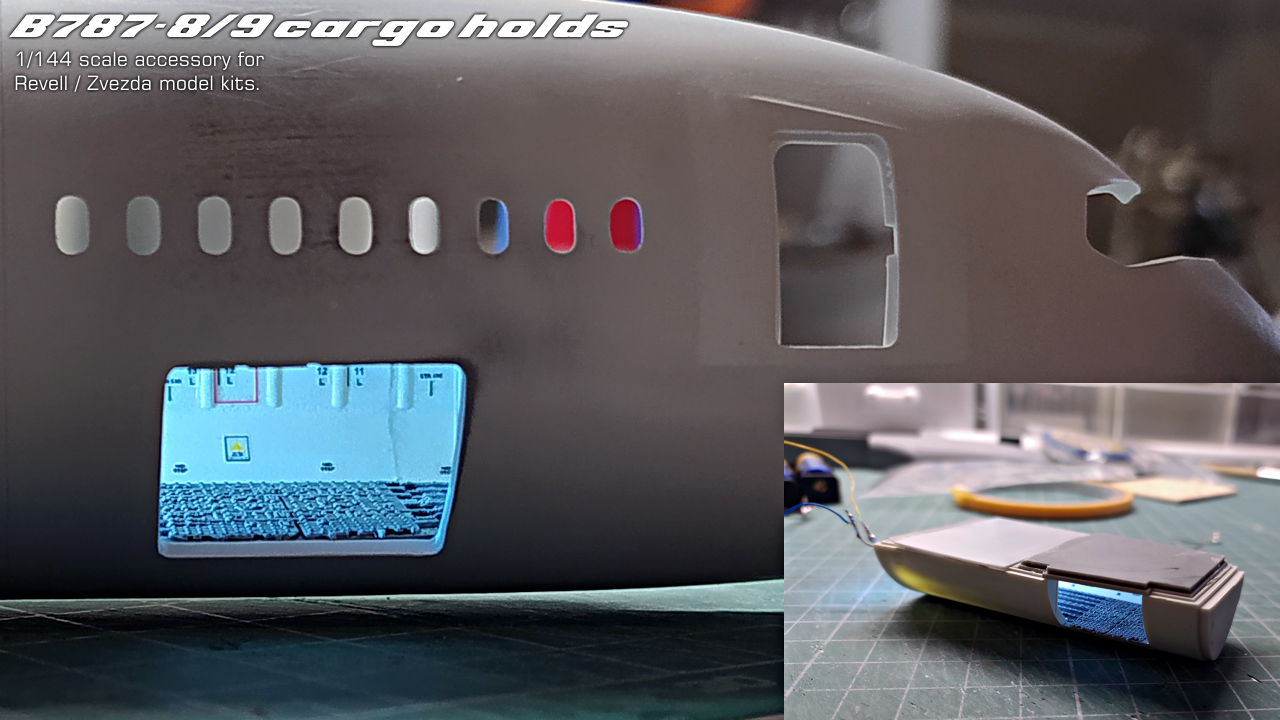

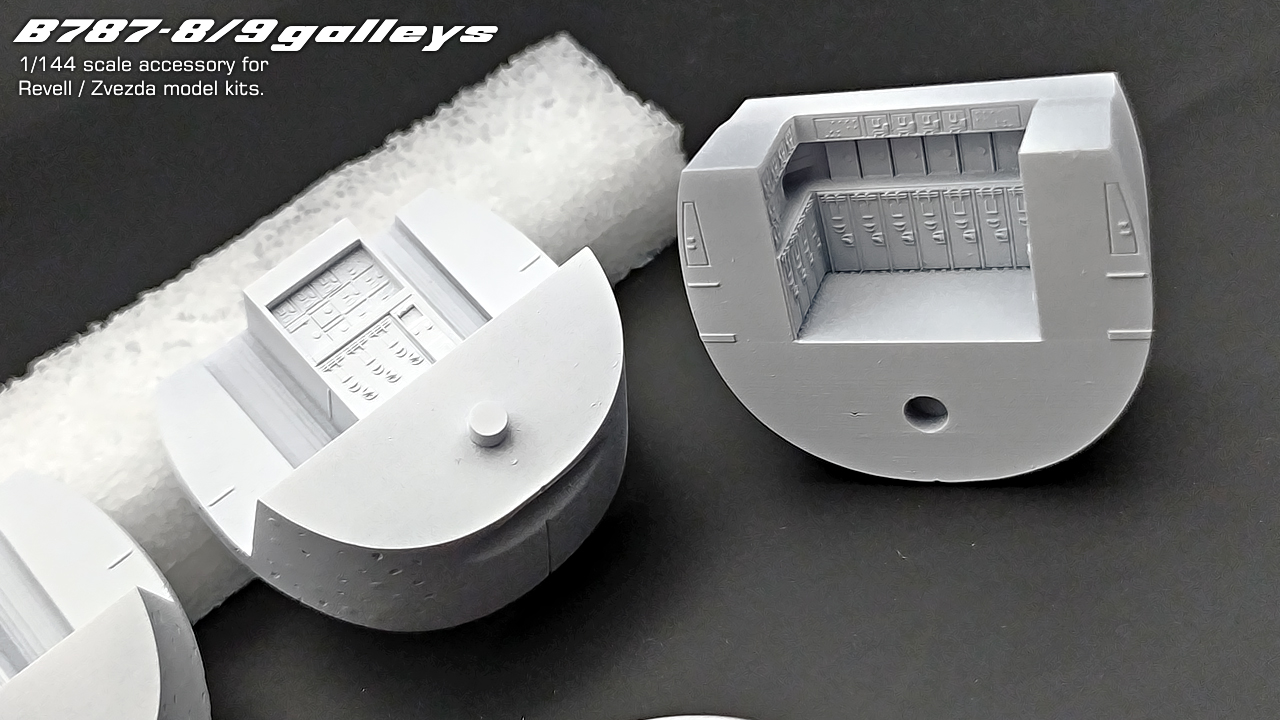
The 787 cargo holds are very much advanced, they are now ready for production. The LED lighting was tested, everything is ok. I am however, doing some tests on the combo galley/cargo hold, to make sure to note in the instructions of the galleys, the procedure to join both elements together. I am waiting to finish the galleys in order to provide a production/stock at the same time. But more about the restock info on the next update.
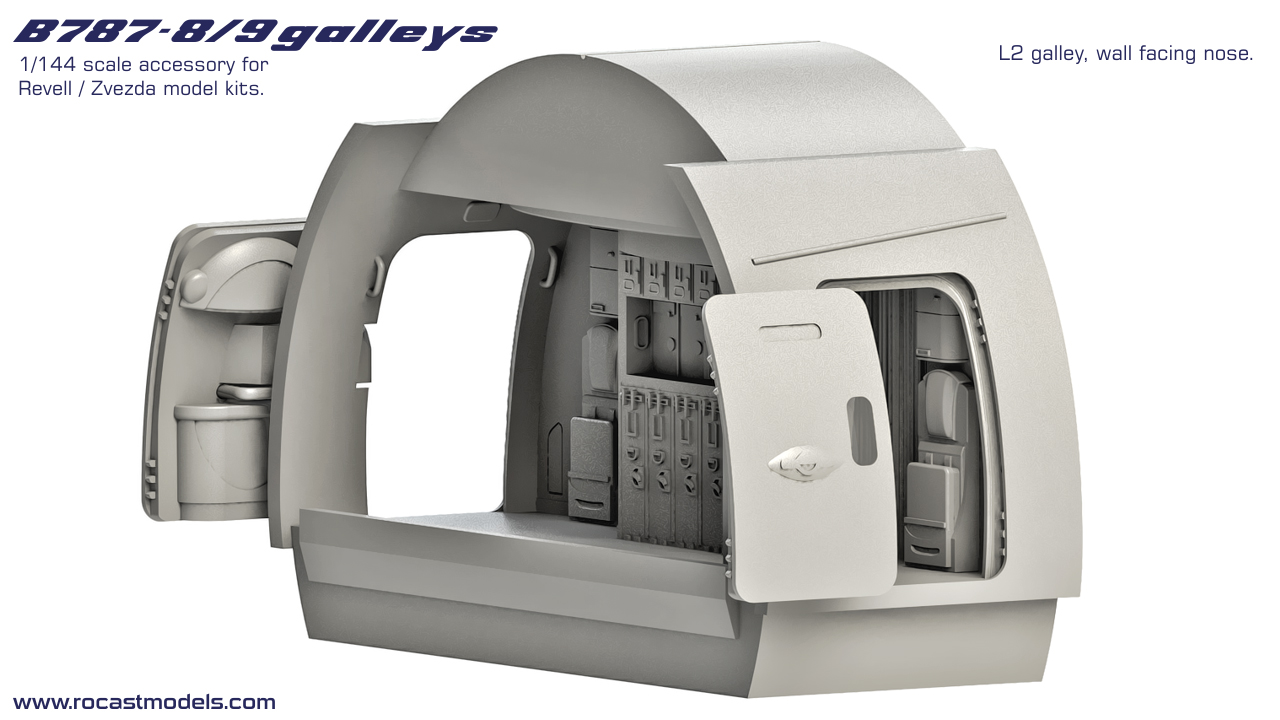
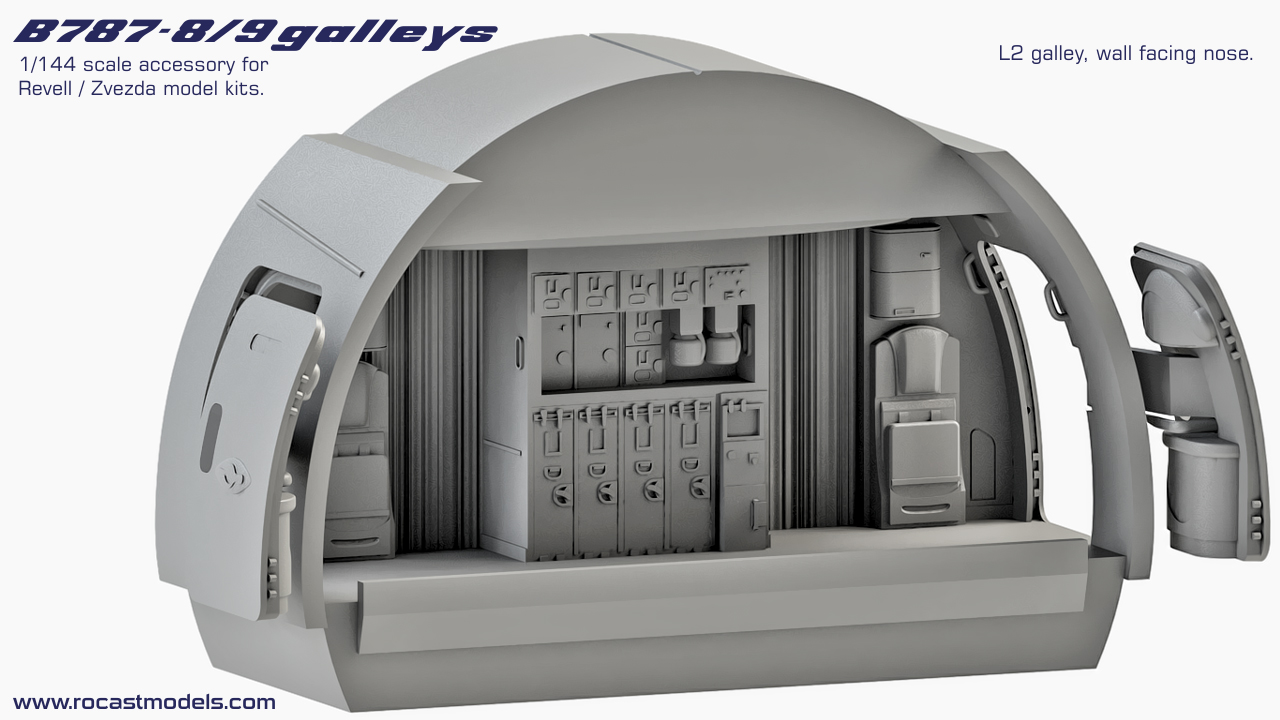
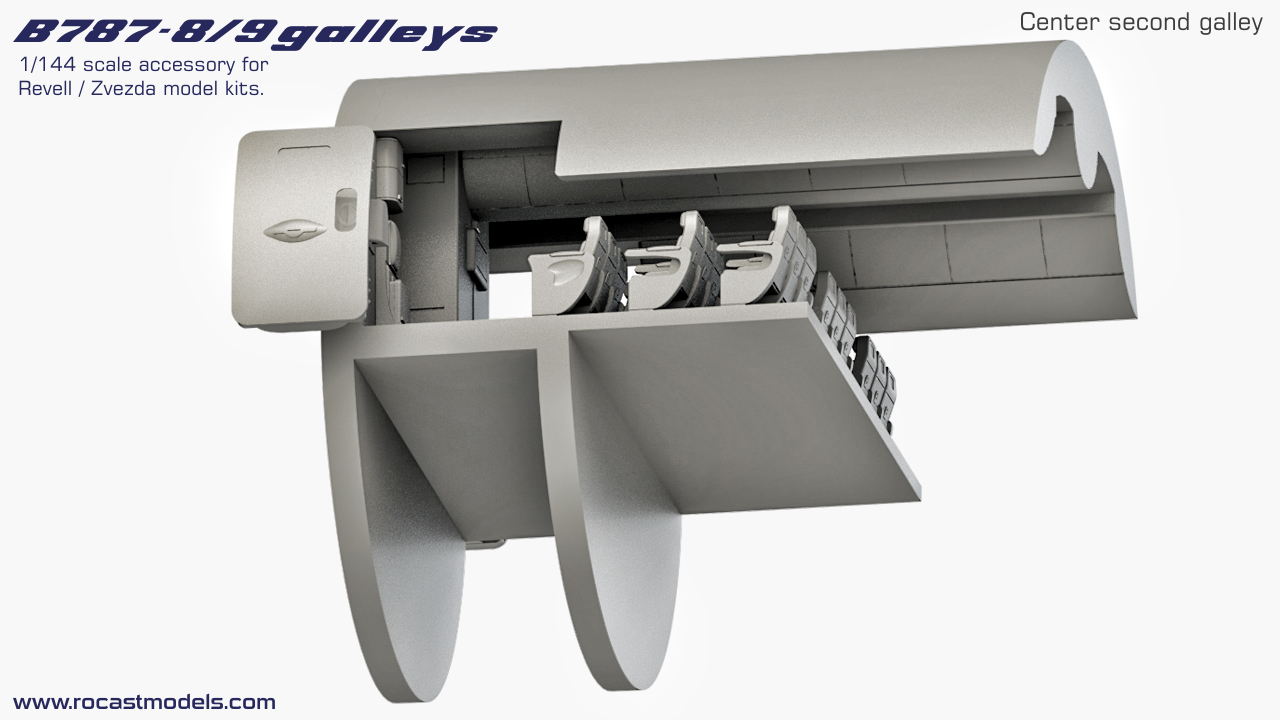
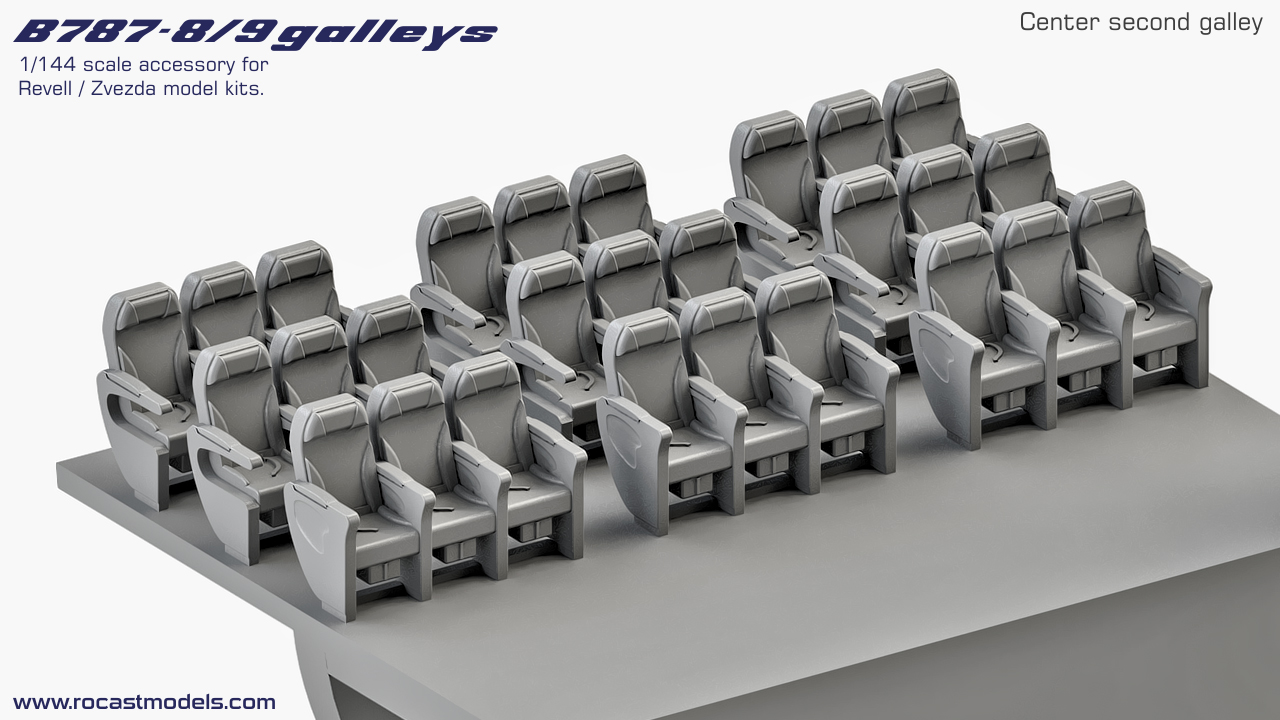
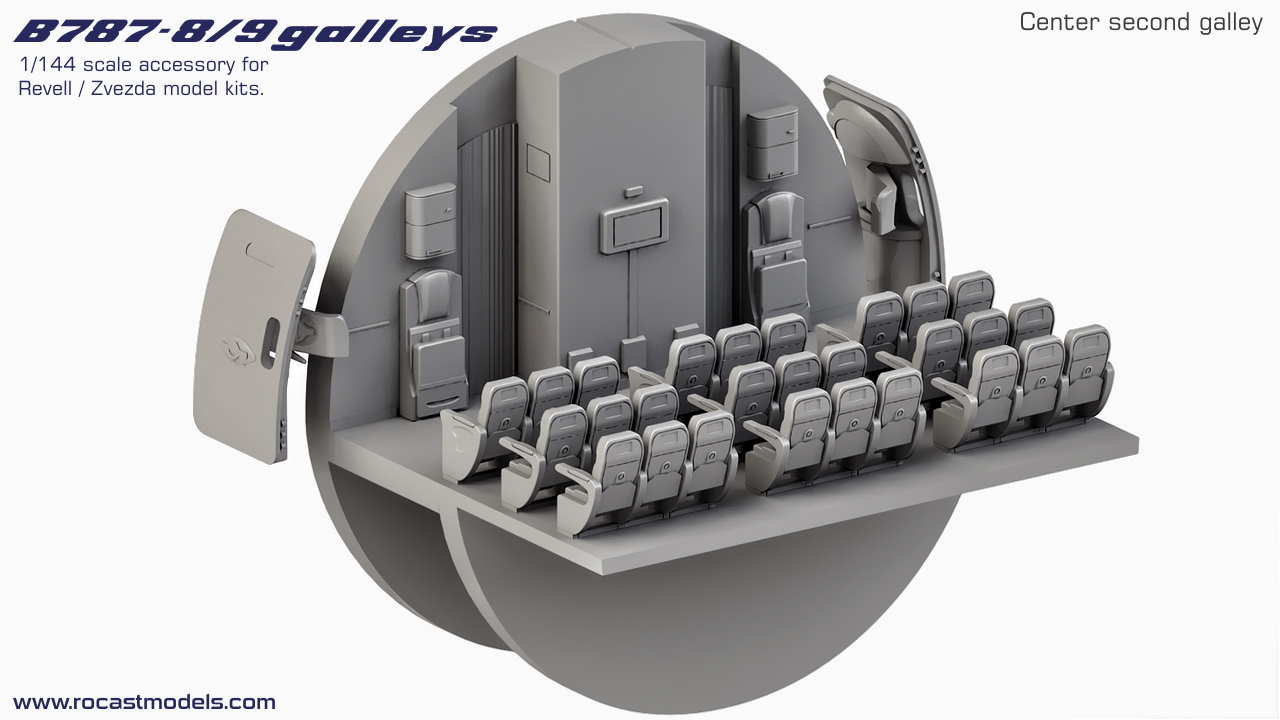
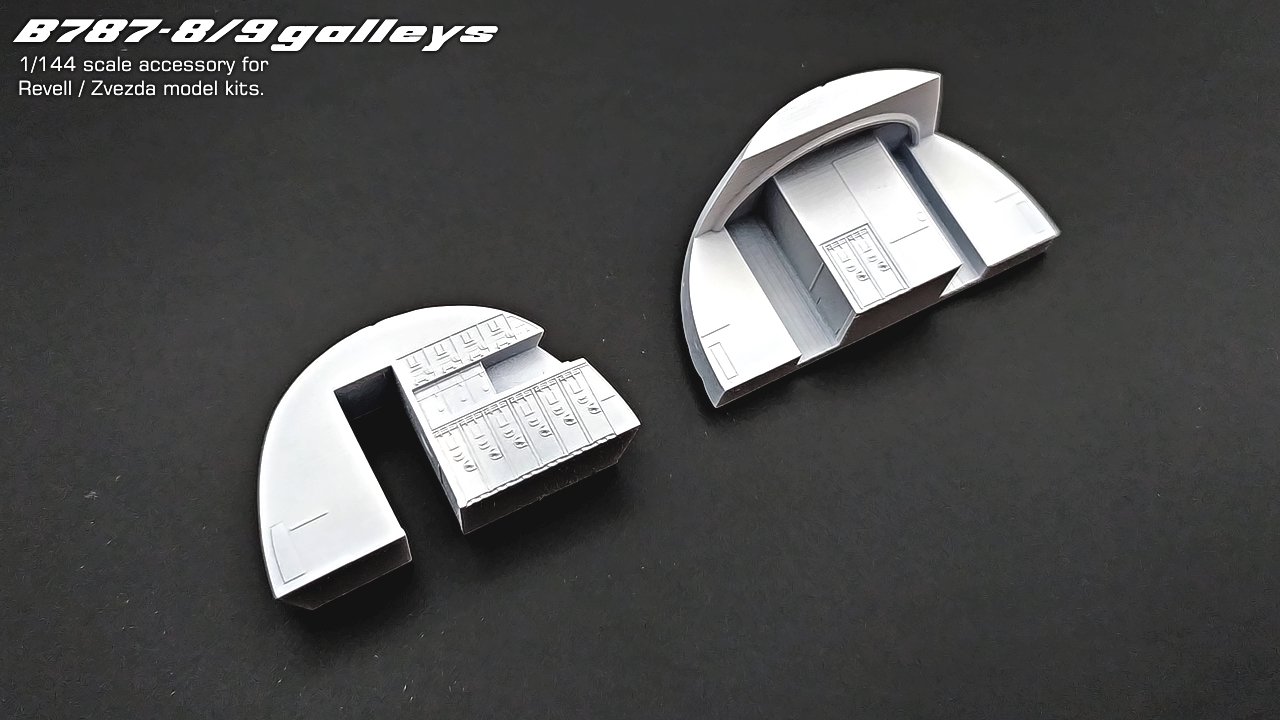
The renders of the 787 galleys:

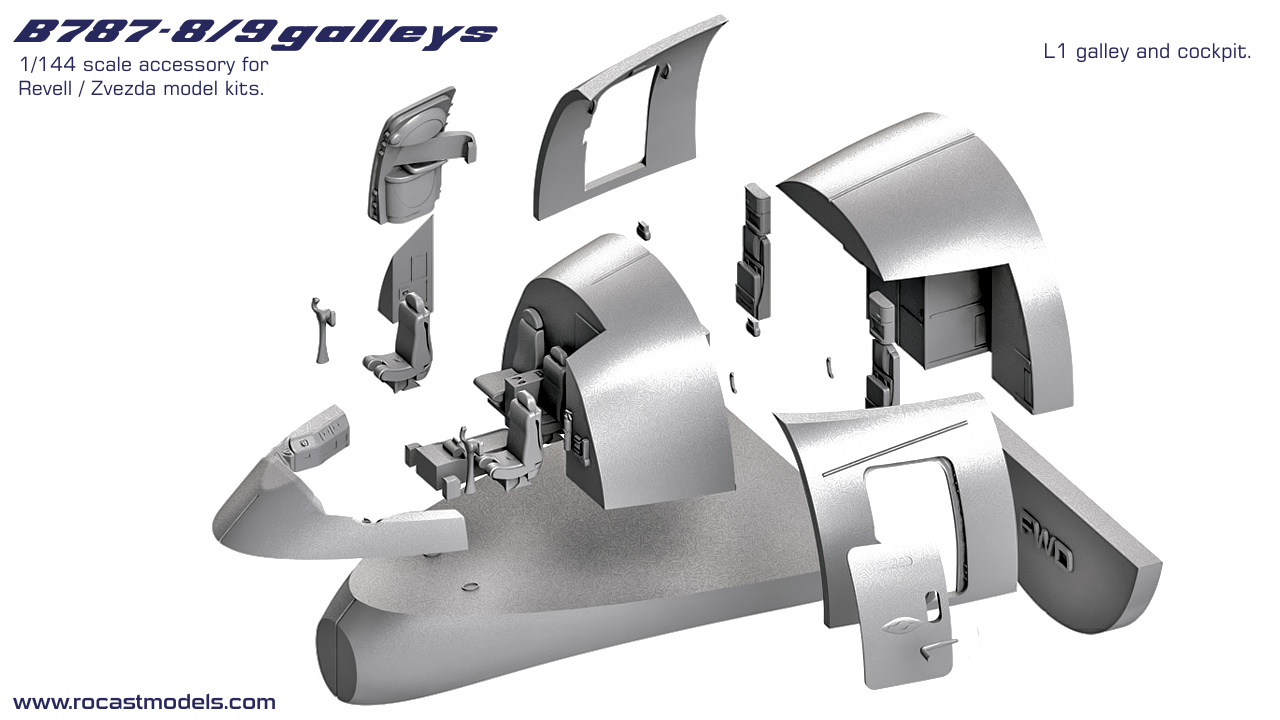
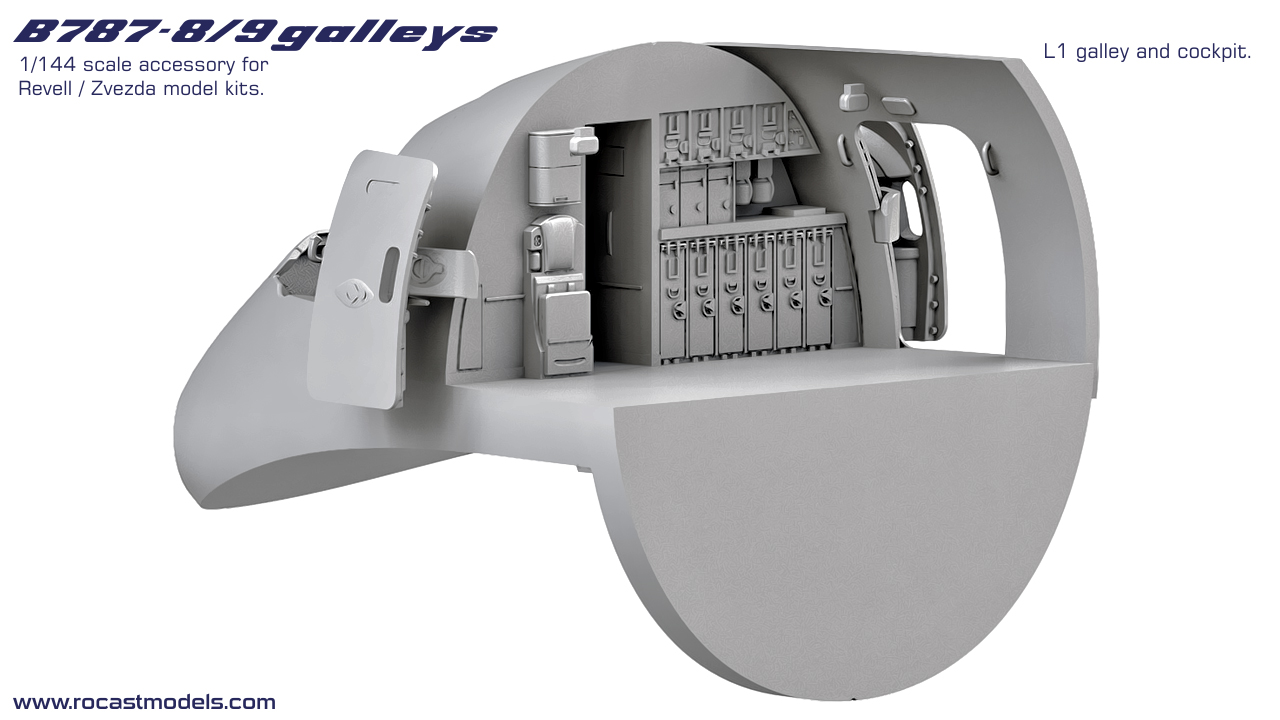

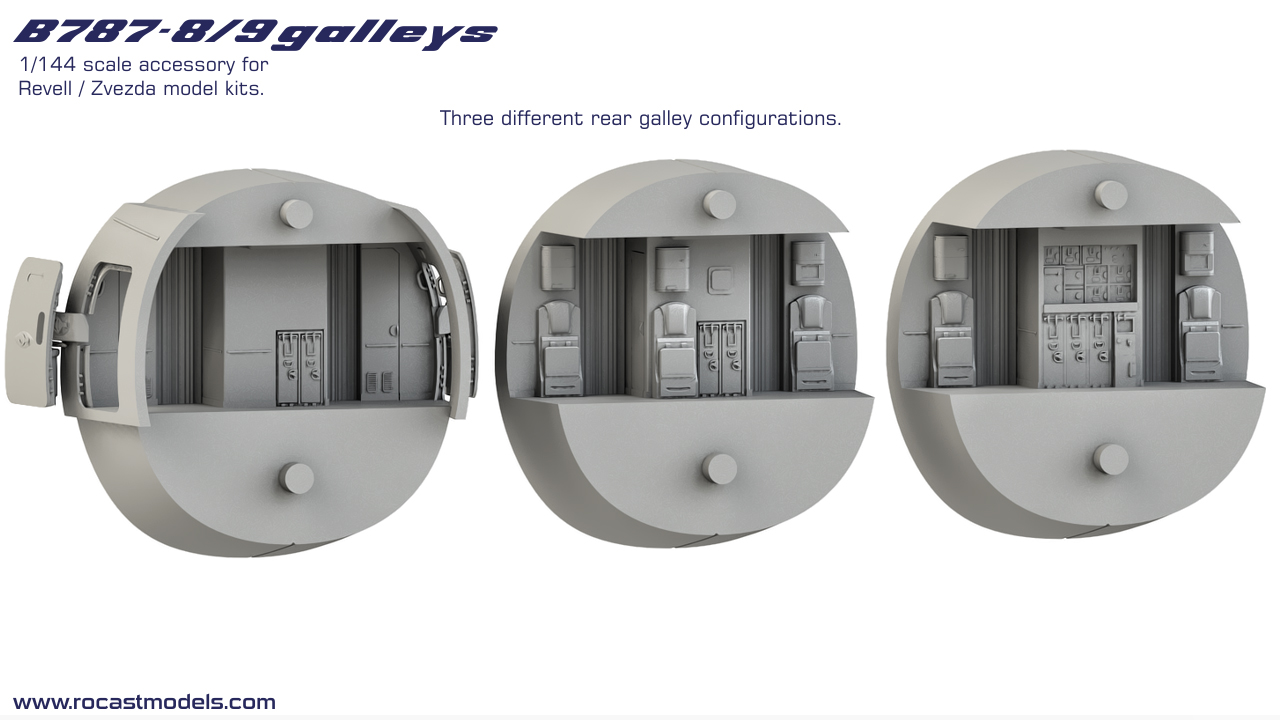


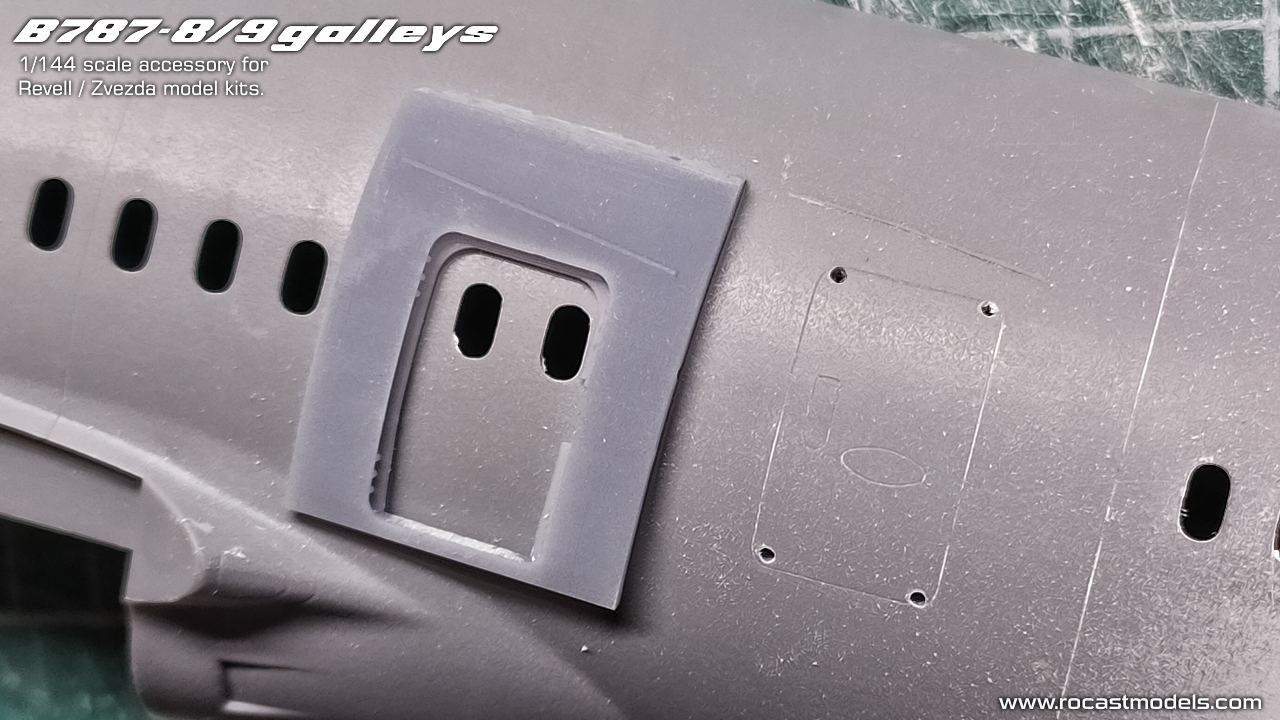
I will be providing the galleys with the new door frames, the set will include a masking guide to make the cut in the right place.
The frames also include a properly-more realistic to the 1/1 model rain gutters.
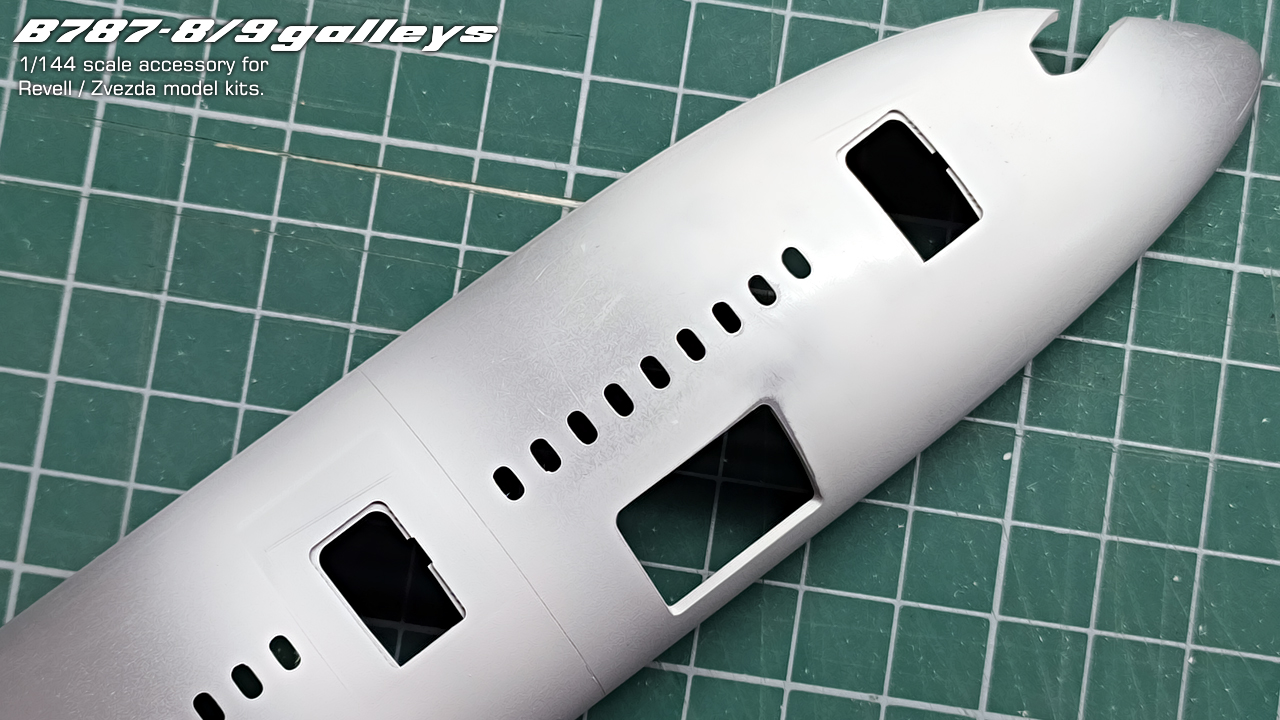
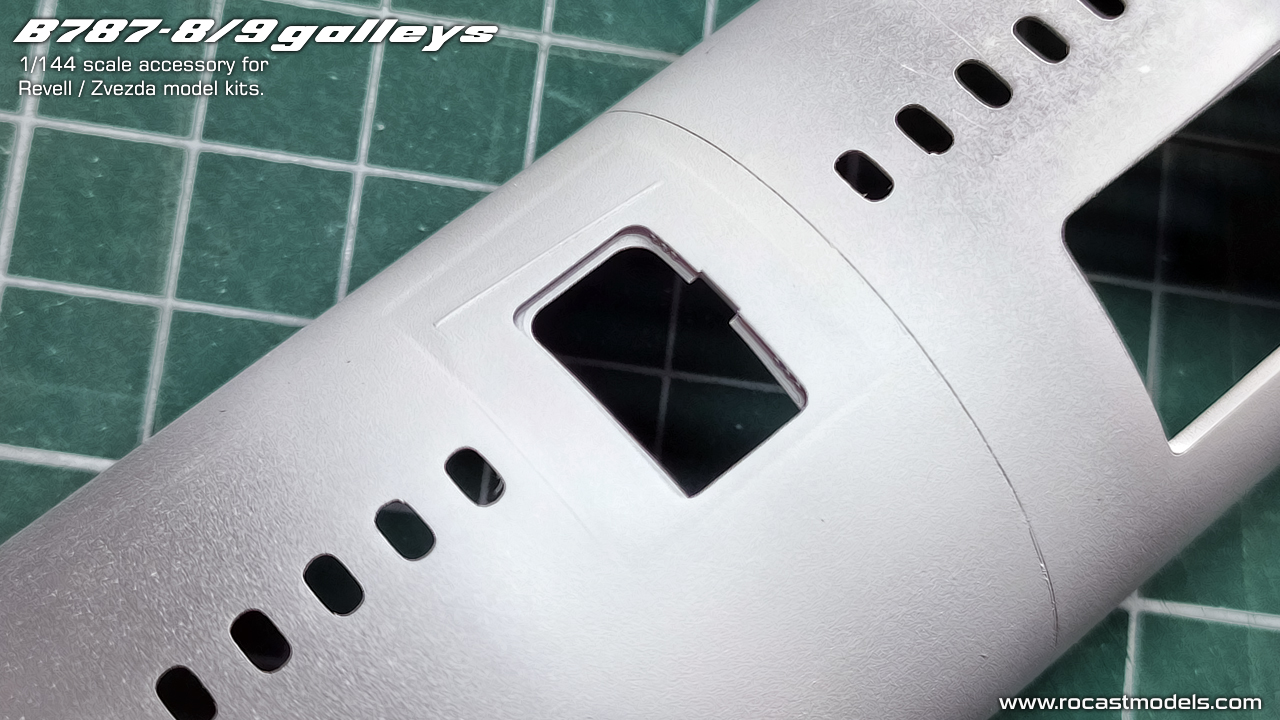
This is what I was mentioning about the combination of cargo holds and galleys, as I can see, it is perfectly possible, but I still need to check the rear cargo hold/galley.
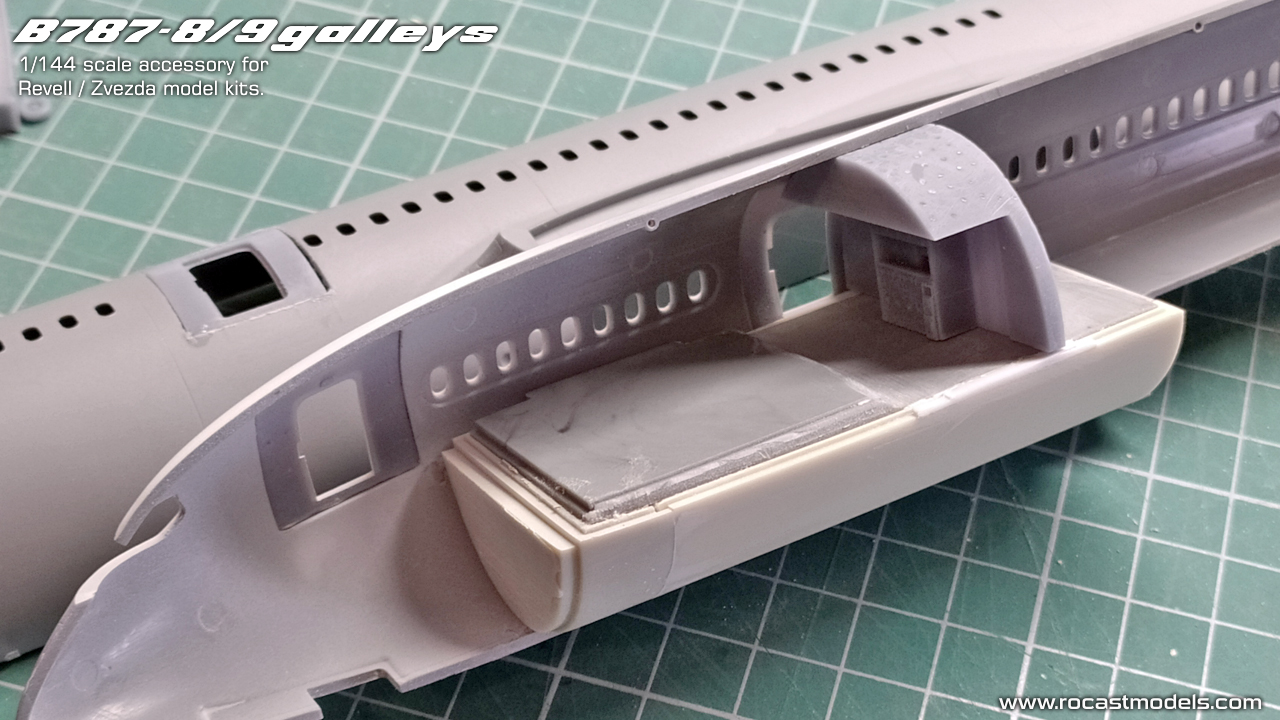
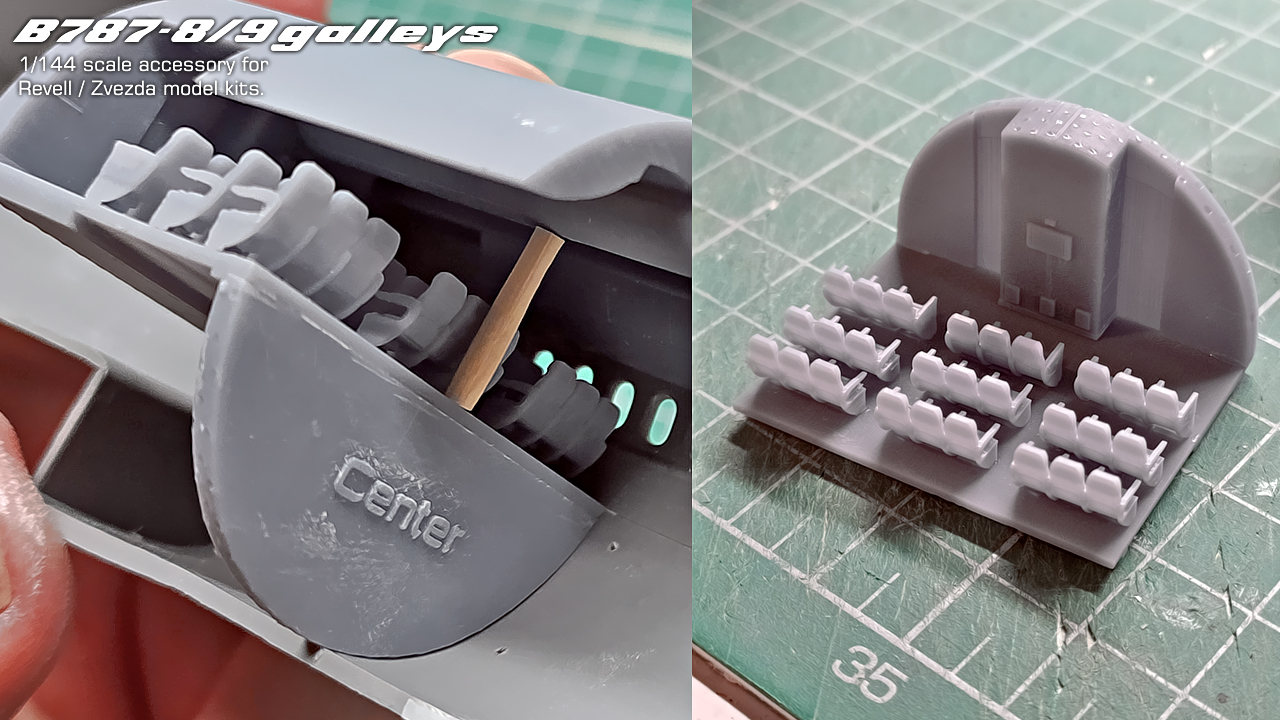
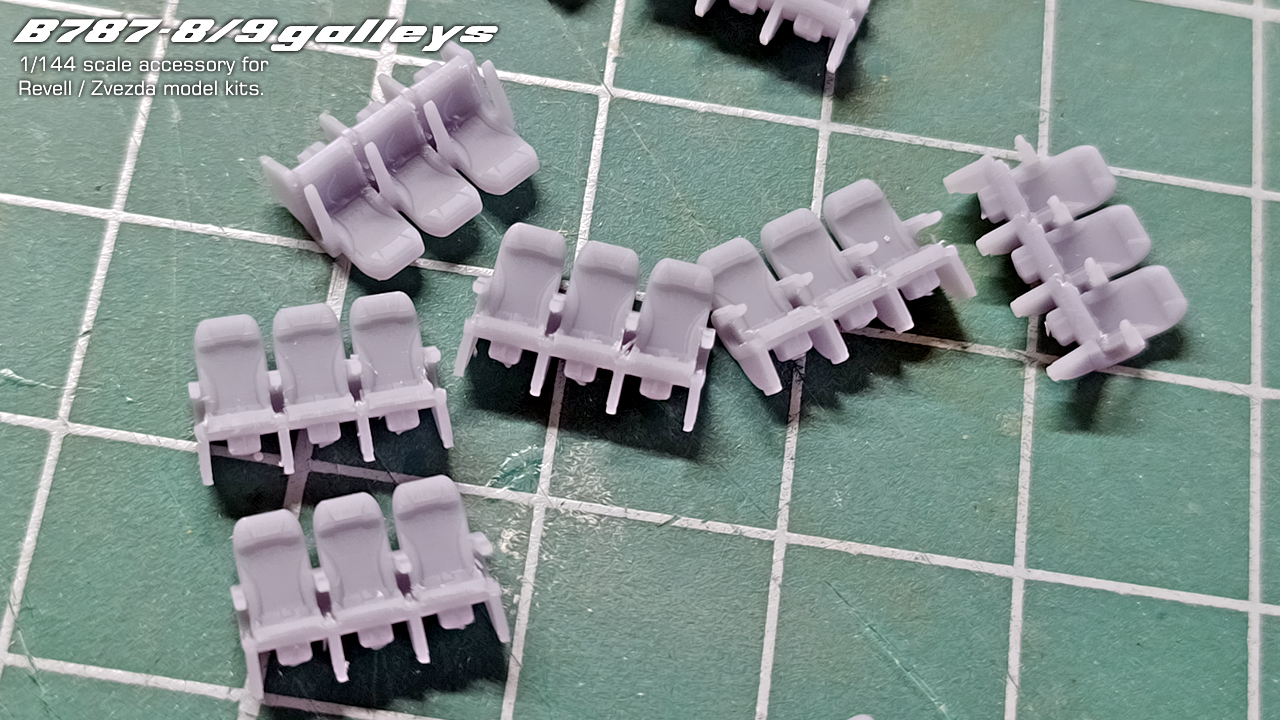
In contrast to the previous galley versions, I am also making a second center galley. The second center galley, or the galley at R/L3 is a galley that does not have a bulkhead, so I had to create a few rows of seats and the upper ceiling compartments.
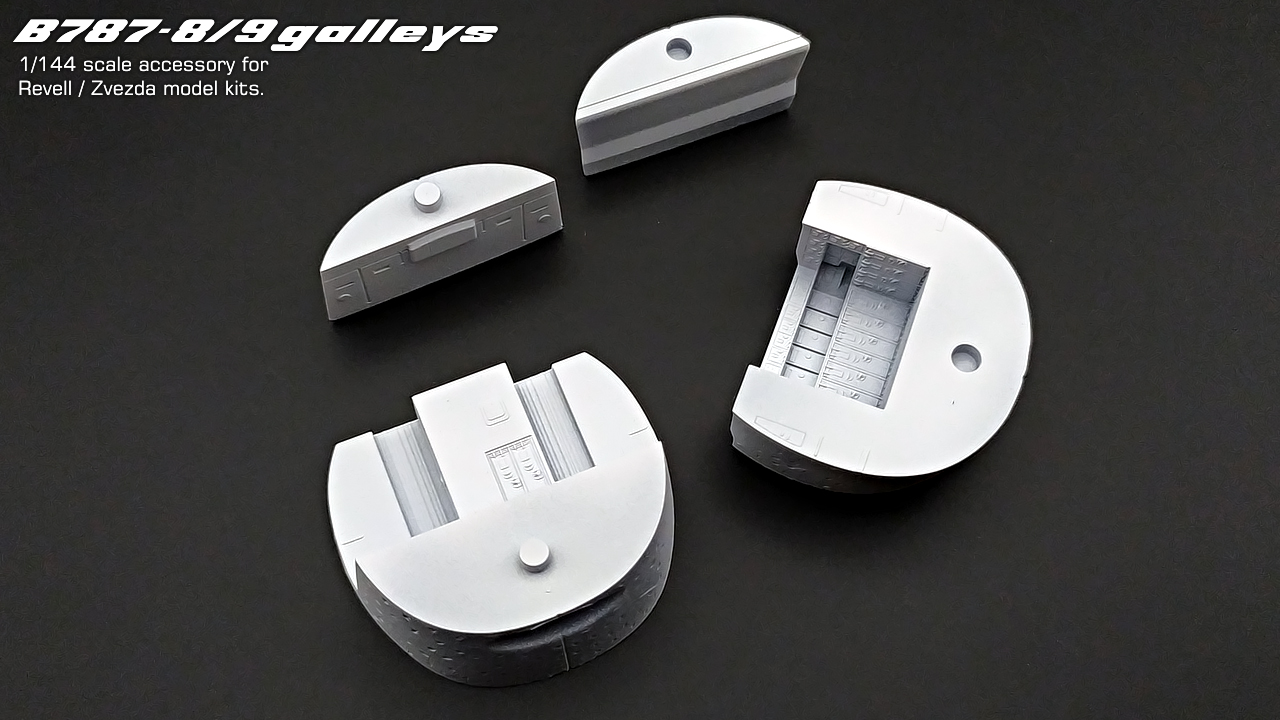
This is the first fitting test I did. There will be a resin column where the wooden rod is, which will help keep things in place when gluing, then the rod will be broken to be released from both unions, more on how to proceed will be explained in the instructions.
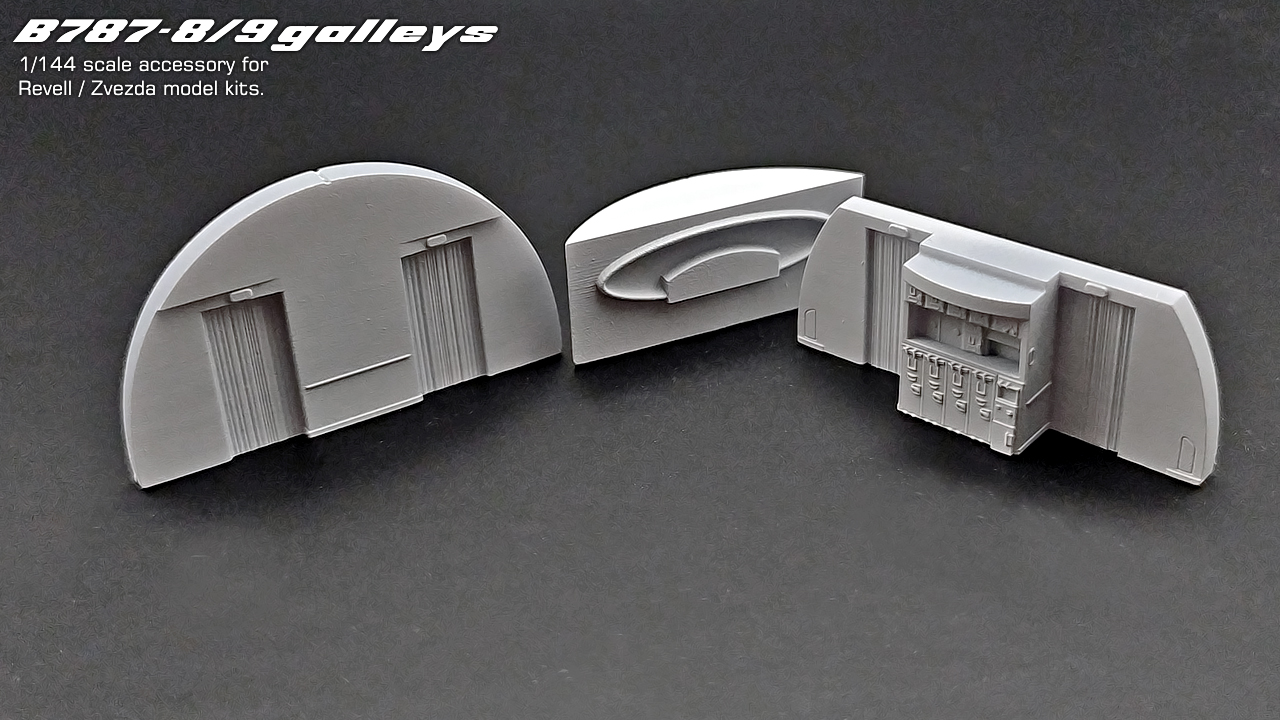
The printed galleys as example, once the rear cargo hold/rear galley test is done, I will proceed to the mold making:
That is all for this part 1 update. The amount of work that I am putting in this is bigger than ever for me, it can be exhausting and quite pressuring, but I enjoy it still, I am seeing that longer projects can be quite a problem in certain matters, so I am not sure if I will be able to do such projects as the 747 in the future, but well… That is why I started with the Queen, the largest project in its category.
On the next update I will be discussing a bit more about the new products; will present a new tractor, two new sets of figures and will also comment on re stocking, shipping methods, future projects and another way that I will use to show/share with you my updates on a more regular basis and a way to follow all of this closer.
Will be writing again tomorrow.
Best wishes,
Guillem