


Hello everyone,
Today I am sharing an update that may seem small, but that actually has taken me a lot of time and energies to get done.
I did a test on the fuselage assembly, a very quick test which reminded me that modeling is not a quick thing, you need to take your time and dedication, and the reason I feel this way is because it has been so long since I worked on a model…
A couple of very important things I need to mention:
For several reasons I won’t be able to provide the fuselage in sections, but rather offer options for which interior to go with the full fuselage. Door plugs will be included in case some of the galleys or cargo holds need to remain closed. A reason for this is simple, when I started the project, the idea was to make the full set, but later at much deeper stage I thought of interchanging sections with the current Revell/Zvezda kits to allow more to choose from.
As I made the fuselage from scratch, I used a reference for the dimensions of the fuselage which for some reason, wasn’t the one’s of Revell/Zvezda. Who had the right dimensions? It seems like both, but I chose the width reference while Revell/Zvezda took the height reference. And this is, surprisingly due the fact that the B787 doesn’t seem to have a circular cross section, but it is actually 17cm higher than wide.
In 1/144 that difference is not so big, 0,5mm top and bottom give or take, still sections can be fitted the one another, but due its difficulty, I prefer to leave it as a full fuselage set with interior options.
Now, this is if center and/or aft galleys want to be used, because there will be separately a cockpit/fwd galley module which will adapt to the Revell/Zvezda kits, and the same for both, the forward and rear cargo holds.

This was a very quick test, I did not spend much time cleaning the window openings as they have just a bit of burr from the molds, which is easily sanded away with a mouse tail needle file.
There is no interior in this test as I only wanted to see the assembly of the fuselage and to provide feedback in the instructions. It looks a bit boring this way, but one has to see this project in the big picture; with the doors opened, the interiors visible and transparent windshields allowing to see the cockpit interior, imagining it with the wings, the engines… Certainly a model to enhance even more a realistic diorama.
The windows fit nice and tight, this was something I was looking for, despite the center row being quite long, it is easier to split it into two as explained in the instructions. I would also like to share a way in which I learned how to work with windows, basically because of the nature of the transparent plastic, you can sand it down and level the windows to the fuselage (as it happens with the kits as well), the plastic would get translucent due the mini scratches from the sanding paper, but would get back transparent and shiny with the polishing compounds (I must credit this technique to a Youtube channel for which sadly I forgot the name/link).
Another important point, I need to redo the forward section of the fuselage. Form L2/R2 door ownwards (keeping the cockpit section though) There was a shape I did not like, and this is what happens sometimes, when the model is in your hands your eyes have a better view of the dimensional object rather what it is on screen. This alone will be another week of work, design-wise as well as mold making.
Speaking of molds, those are my first fuselage molds and I have to say I did learn a lot and once I had them done I thought I could have done this or that way, so this is experience I gained for future projects (the 747 which is coming next year). The fuselage parts don’t present any other complications and because they are in 3 sections it does resemble the assembly of the B737 in 1/72 from BPK, which demands more patience from the modeler, so I am happy to see that having done this assembly myself in a quick maner after all this long time without building models, I got the result you can see in the photos.
The model was also tested with the original kit wings and horizontal stabilizers.
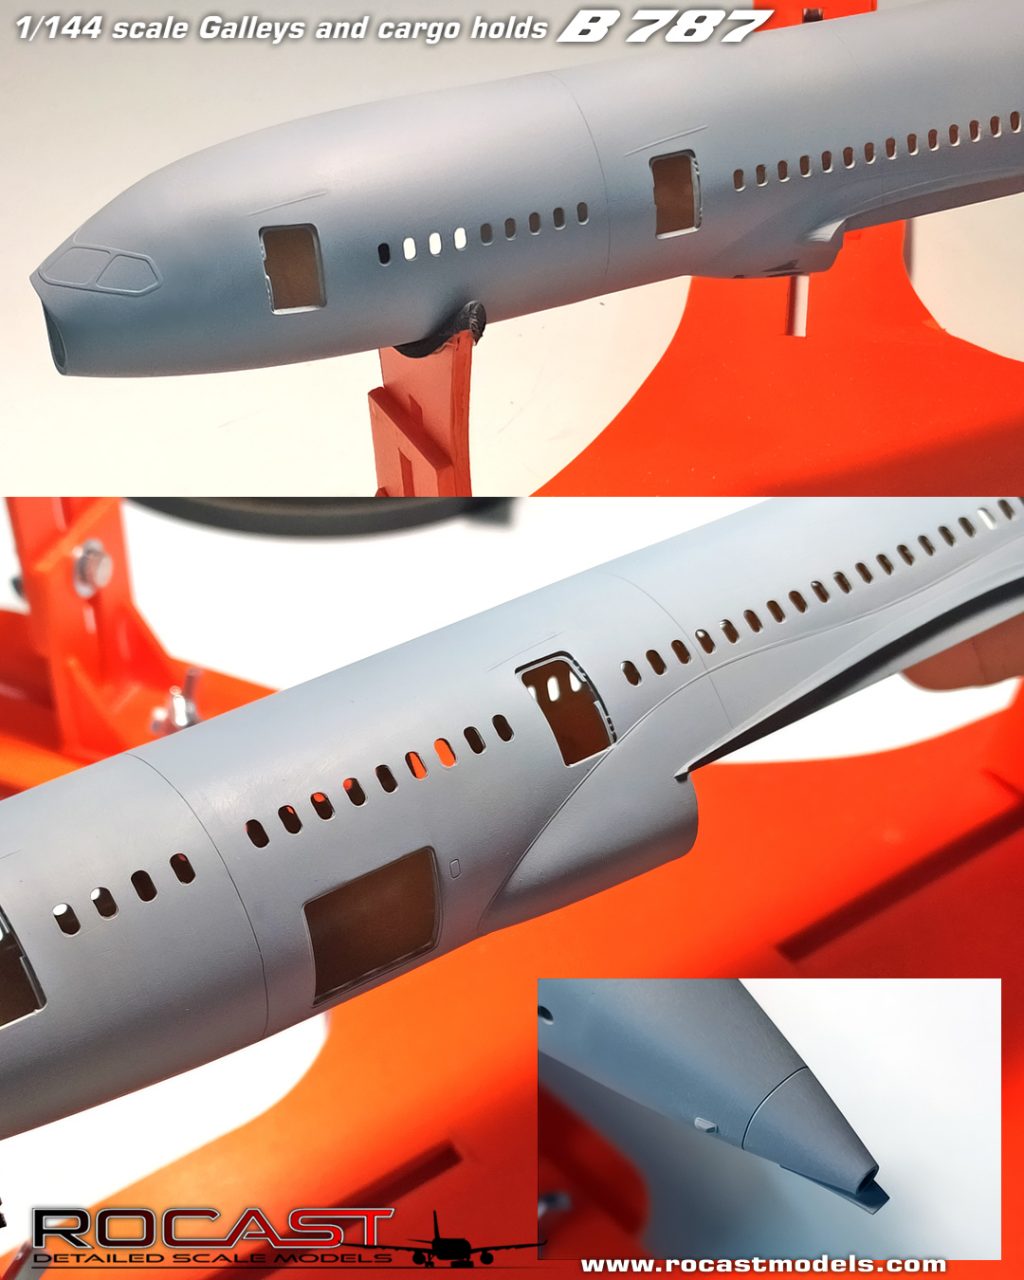
The fuselage presents improvements with the APU cone, having the lights and the fluid deflector plate underneath the APU exhaust. The center section has the improved wing to body fairing with the wing root details and the forward section has the better represented nose cone and better approach for the transparent windshields. All in all, the rain gutters are also improved for the whole fuselage. The fact that the fuselage also has all the door openings with the detail makes it much easier than having to add every door frame separately.
Another important aspect I checked is that the panel lines are very forgiving, allowing to sand down the area, lines would still be visible and they would not present any issues if a bit of engraving was needed.
I want to have these sets ready before Christmas, I should be making the first units by now but there are things that require more work so I need more hours a day to arrive to that objective. I want to make the -9 version as well, however, the cockpit and cargo holds which will be available at the same time will also fit the -9 version.
This is my road map and what is already done:
– Instructions, decals, galley / cargo hold parts, window masks are all done and tested.
– Fuselage is tested needing to rework the forward section.
– Transparent parts for the doors/cockpit are in the works.
– Another cast of the new forward section will be done and another test will be initiated, the test with all the interior elements.
– Once the test is completed, if results are satisfactory, I will proceed to make the last molds and start production.
That is all for now, going back to work.
Best wishes,
Guillem